
How to Send a Simple Pay
As an Admin, you can send a payment directly to a Payee or vendor to start the payment process immediately.
Simple Pay lets you send trusted business payments quickly — funds move directly to the Payee’s LiquidTrust Wallet once released.
Step-by-Step Instructions
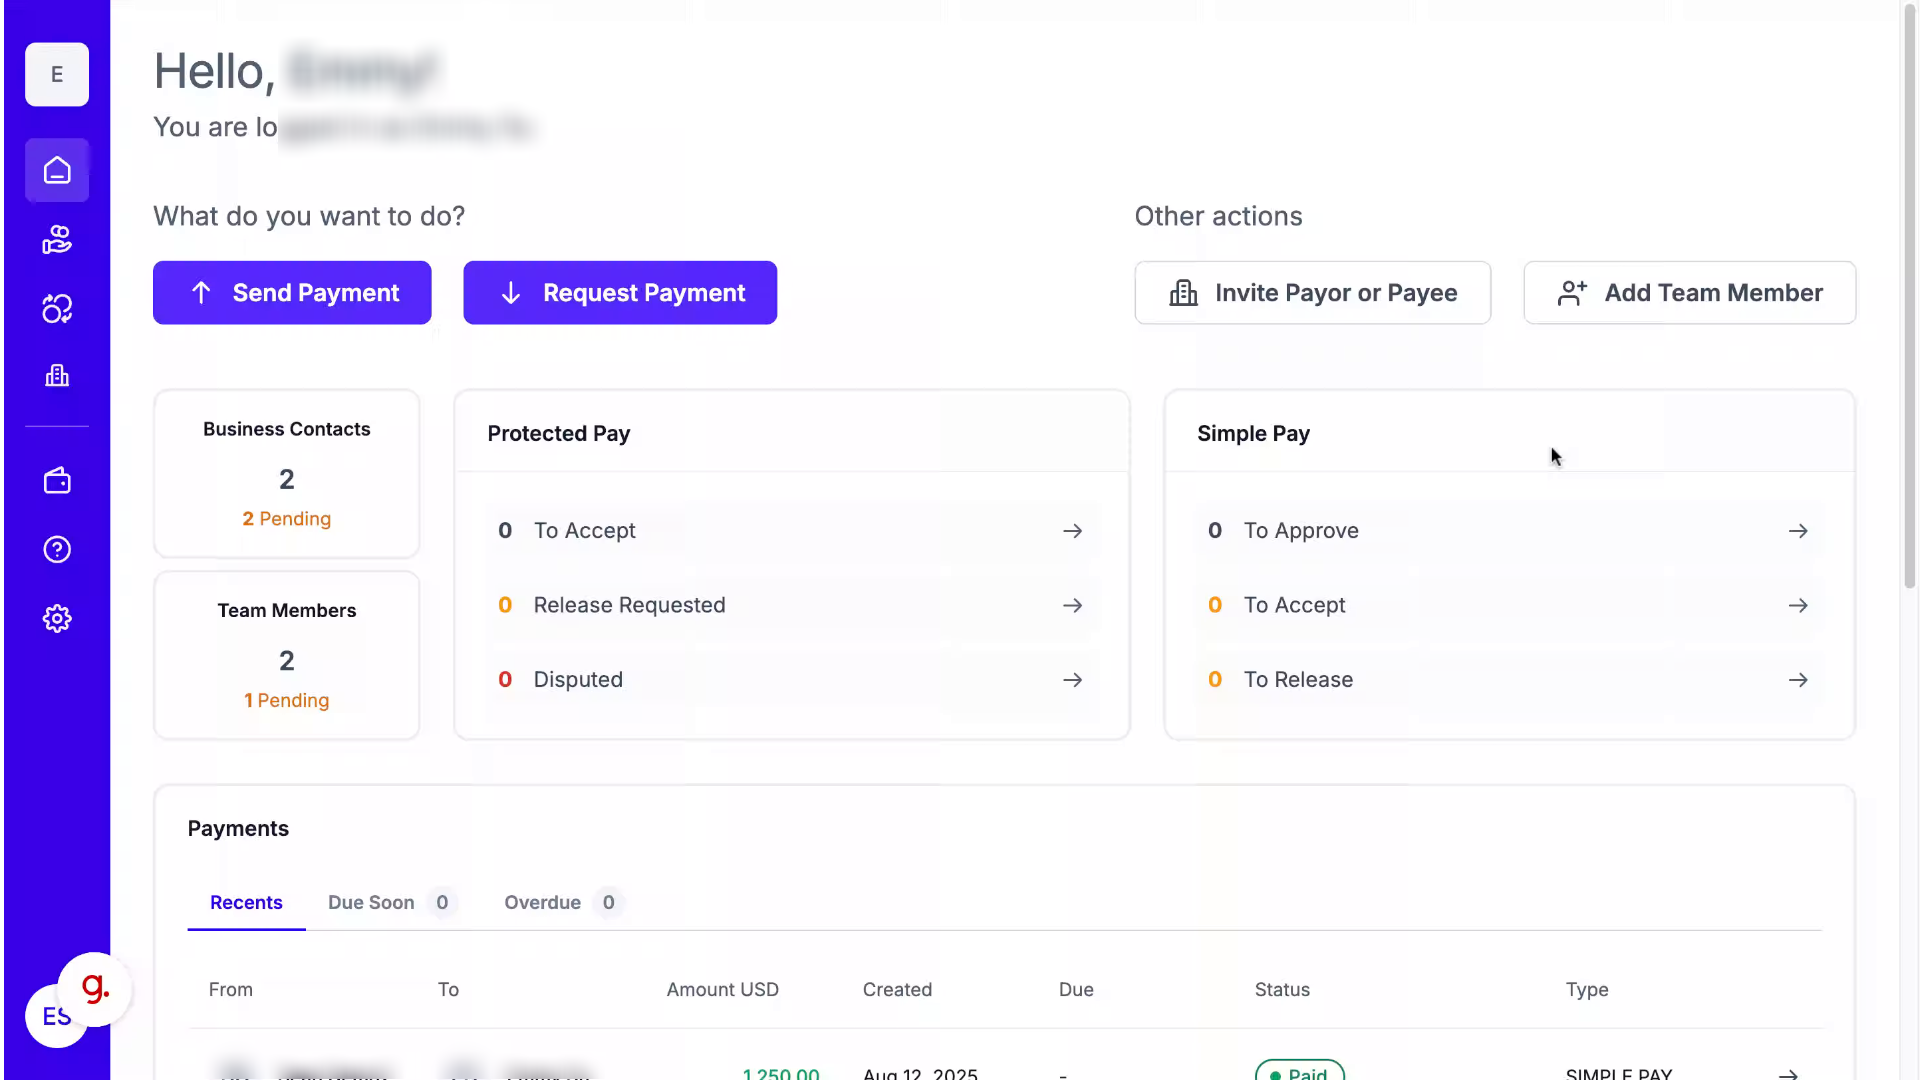
1. Go to Your Dashboard
From your Dashboard, you can send a Simple Payment in two ways.
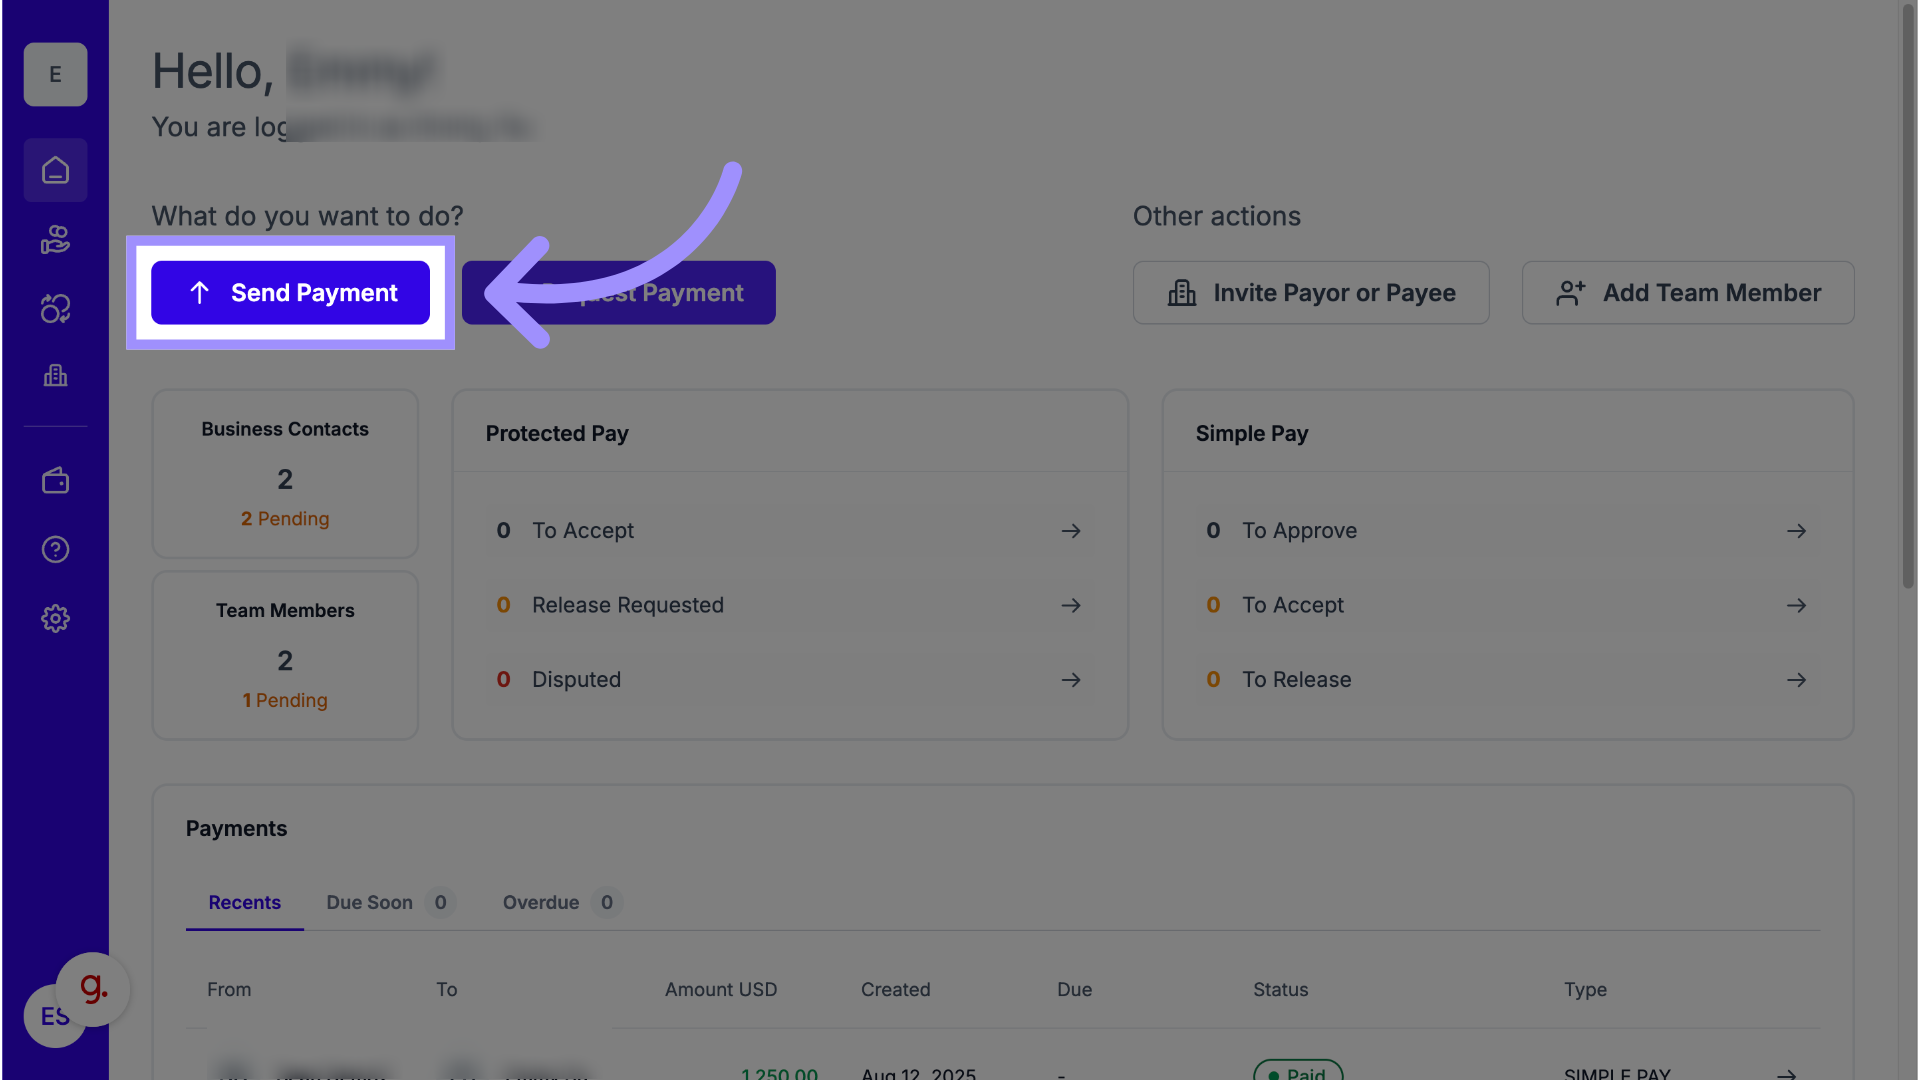
2. Choose How to Send a Payment
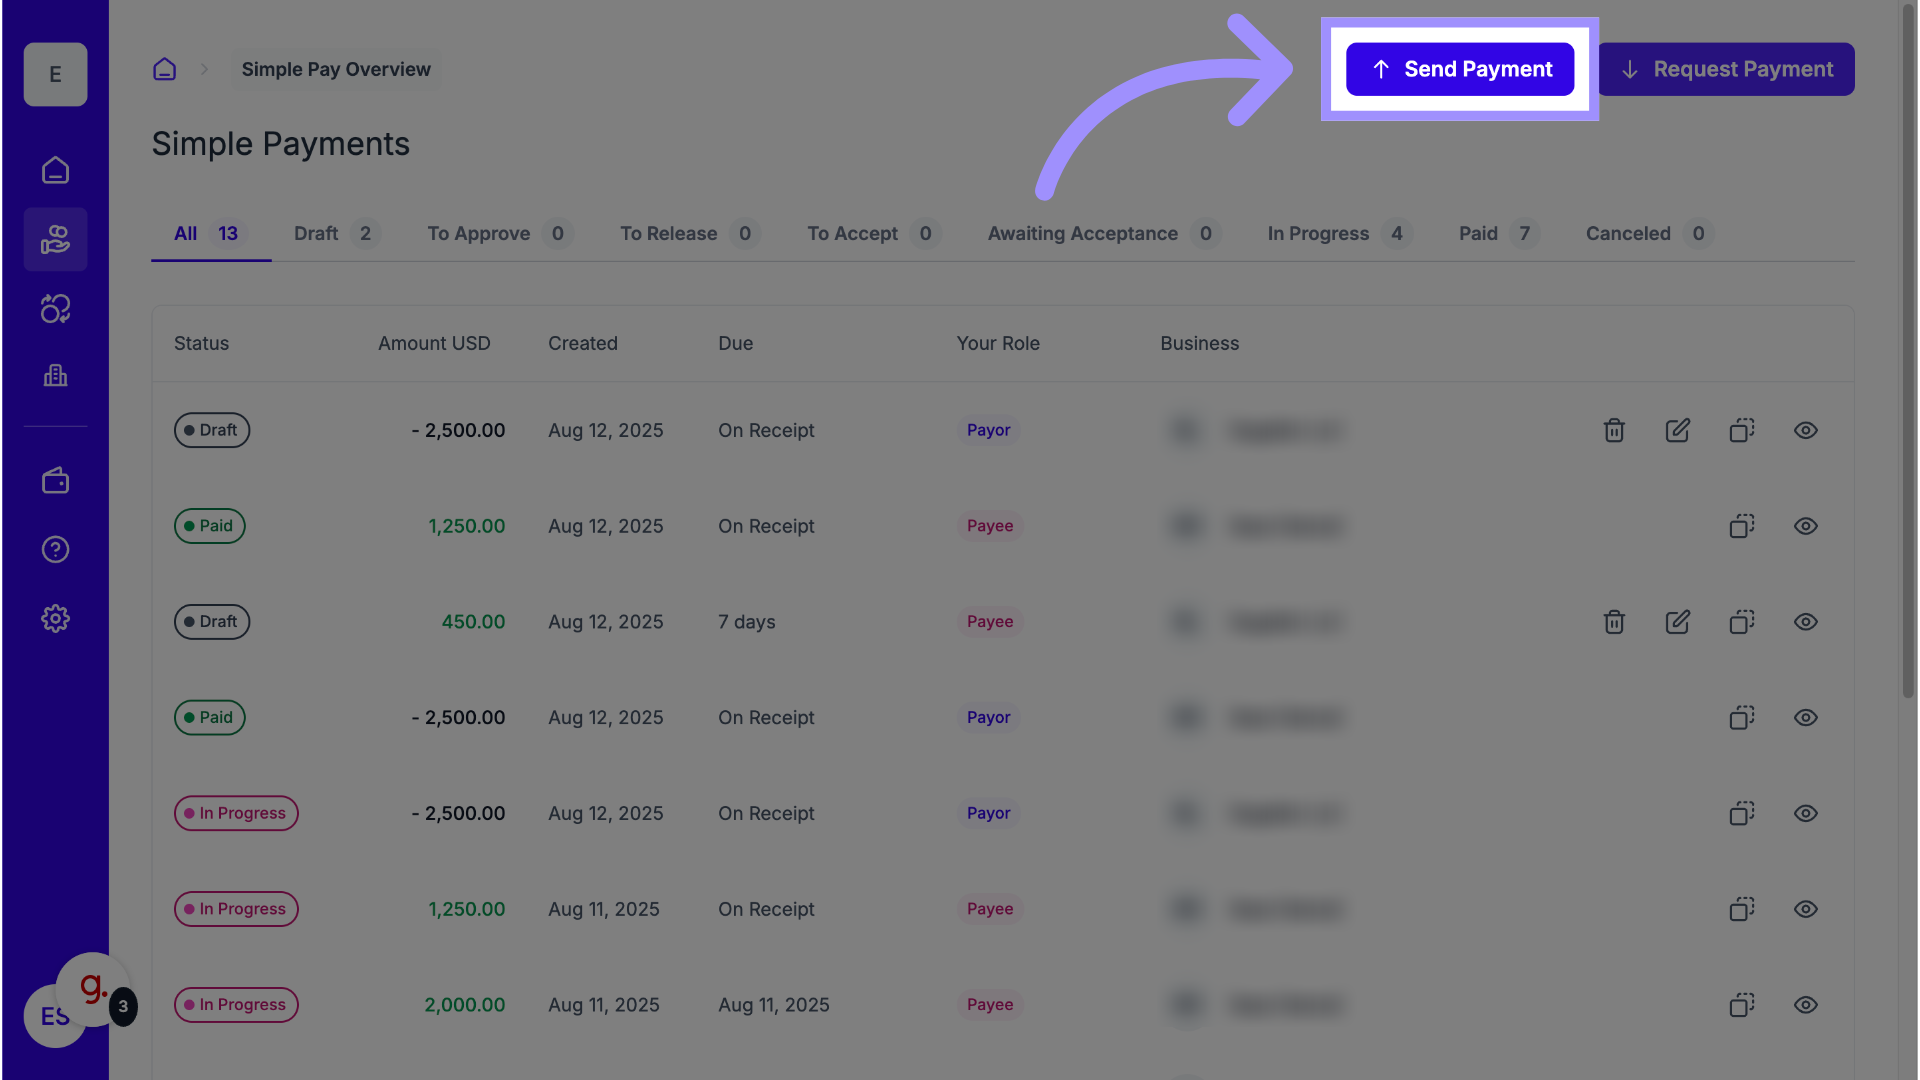
From the Dashboard, click Send Payment.
If you don’t see this button, your account may not be enabled to send payments.
Contact Support if you’re a U.S.-based business that needs this feature enabled.
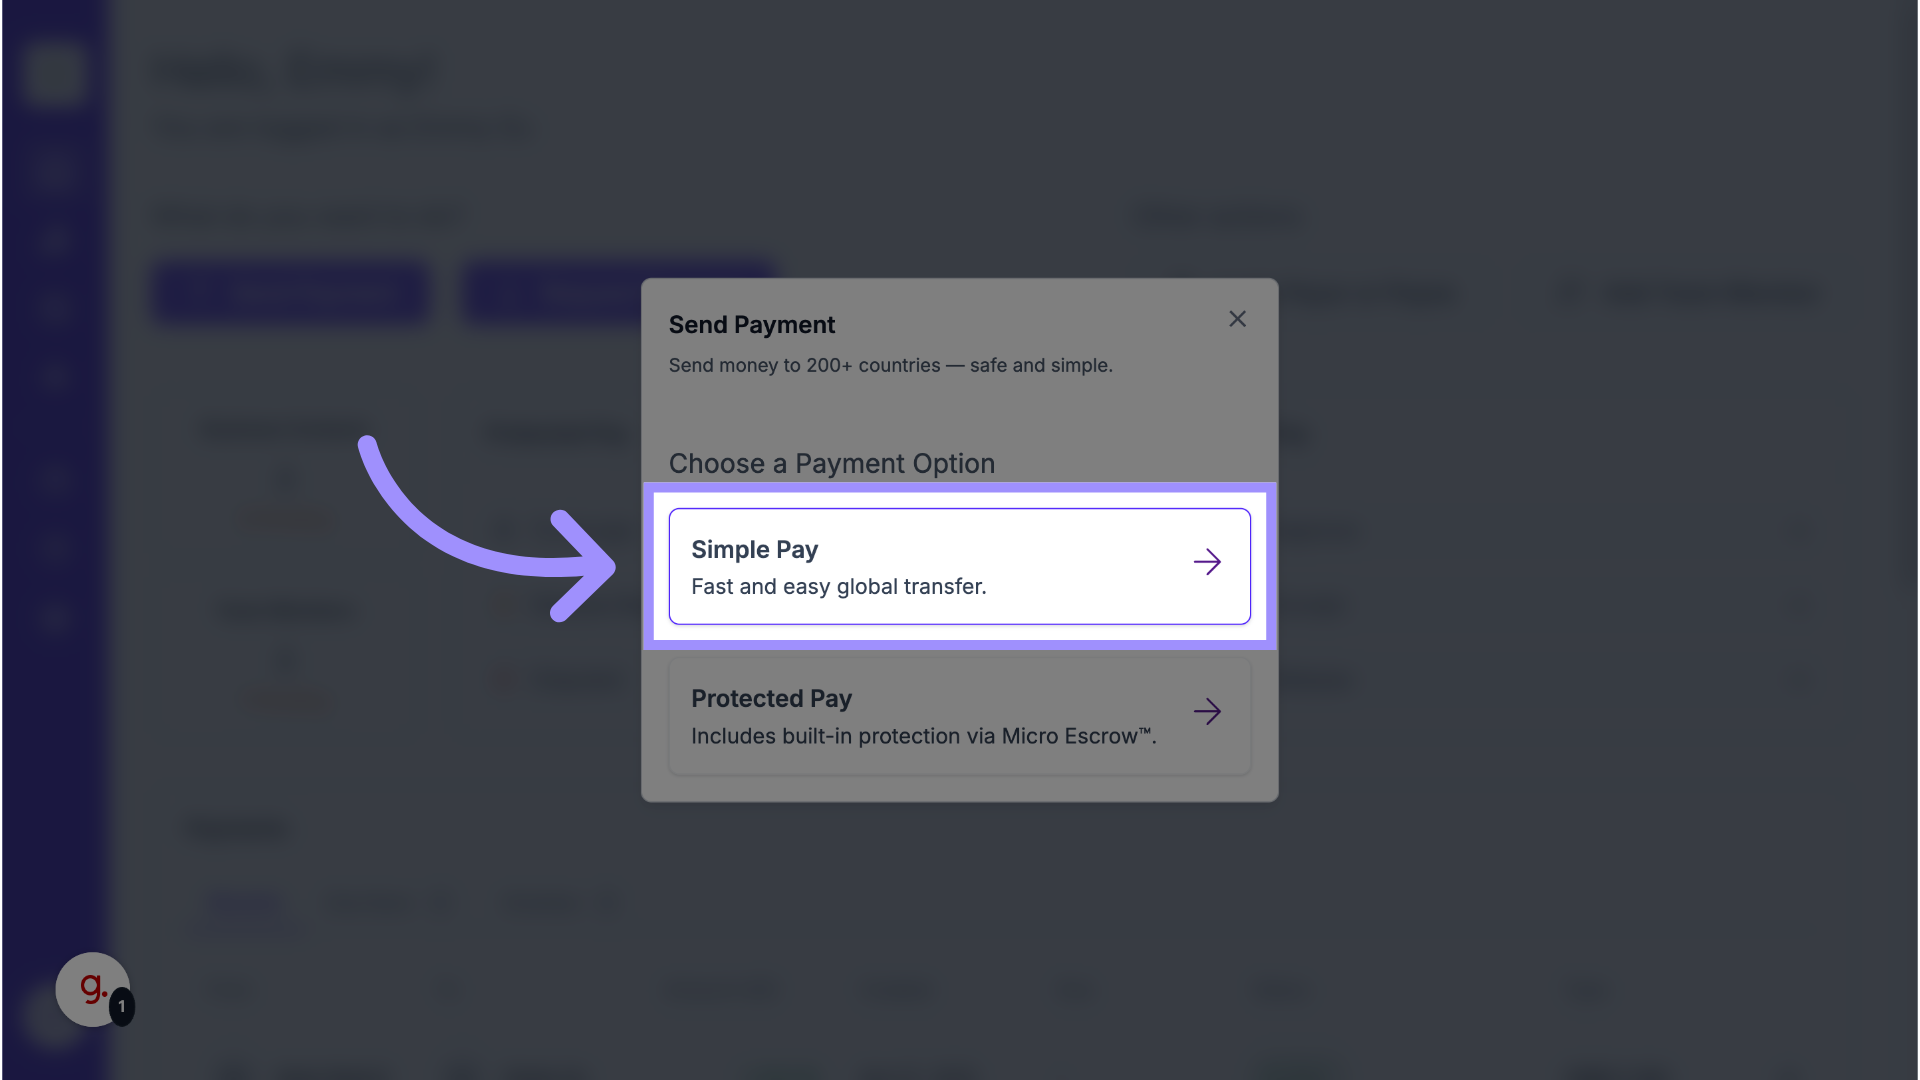
3. Choose Type of Payment
Select Simple Pay as the payment type.
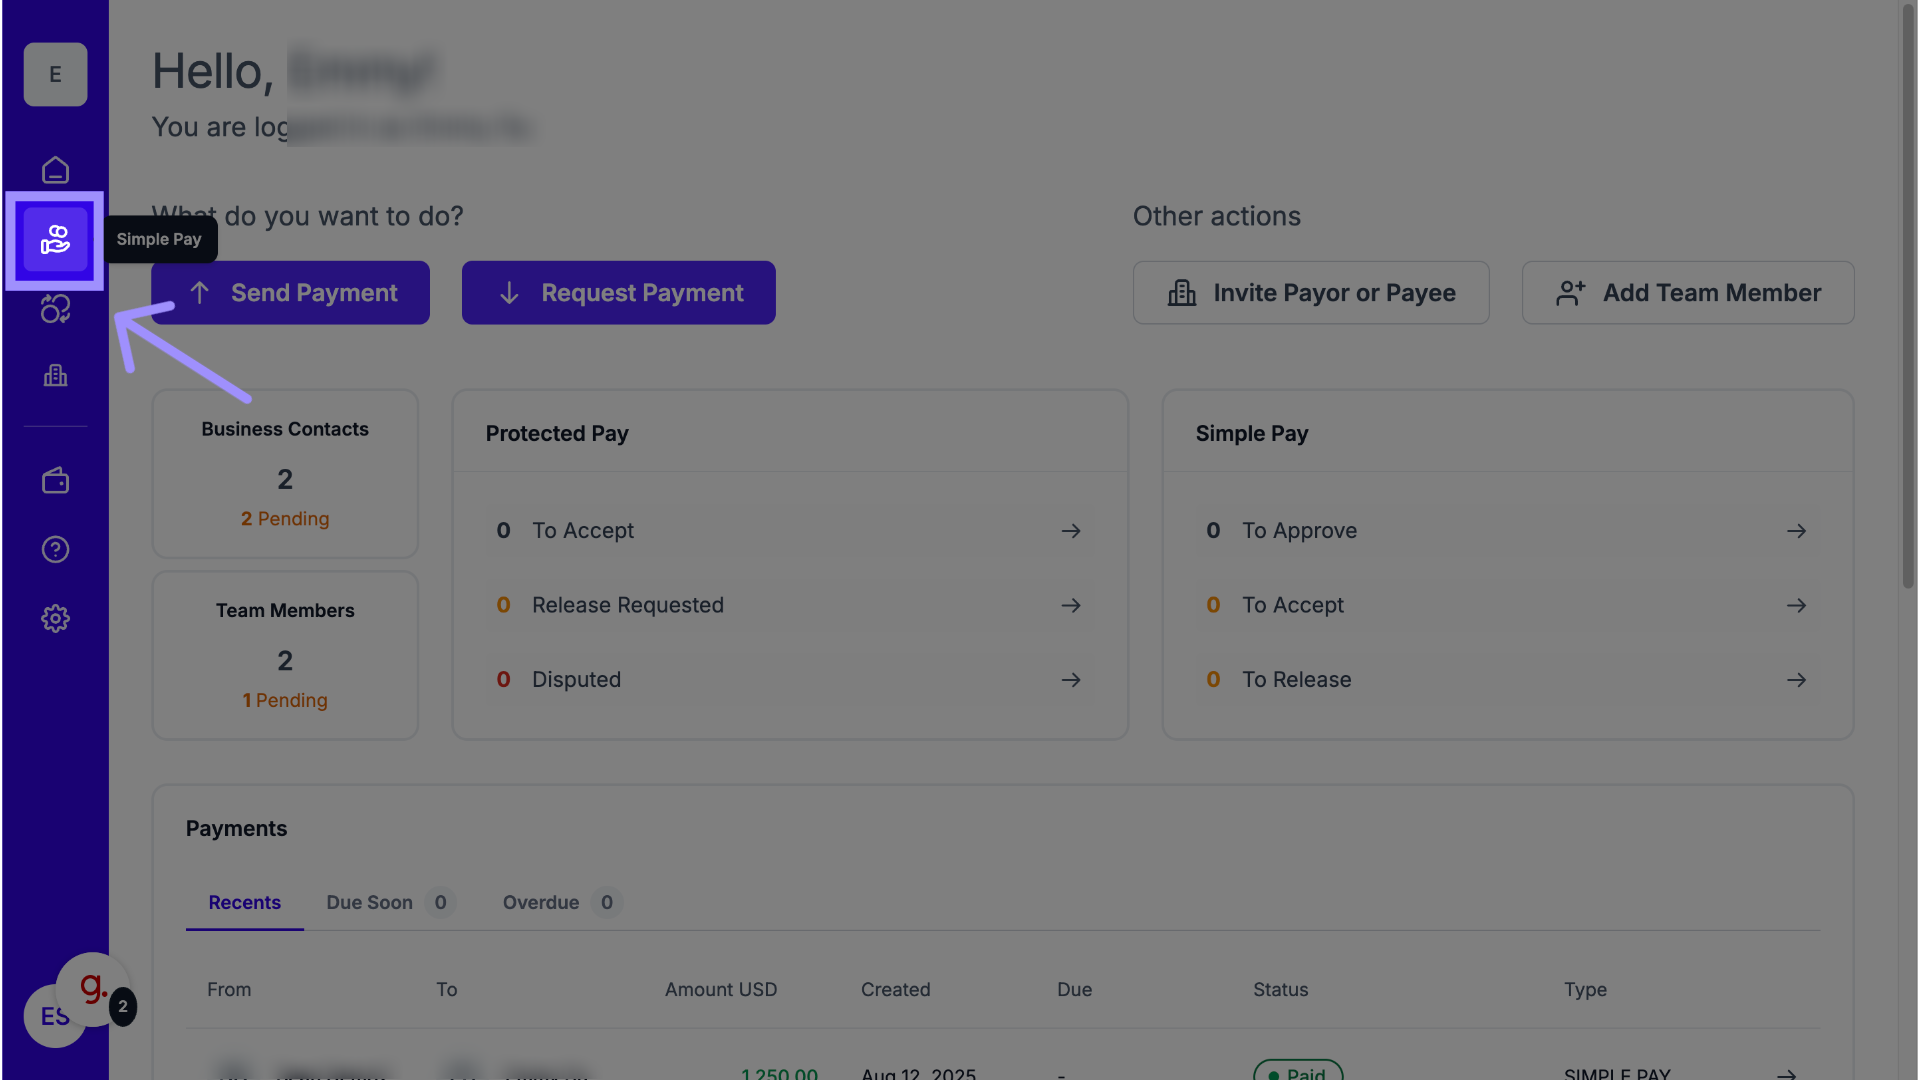
4. Left Navigation Panel
Alternatively, you can click the Simple Pay icon from the left navigation menu.
5. Click “Send Payment”
Click Send Payment in the top right corner.
6. Ensure You’re Connected
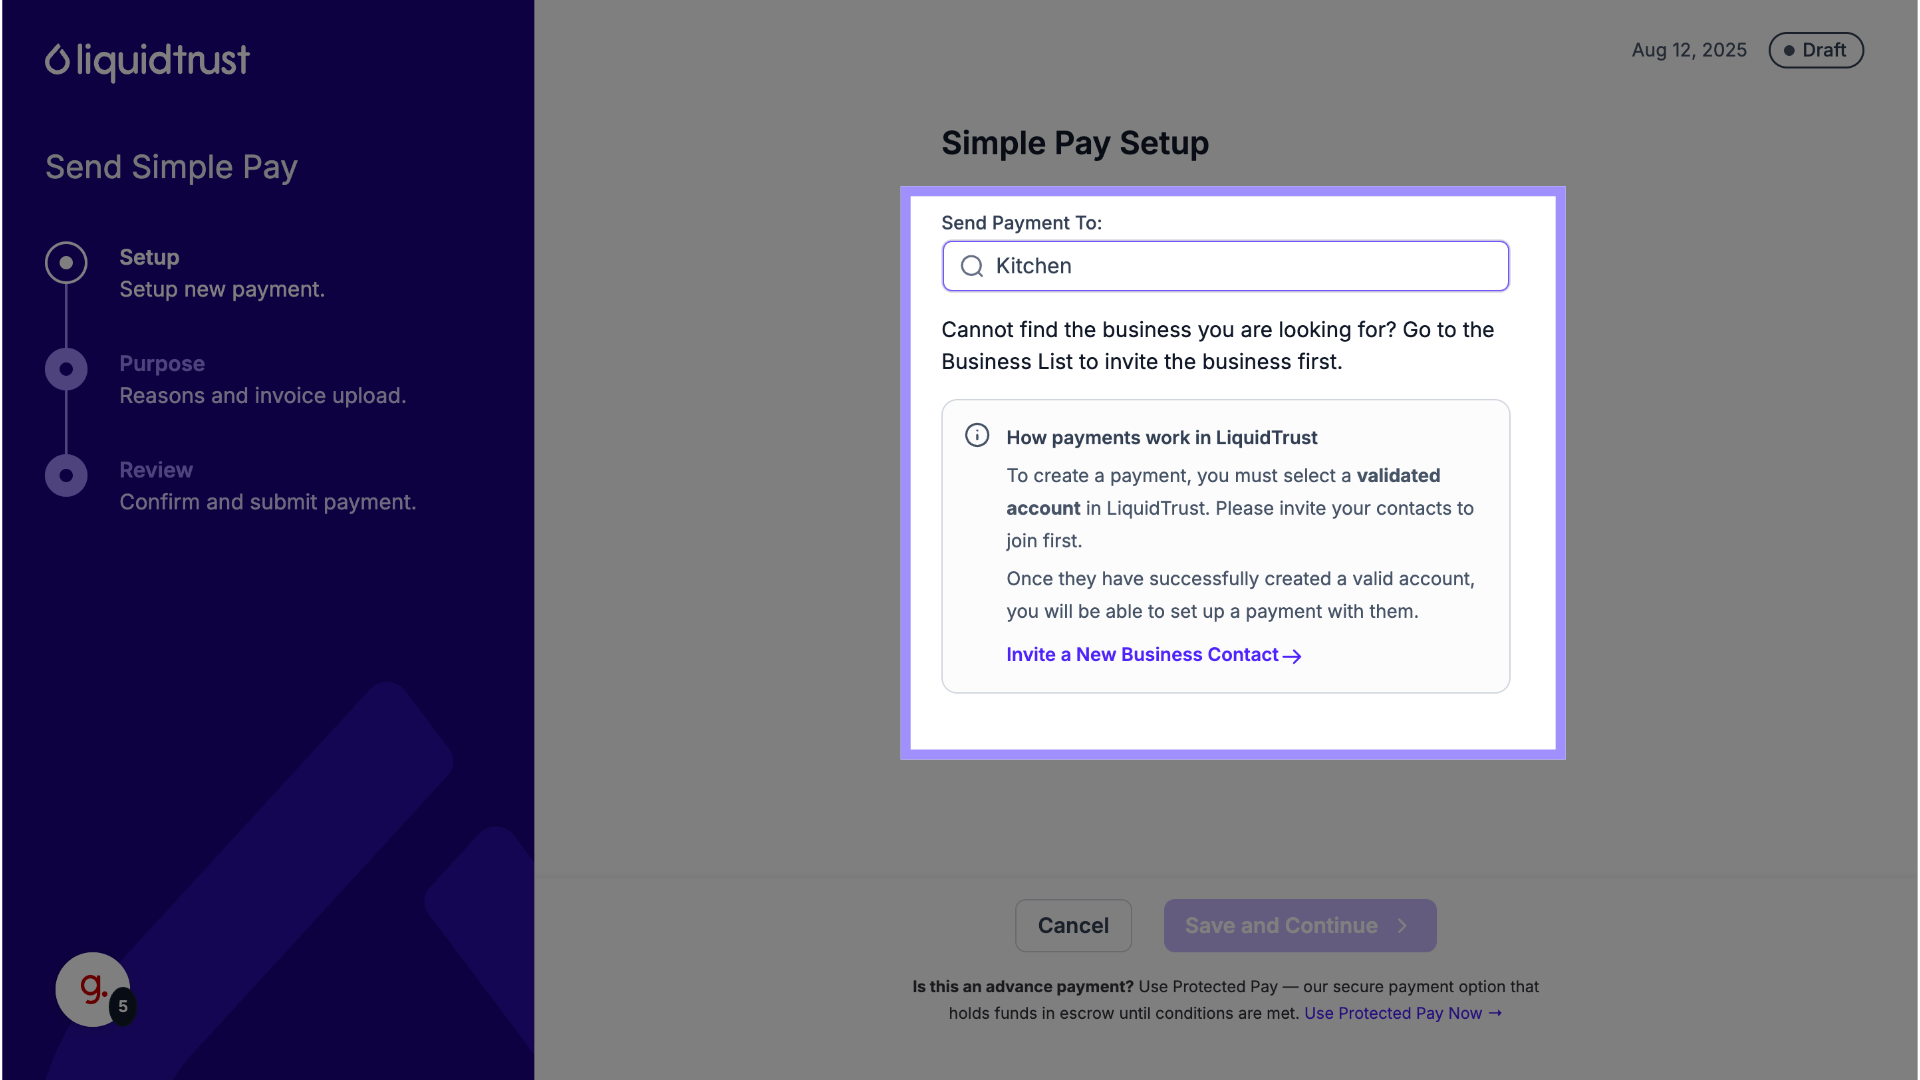
To send any payment, you must first be connected with the Payee as a Business Contact.
If you’re not yet connected, send or accept an invitation before continuing.
For more details, see How to Invite Other Businesses to Transact.
7. Not Connected
If you try to send a payment to a business you’re not connected with, it will not proceed until the connection is accepted.
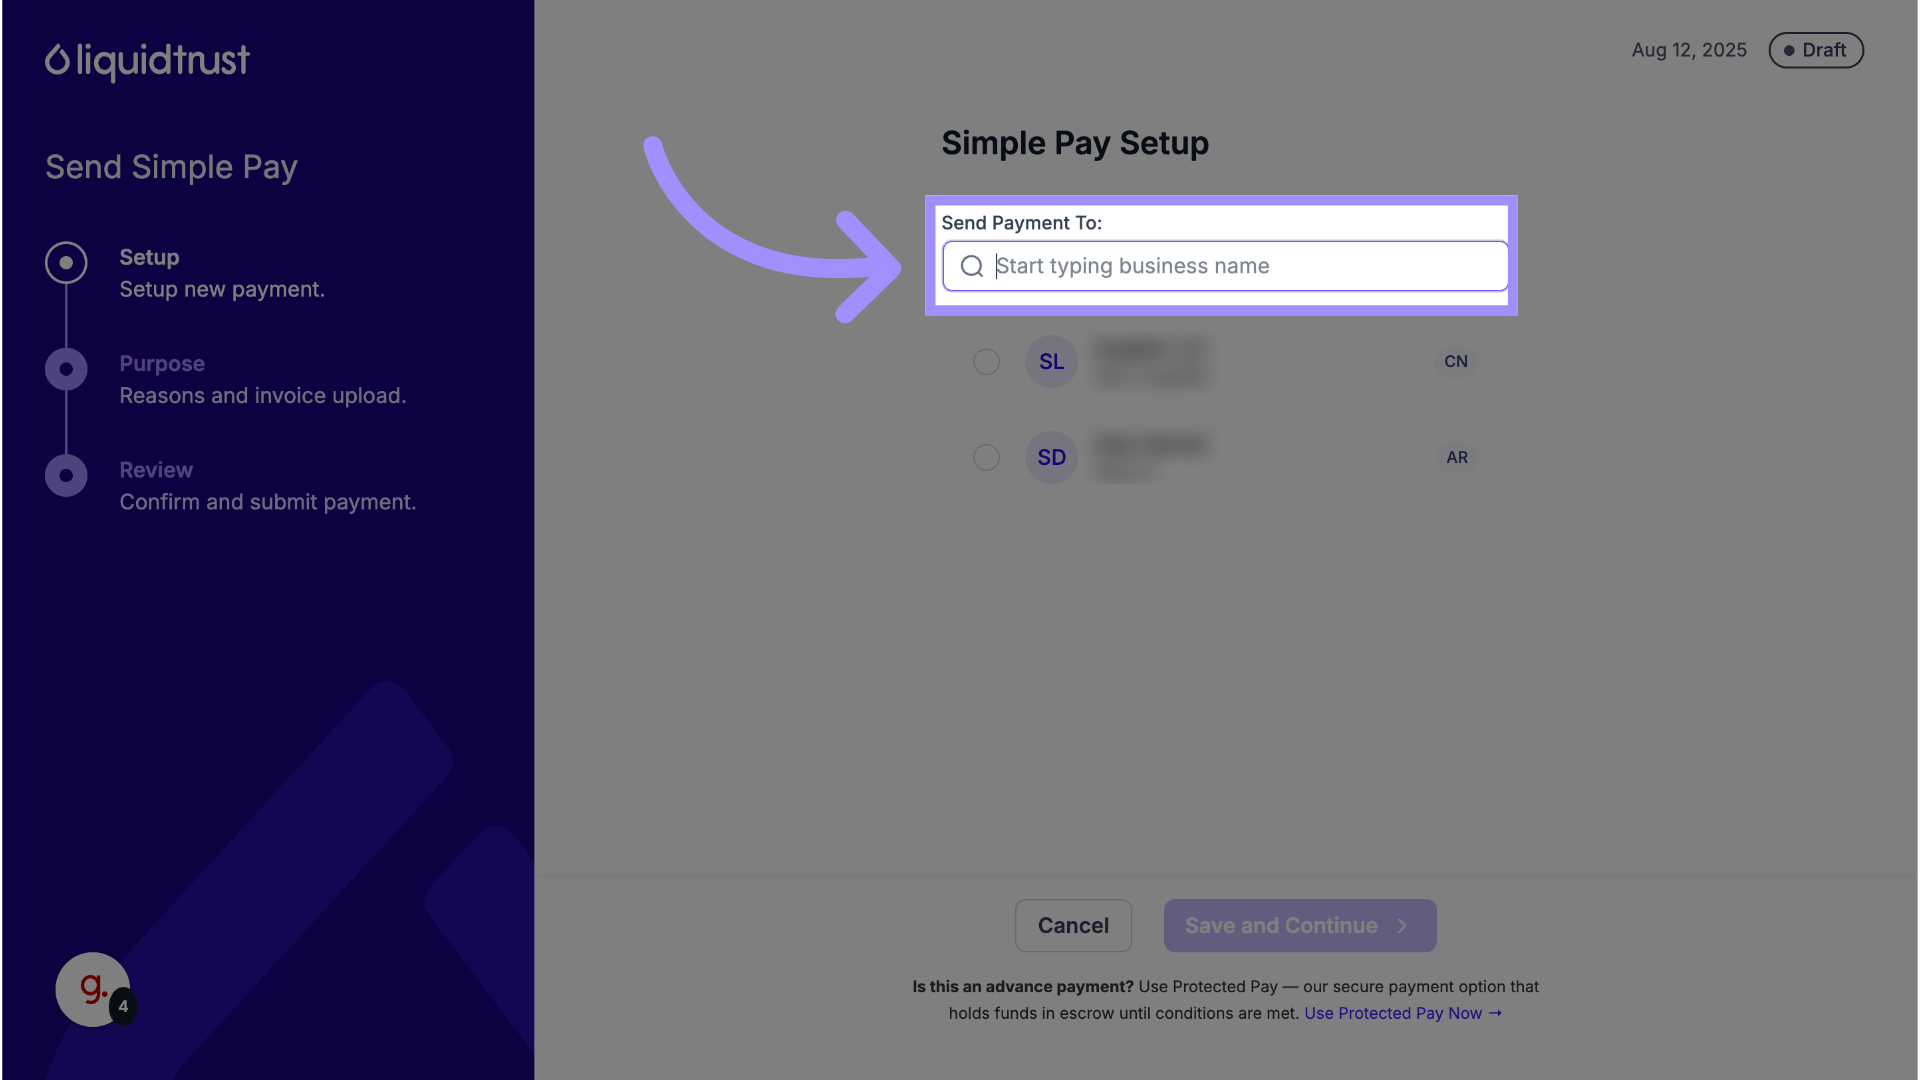
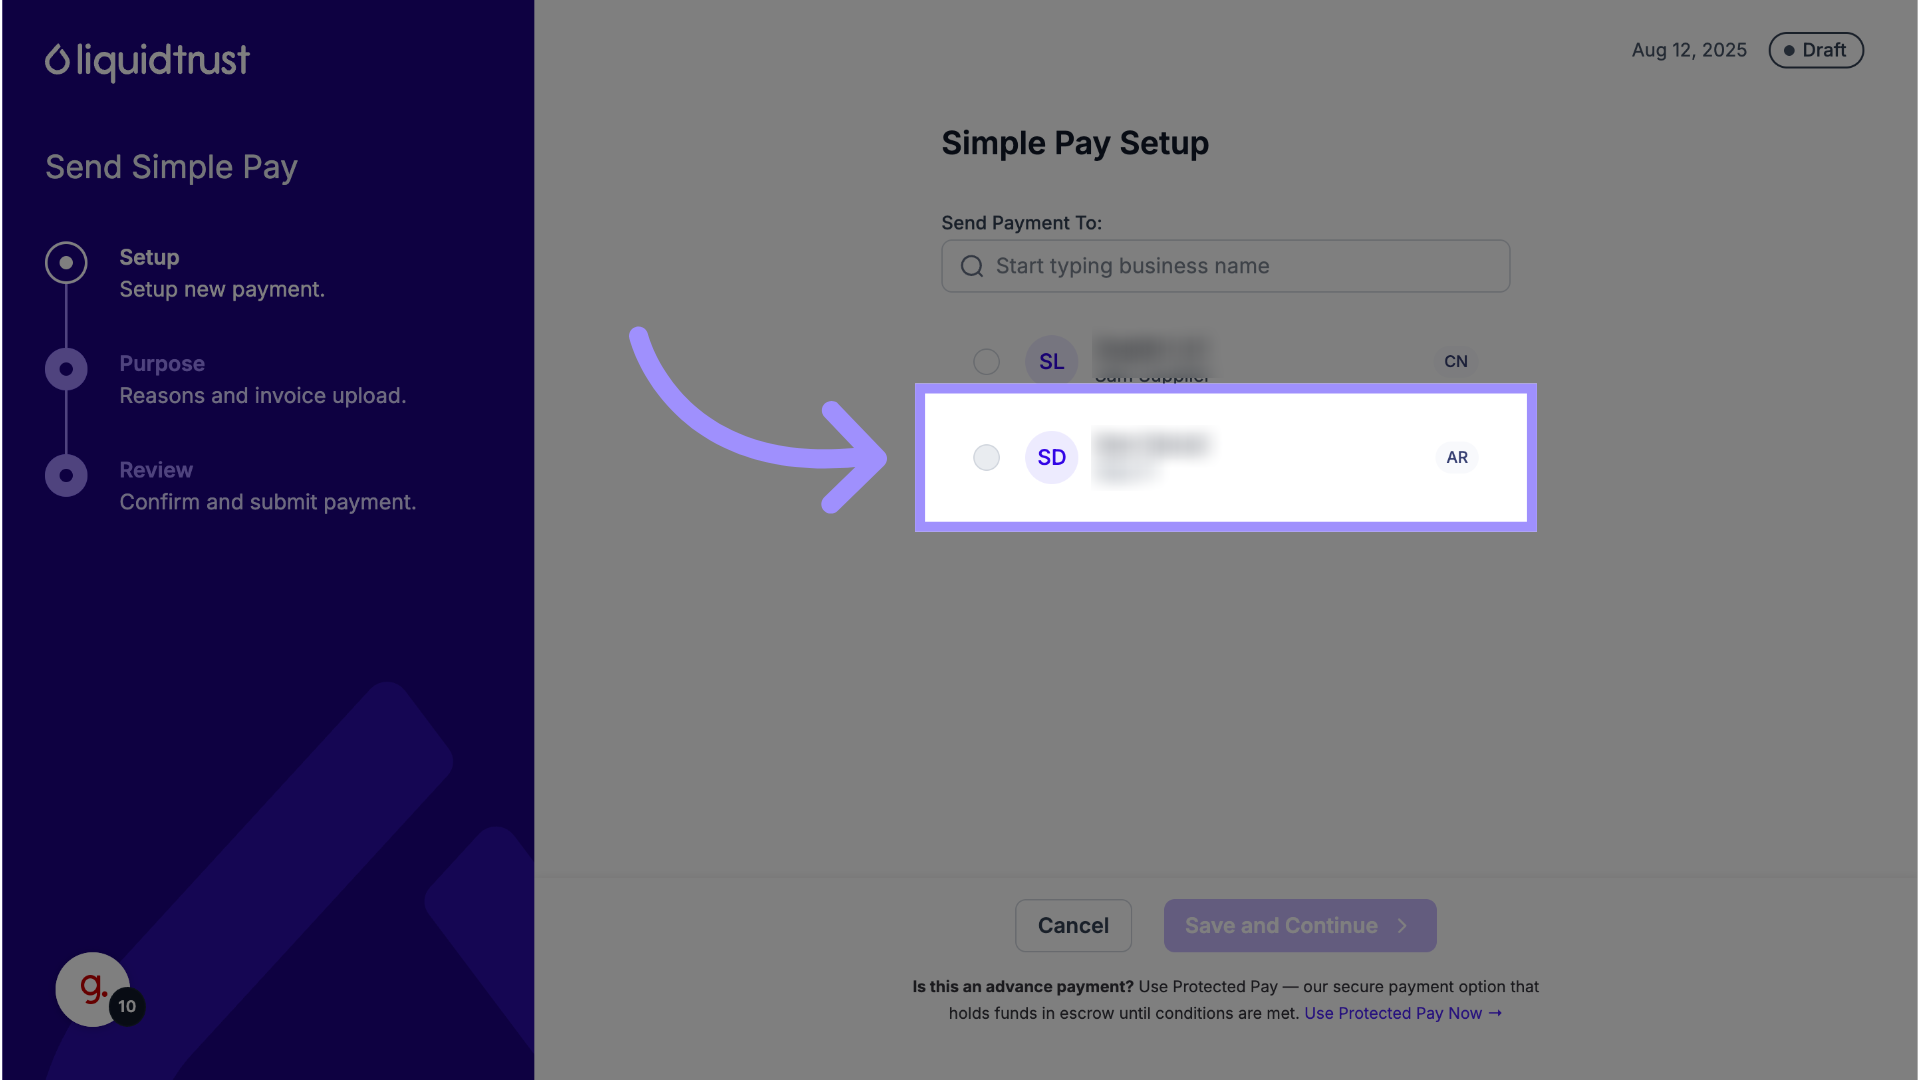
8. Select a Connected Business
If you are already connected, select that business from your Contacts list.
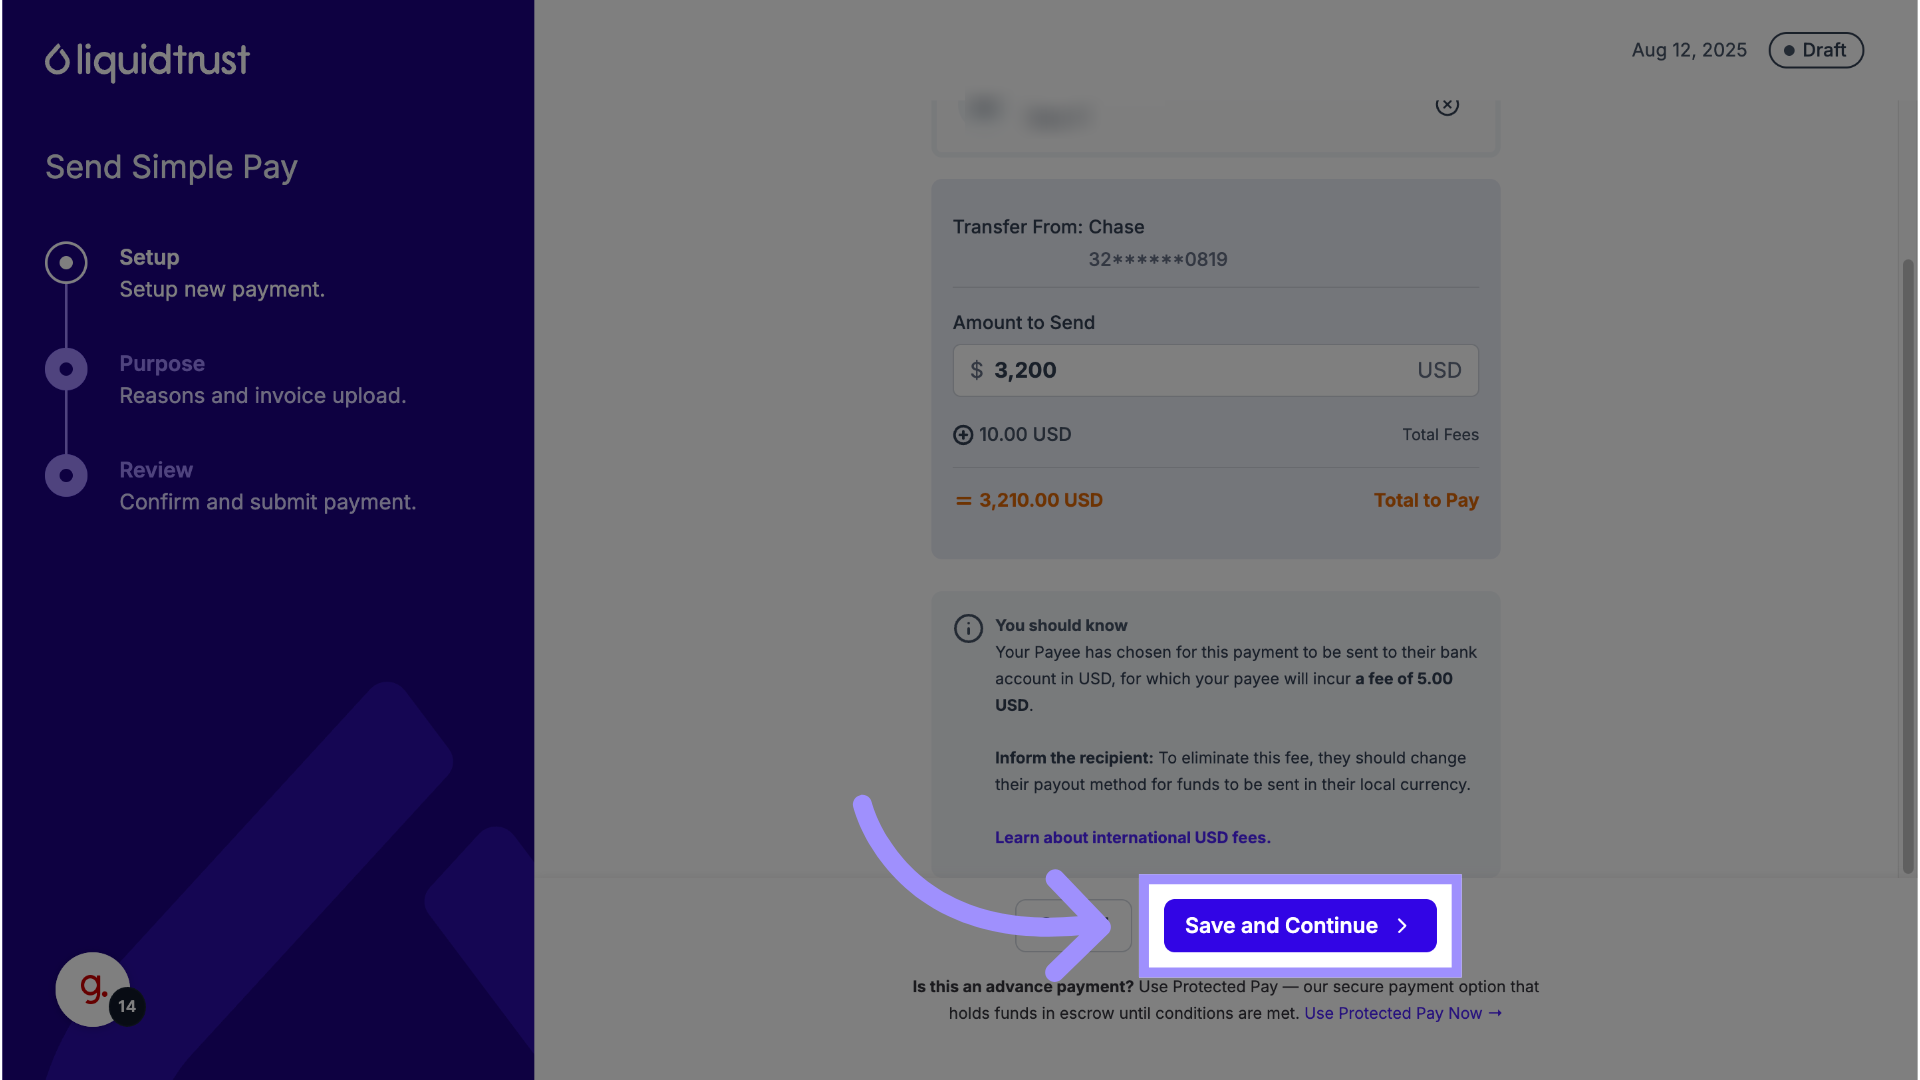
9. Enter the Payment Amount
Enter the total payment amount.
Any applicable fees will be automatically calculated based on the Payee’s location and added to your total.
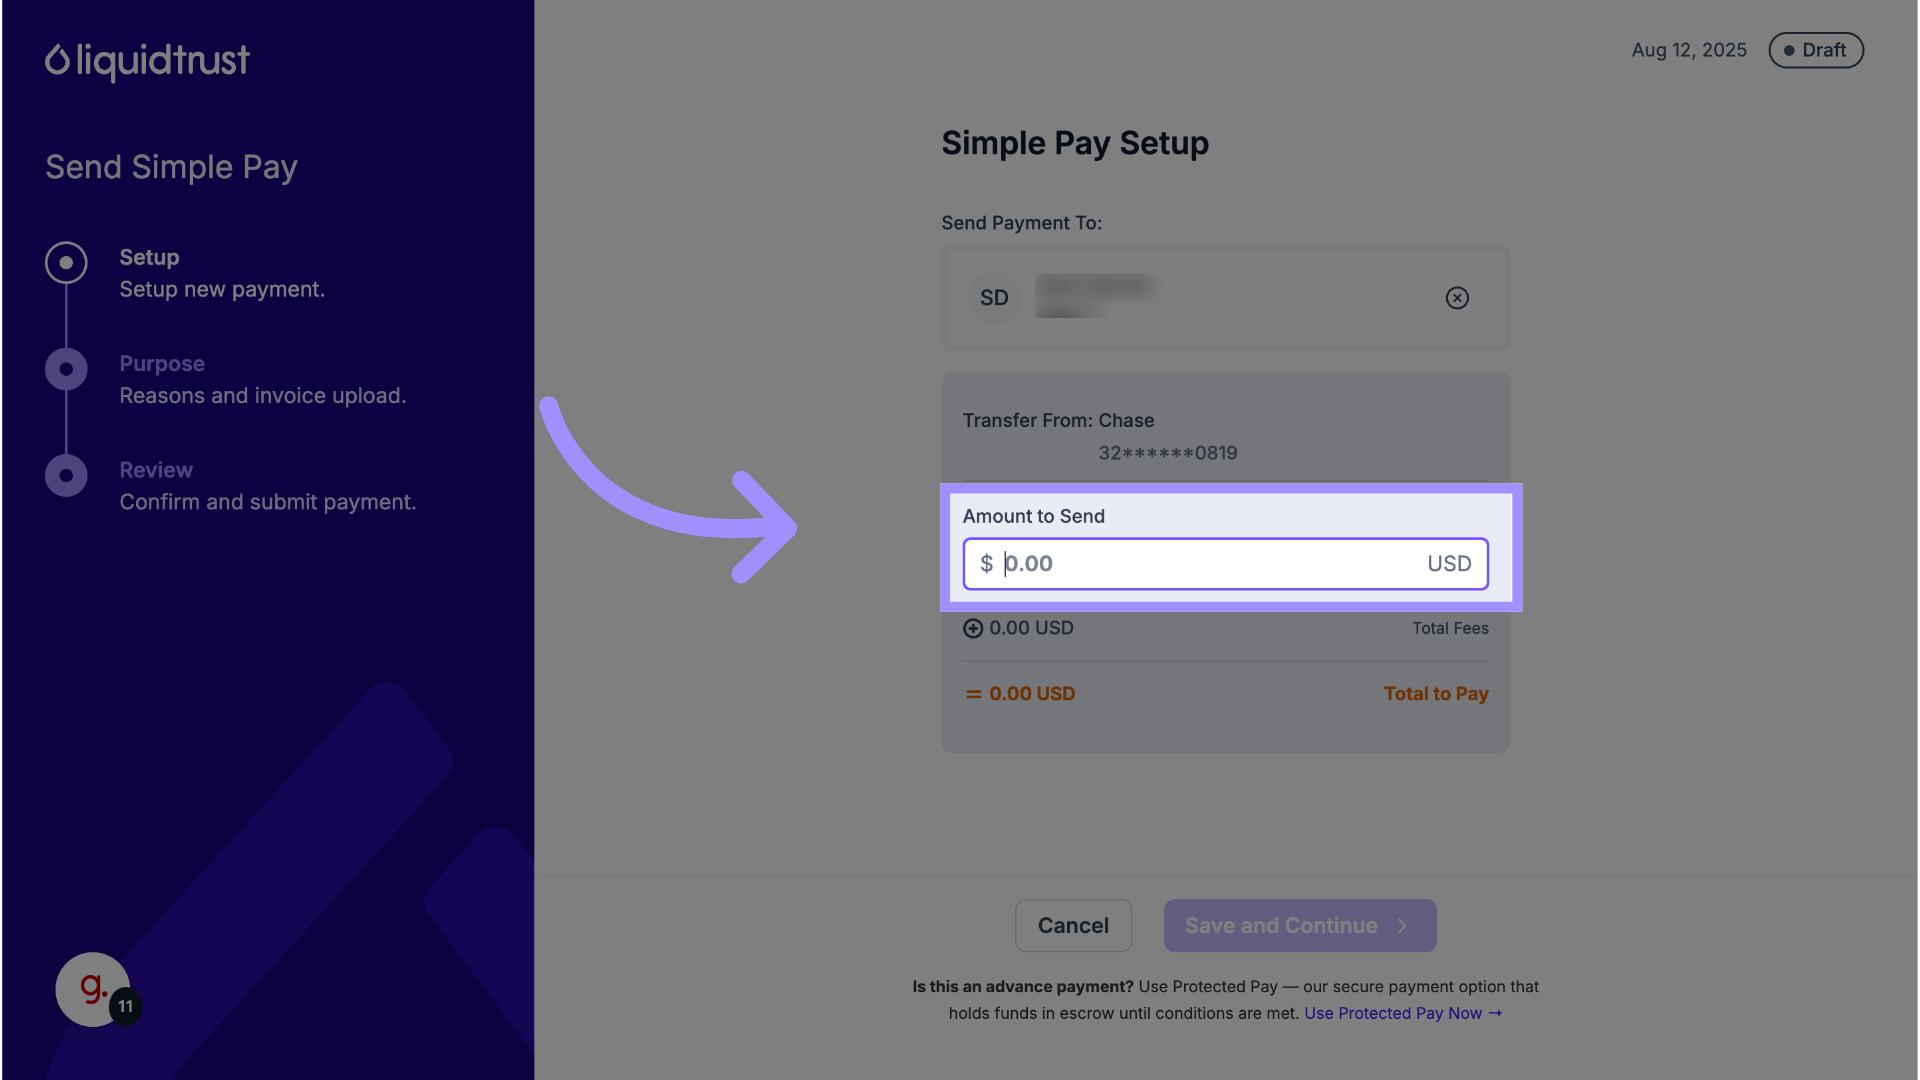
10. Click “Save and Continue”
Save your entered details to proceed.
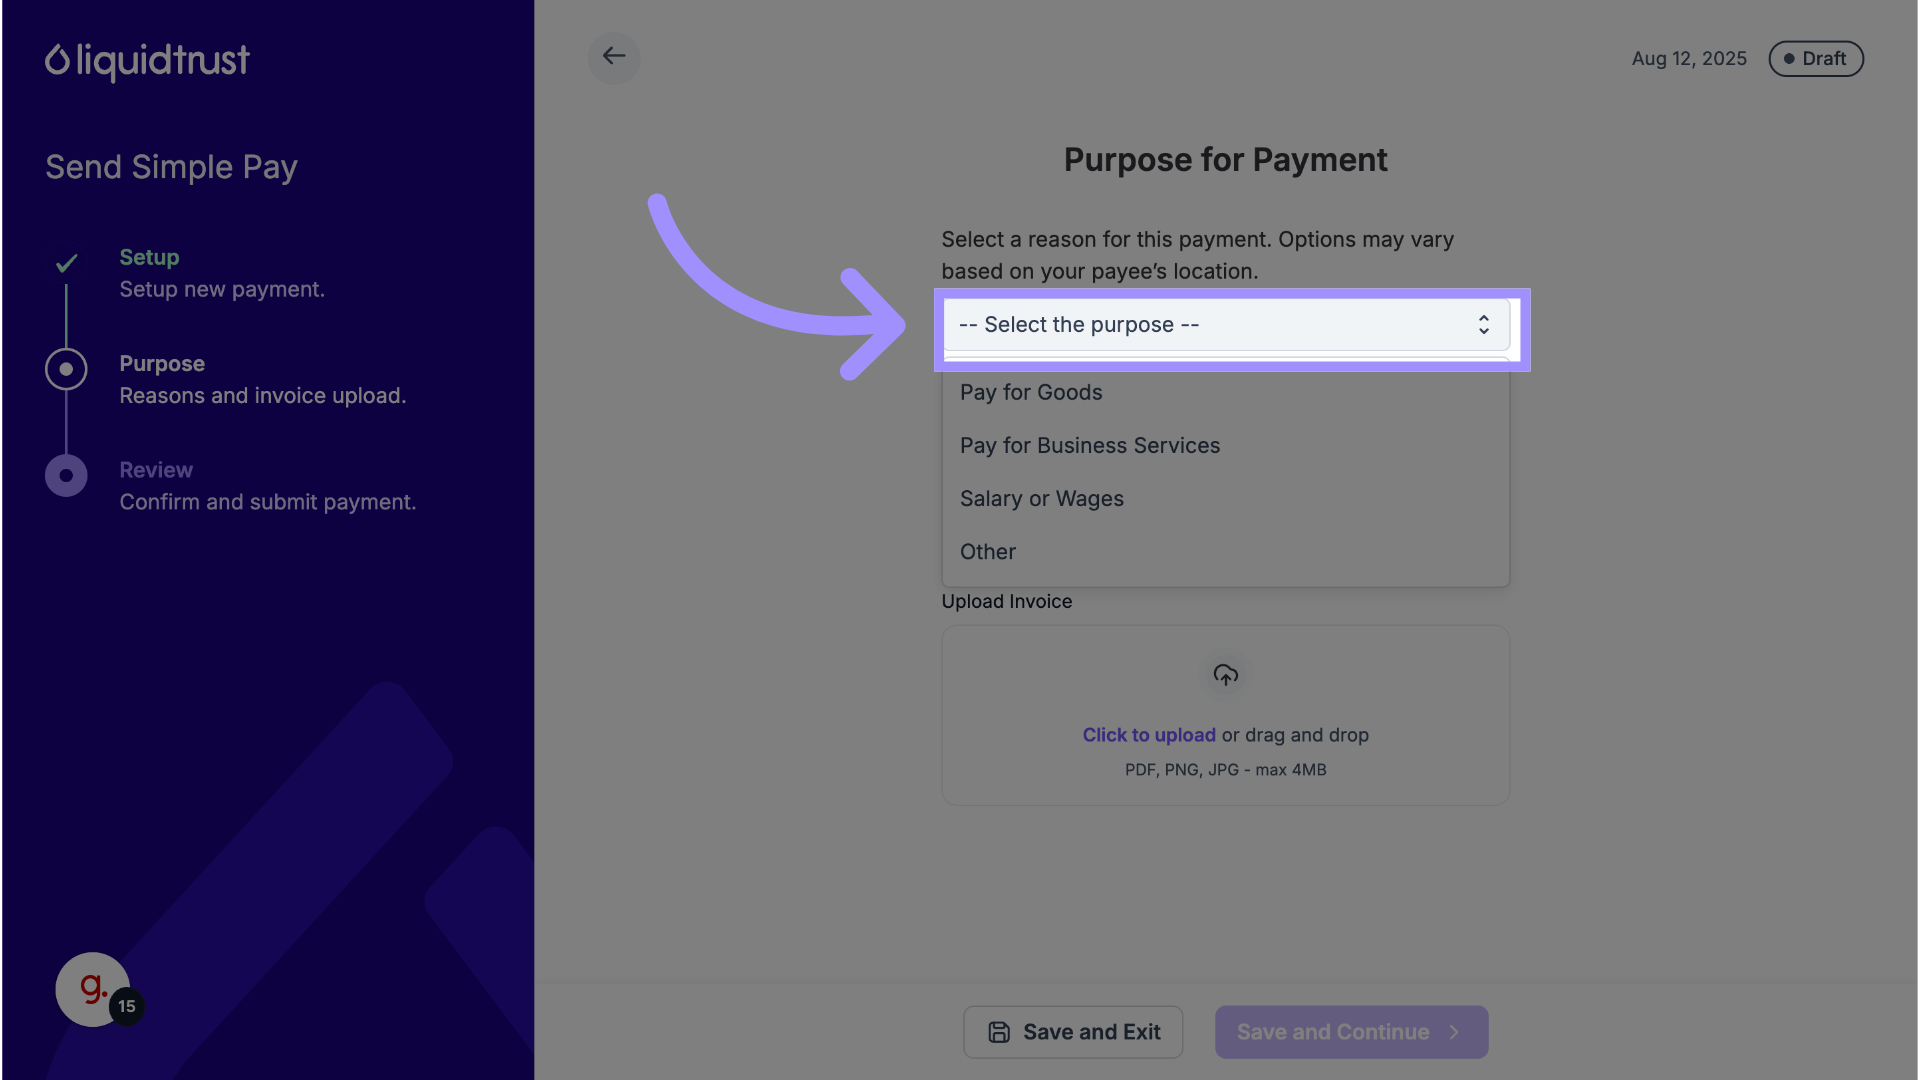
11. Provide the Purpose of Payment
Select the Purpose of Payment from the dropdown list.
Available options vary depending on the Payee’s bank country.
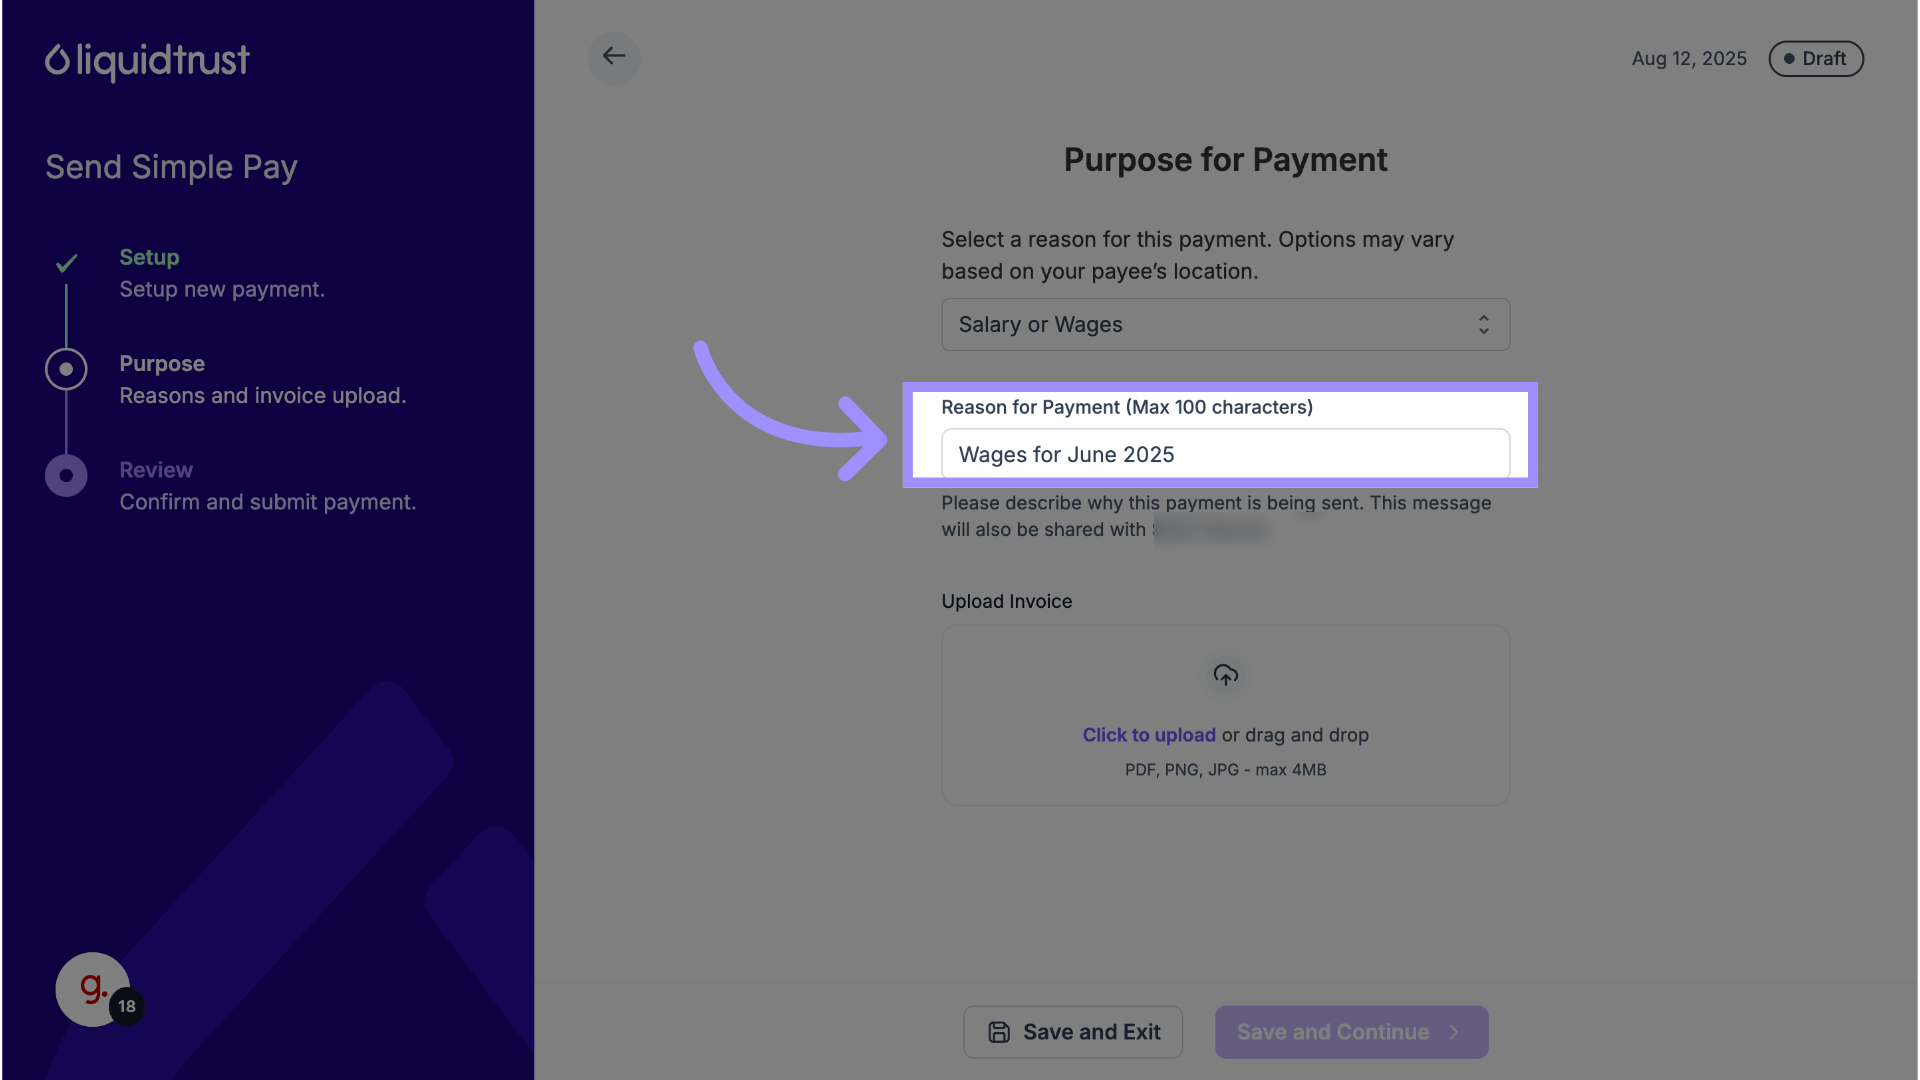
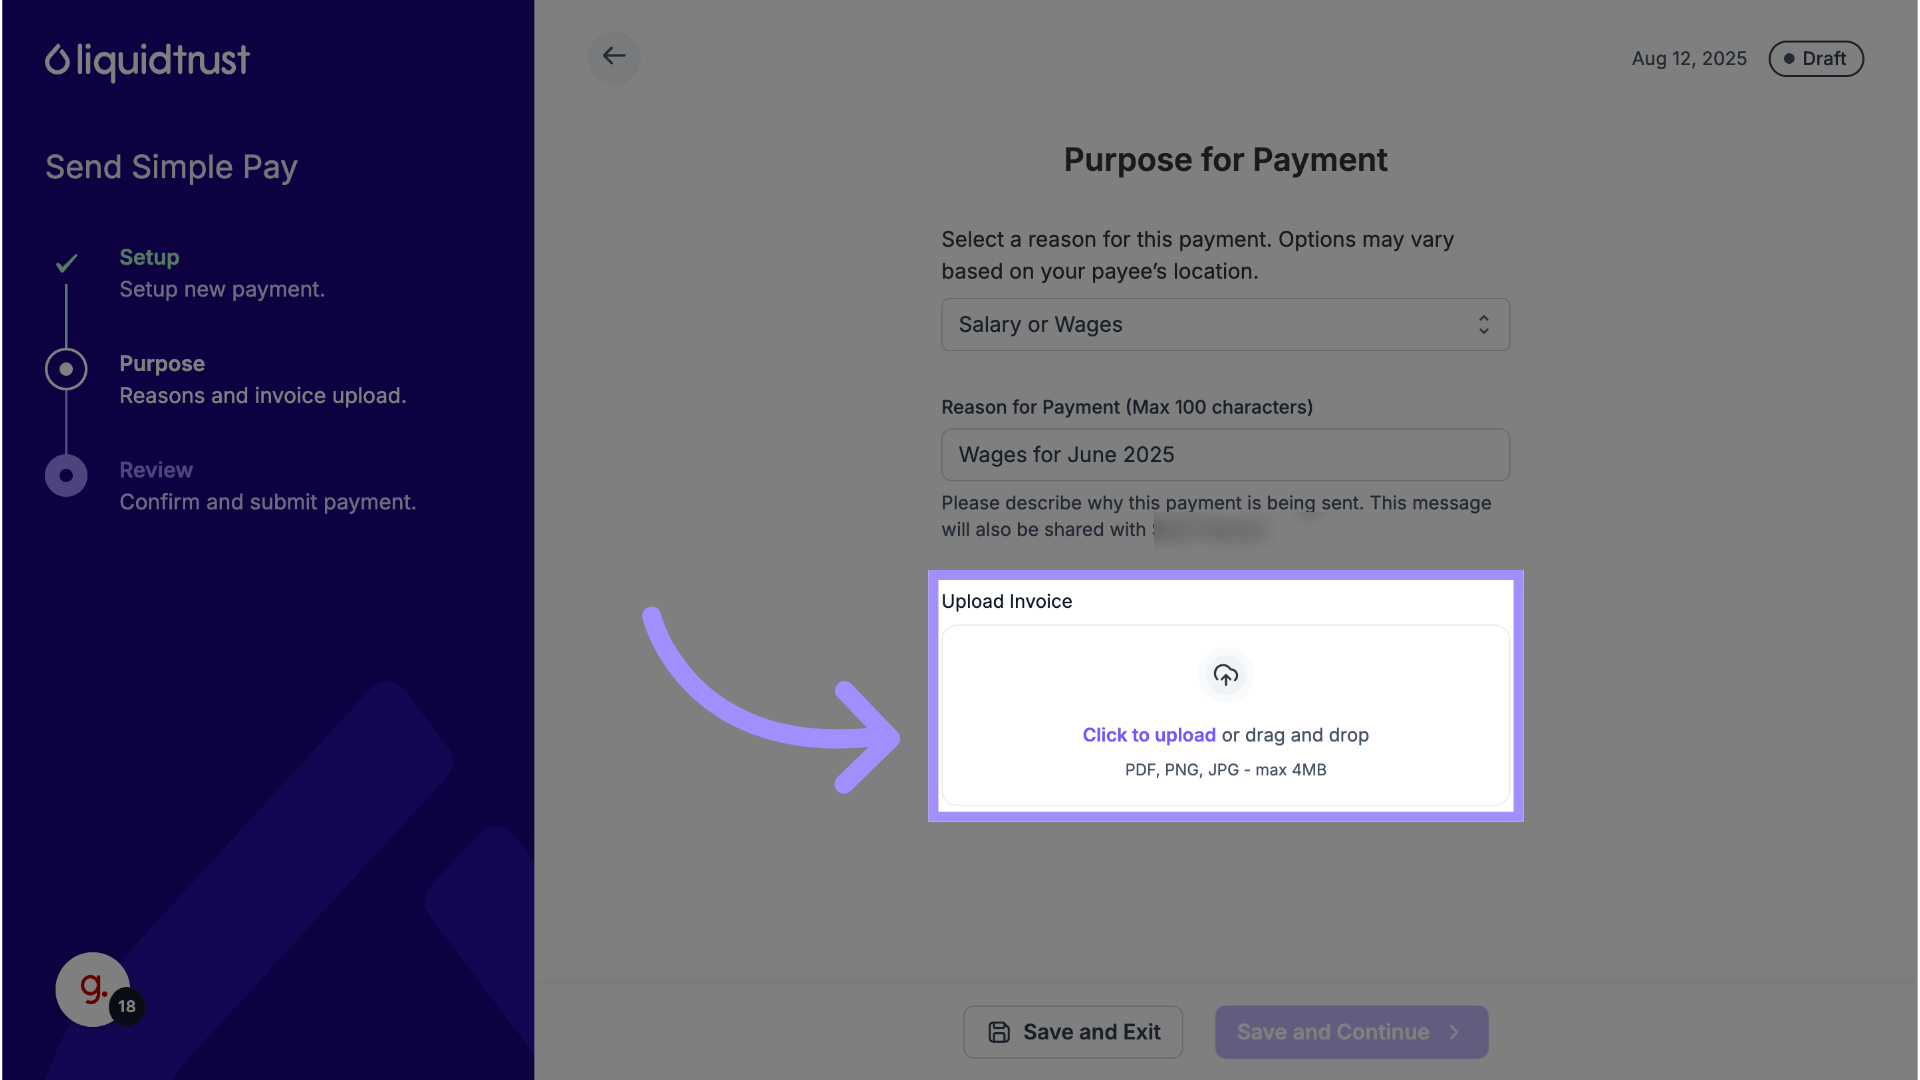
12. Reason for Payment
In the Description field, briefly describe what this payment covers (e.g., “Monthly software license” or “Consulting services”).
13. Upload Invoice
Upload an invoice file to complete the payment setup.
Accepted formats: PDF, JPG, or PNG.
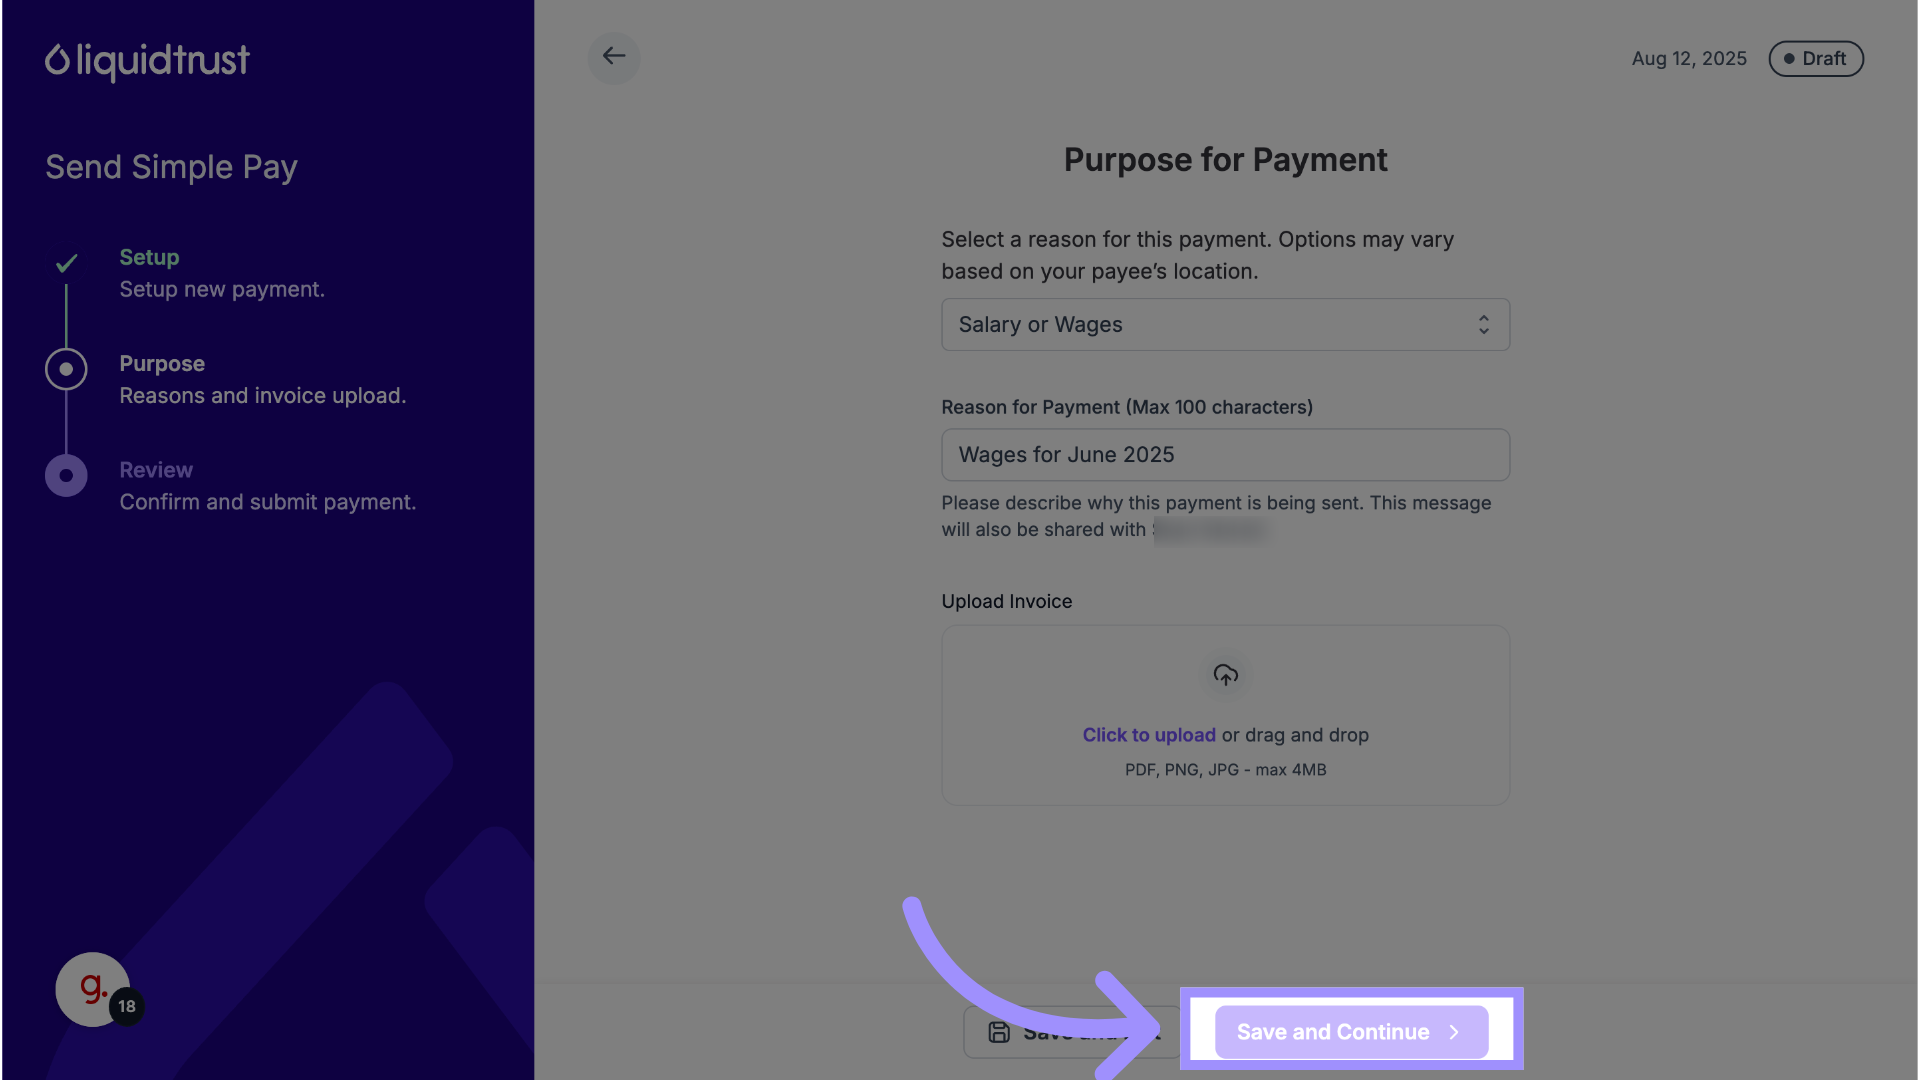
14. Save and Continue
After uploading your invoice, click Save and Continue.
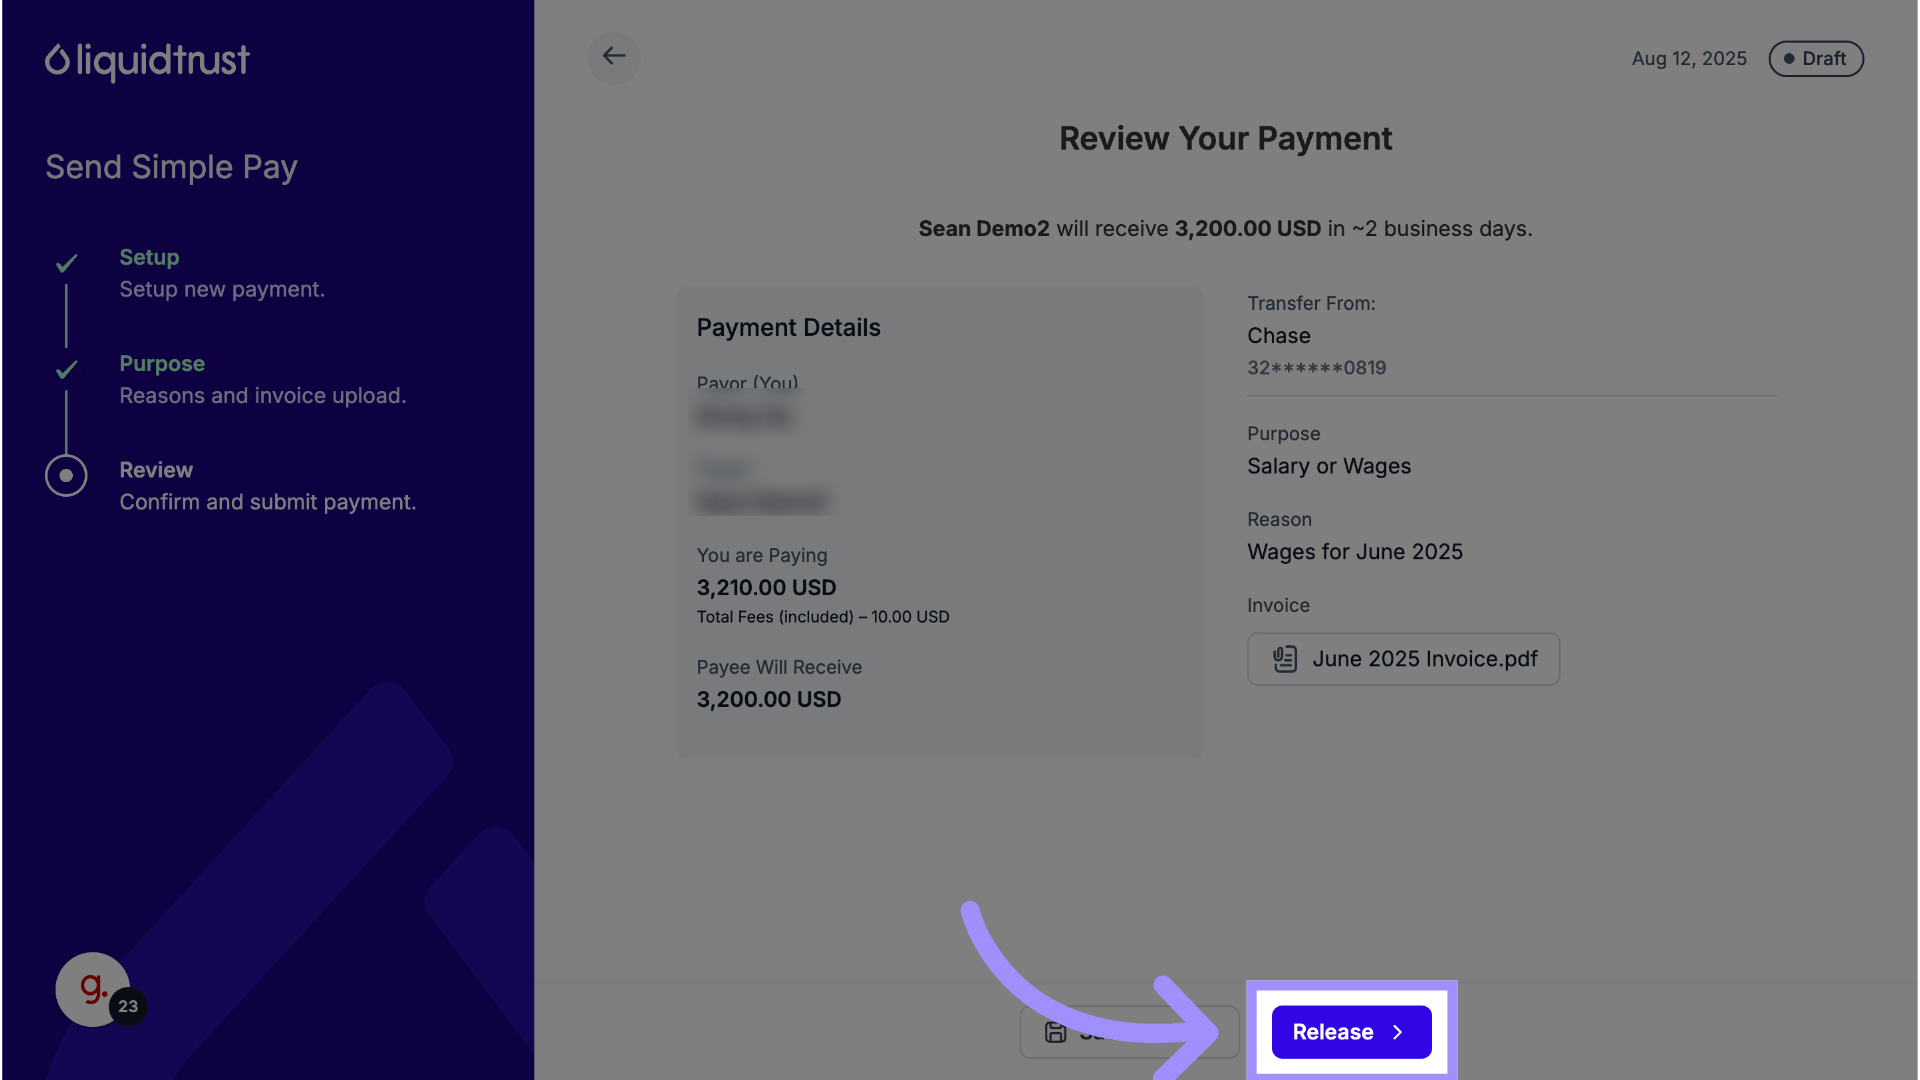
15. Review and Confirm Payment Details
Review all payment information carefully.
When you’re ready, click Release to initiate the payment.
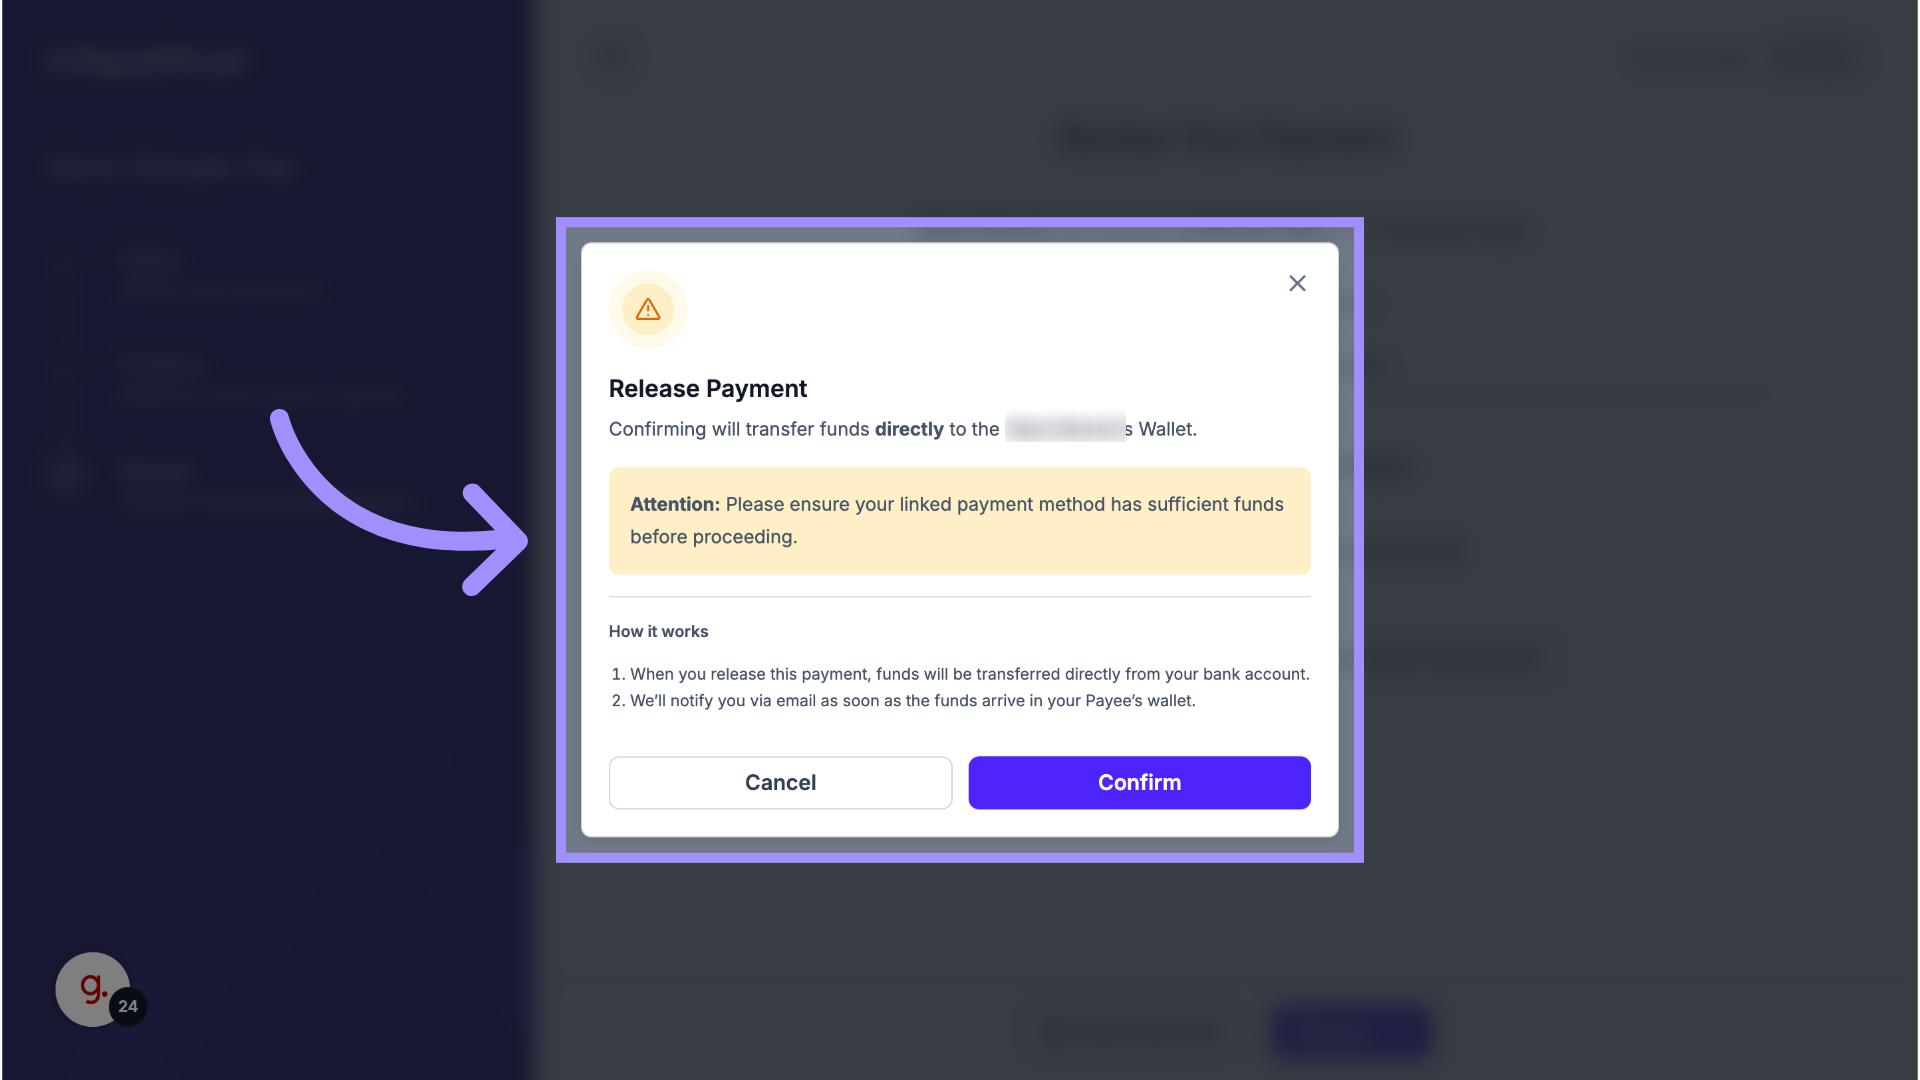
16. Click “Confirm”
A confirmation pop-up will appear.
Click Confirm to send the payment.
The Payee will receive an email notification that the payment has been sent.
17. Payment Sent
Once you see the green success screen, the funds will begin transferring to the Payee’s Wallet and will typically arrive within 2 business days.
No further approval is needed.

Sending a Payment as a Manager
A Manager can also send a payment, but it must be Released by an Admin before funds are withdrawn from the bank.
See How to Approve and Release Payments for details.
Summary
- Admins: Can send payments directly without additional approvals.
- Managers: Can create and send payments, but an Admin must release them.
- Payees: Do not need to approve payments before funds are sent.