
How to Create a Protected Pay
Use Protected Pay when you want added security for your transaction. This articles walks you through each step to create a Protected Payment in LiquidTrust using Micro Escrow™, which holds funds securely until the agreed-upon conditions are met.
Step-by-Step Instructions
1. Go to Your Dashboard
From your Dashboard, you can create a Protected Payment in two ways.
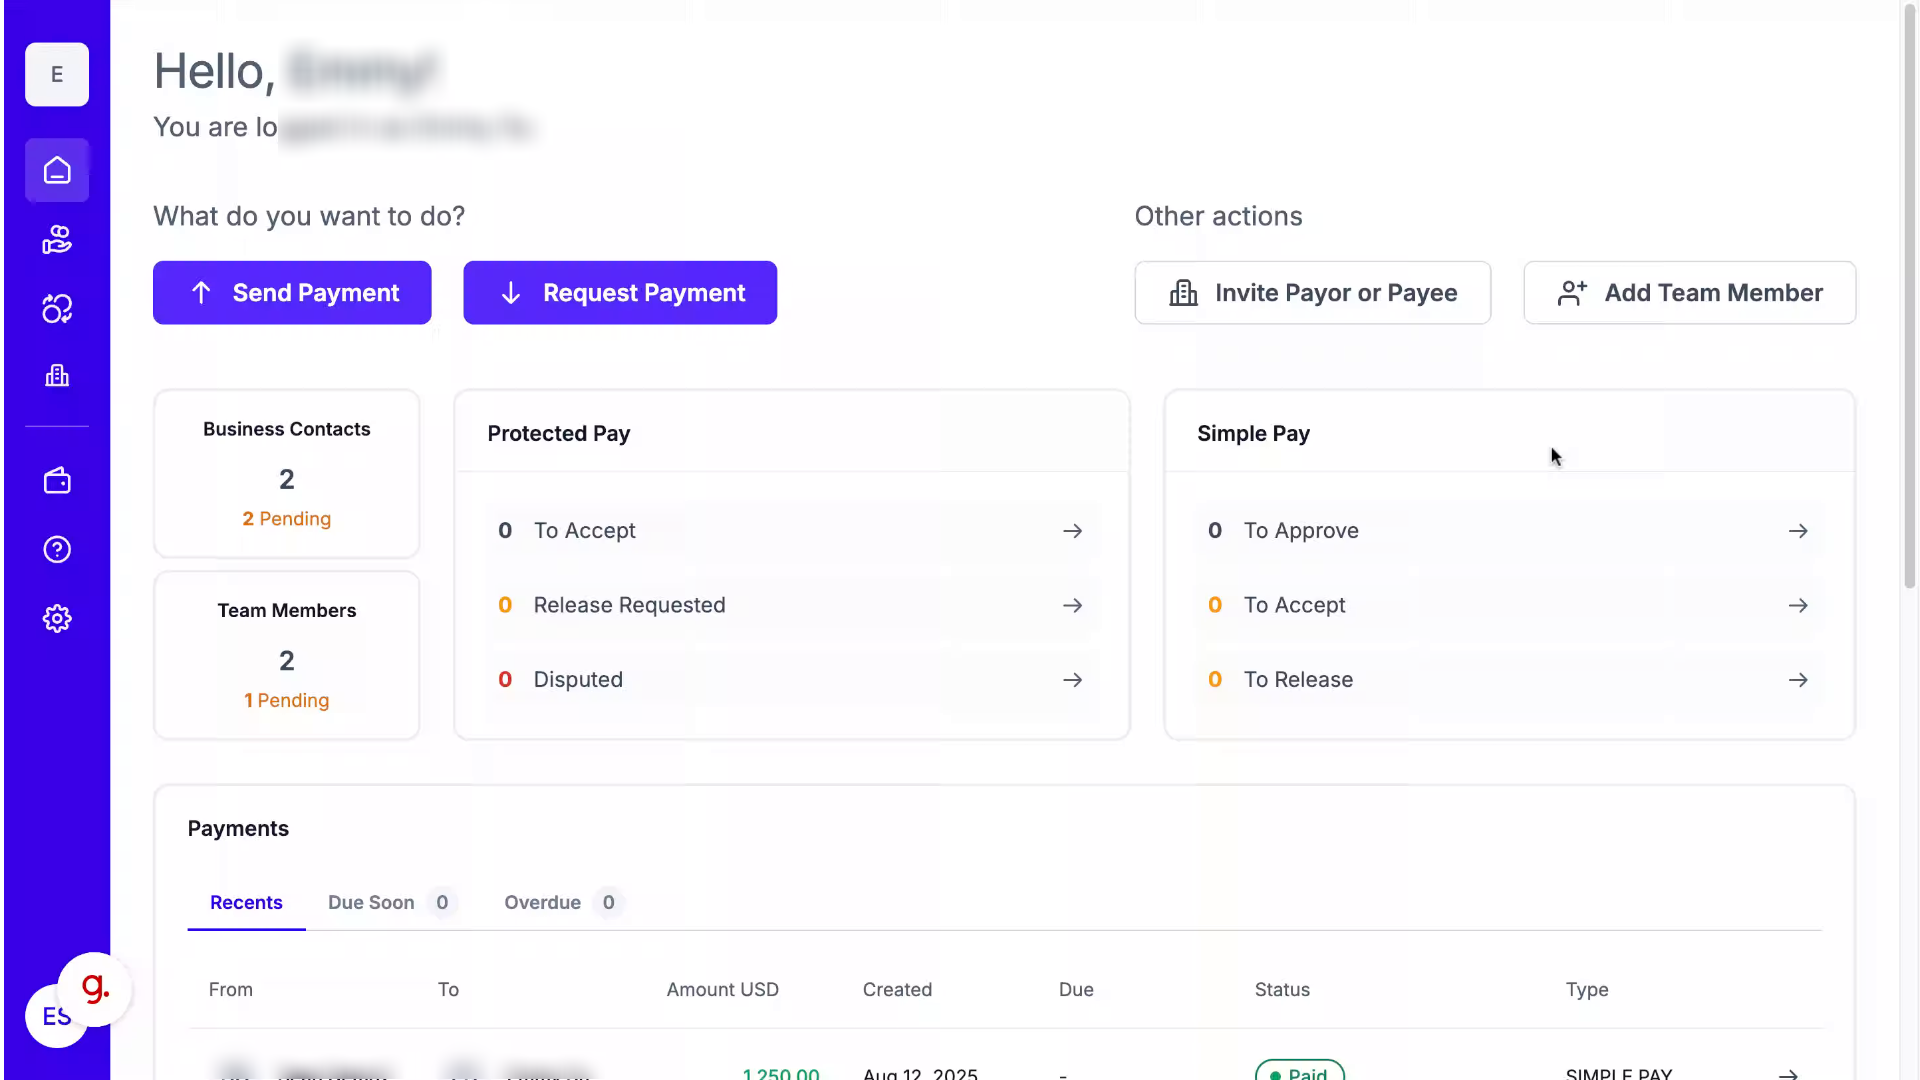
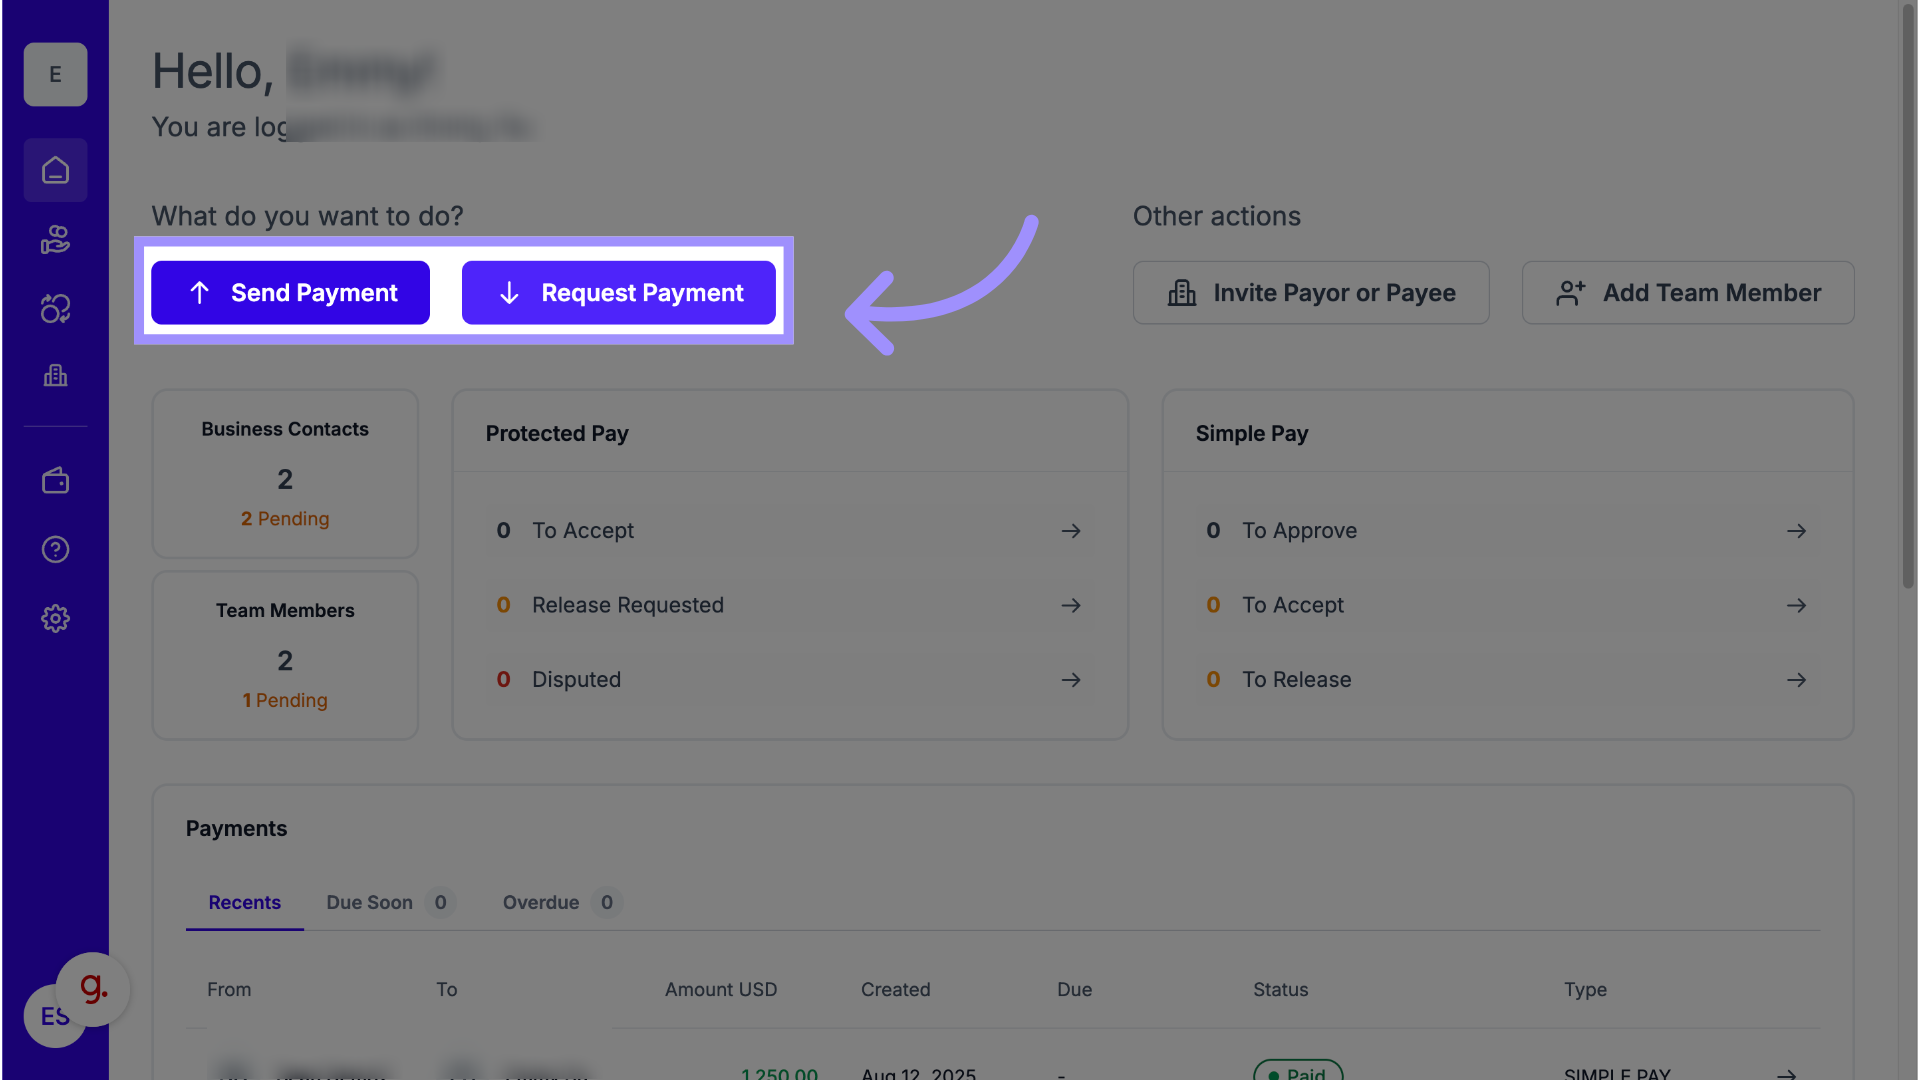
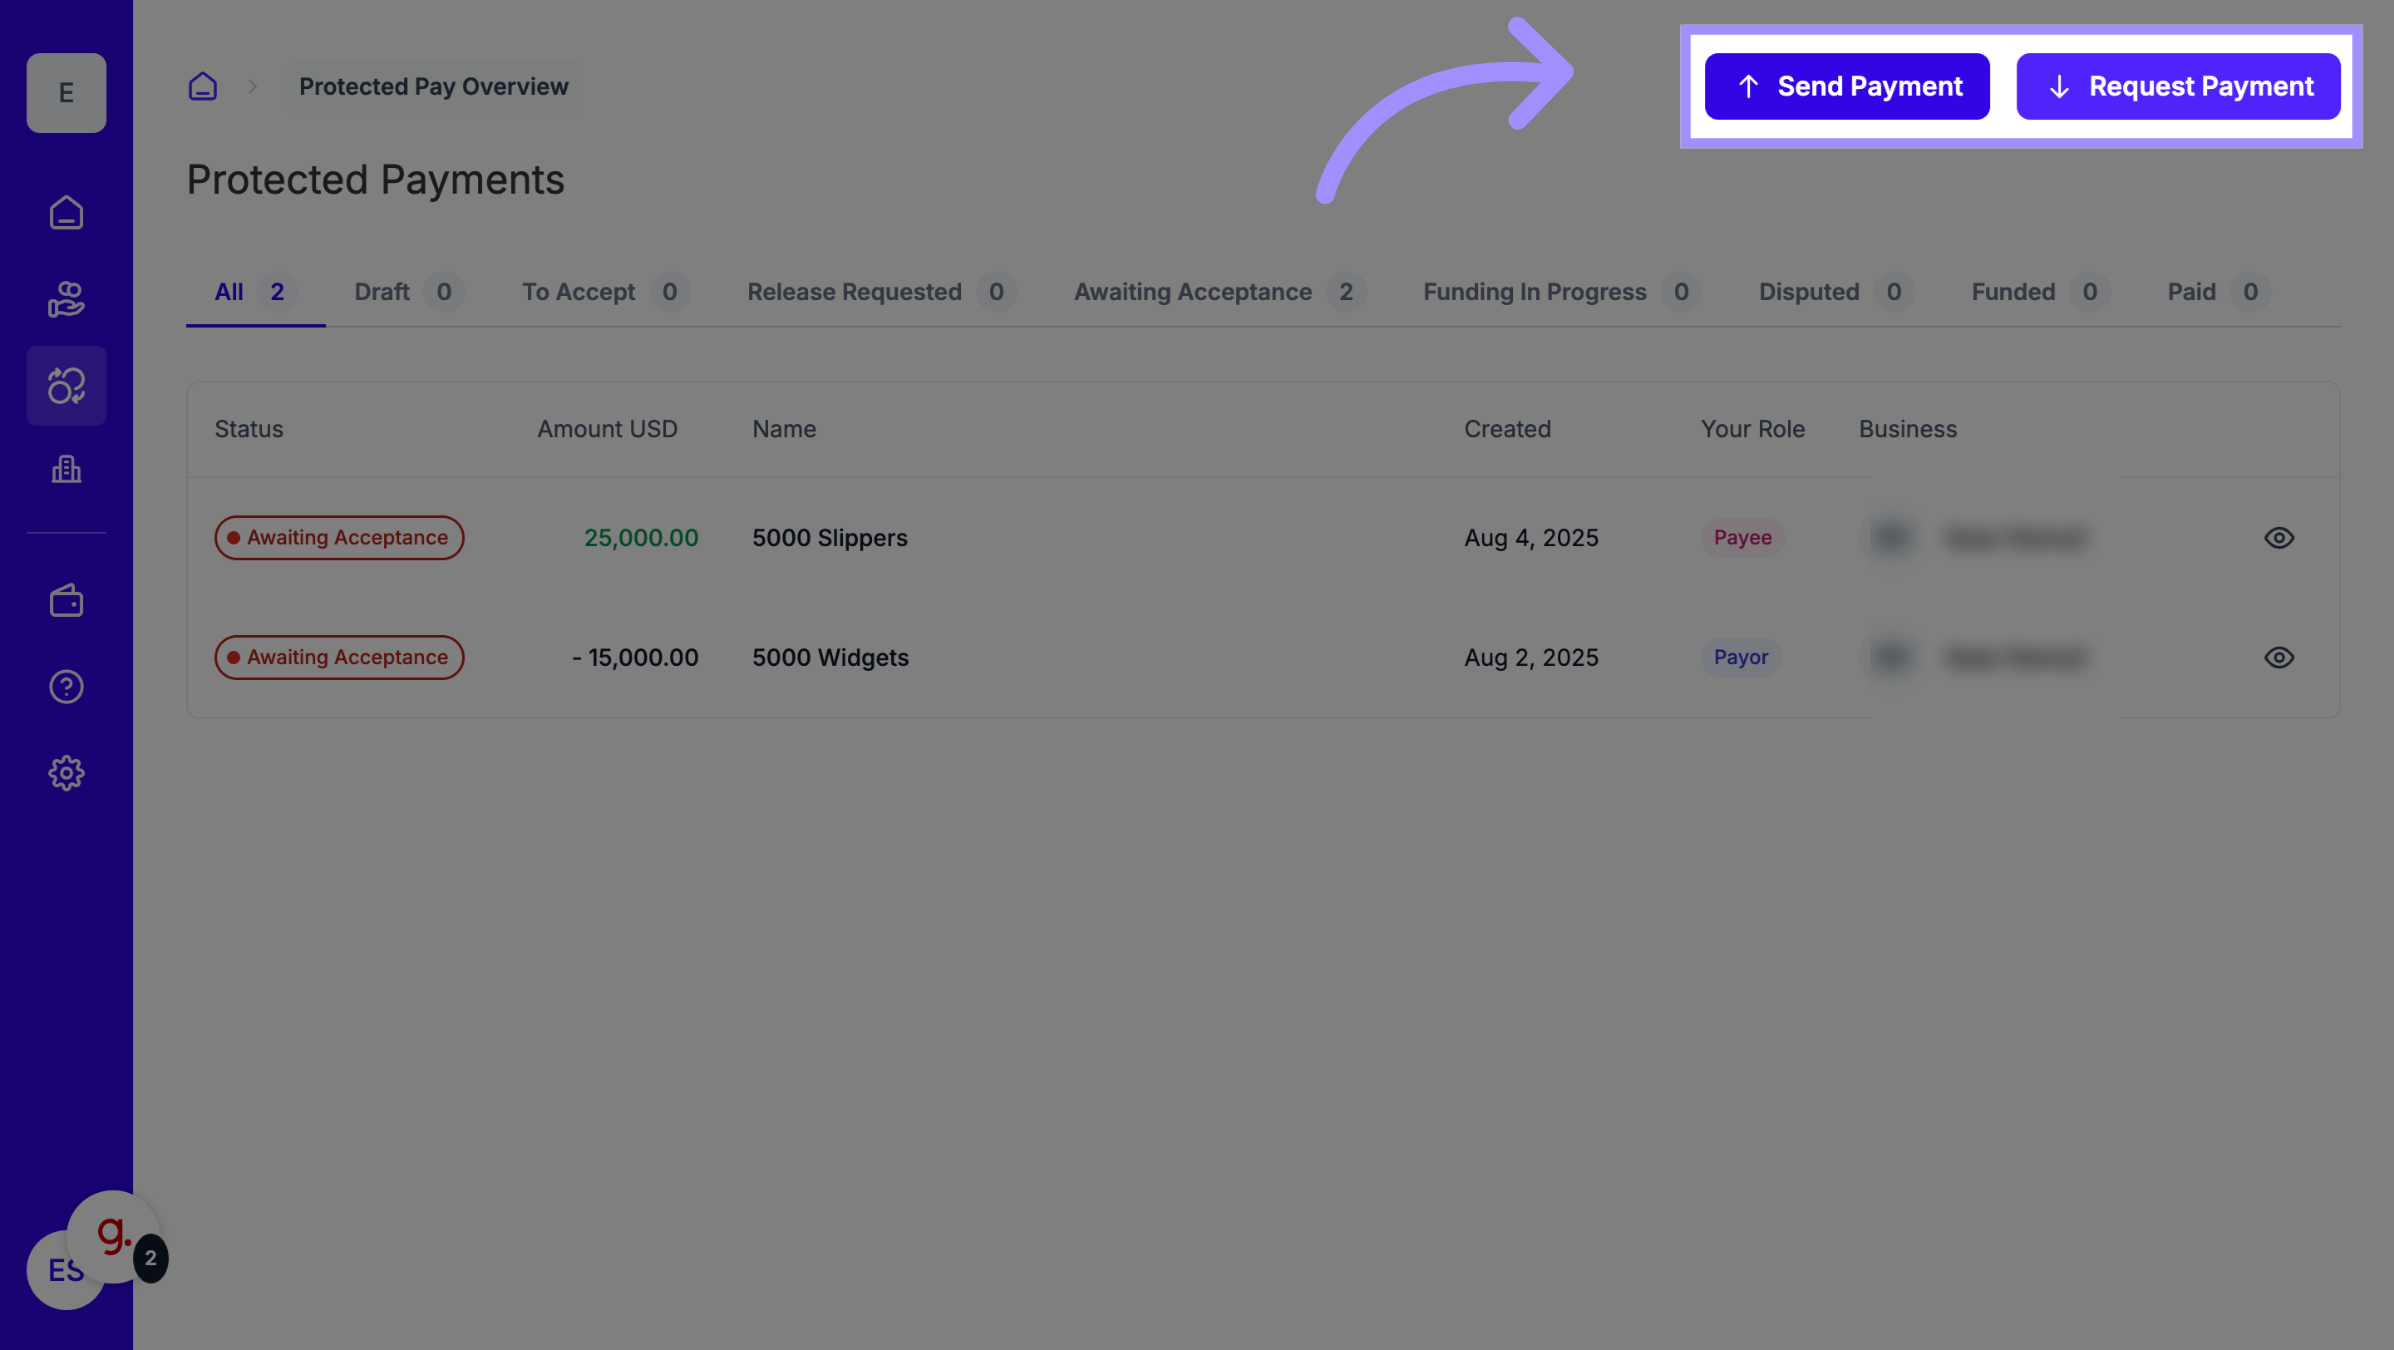
2. Choose from Dashboard
From the Dashboard, click Send Payment or Request Payment.
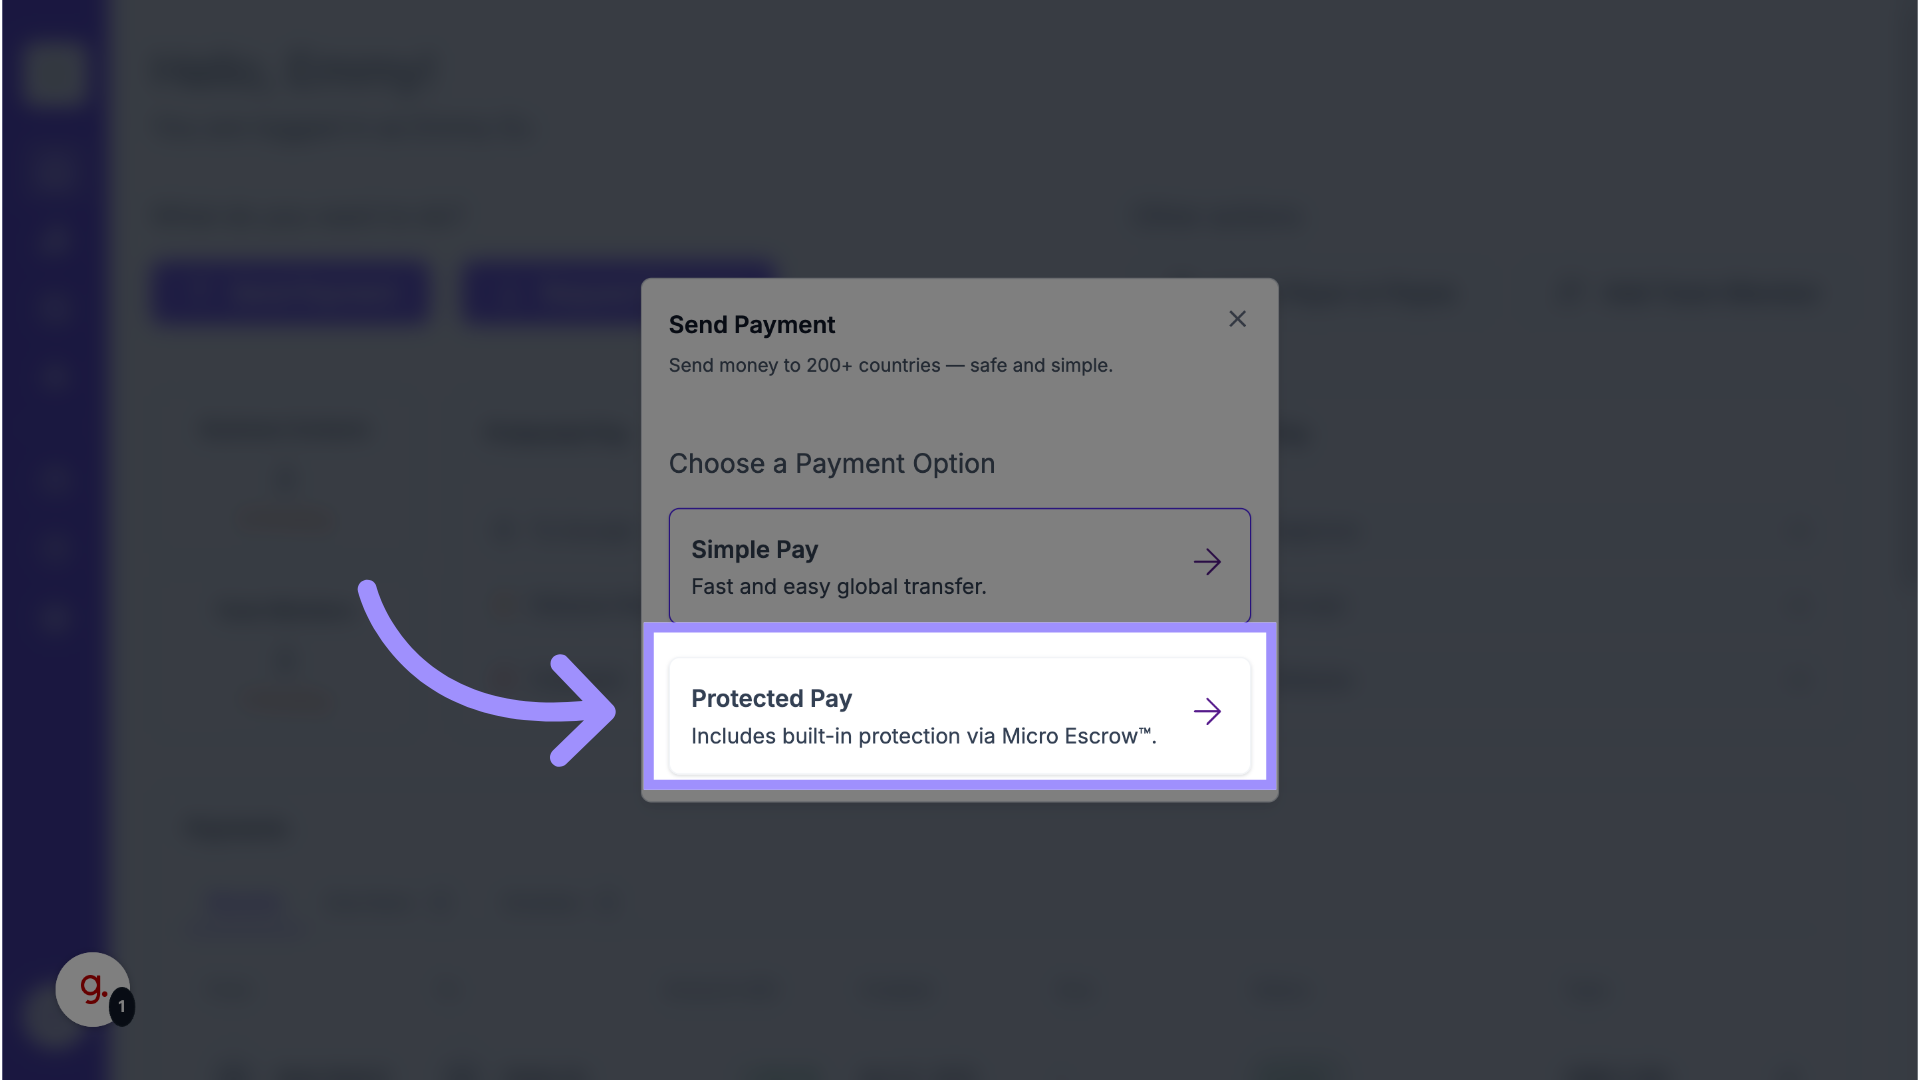
3. Choose Type of Payment
Then select Protected Pay.
4. Left Navigation Panel
Alternatively, from the left navigation panel, click the Protected Pay icon.
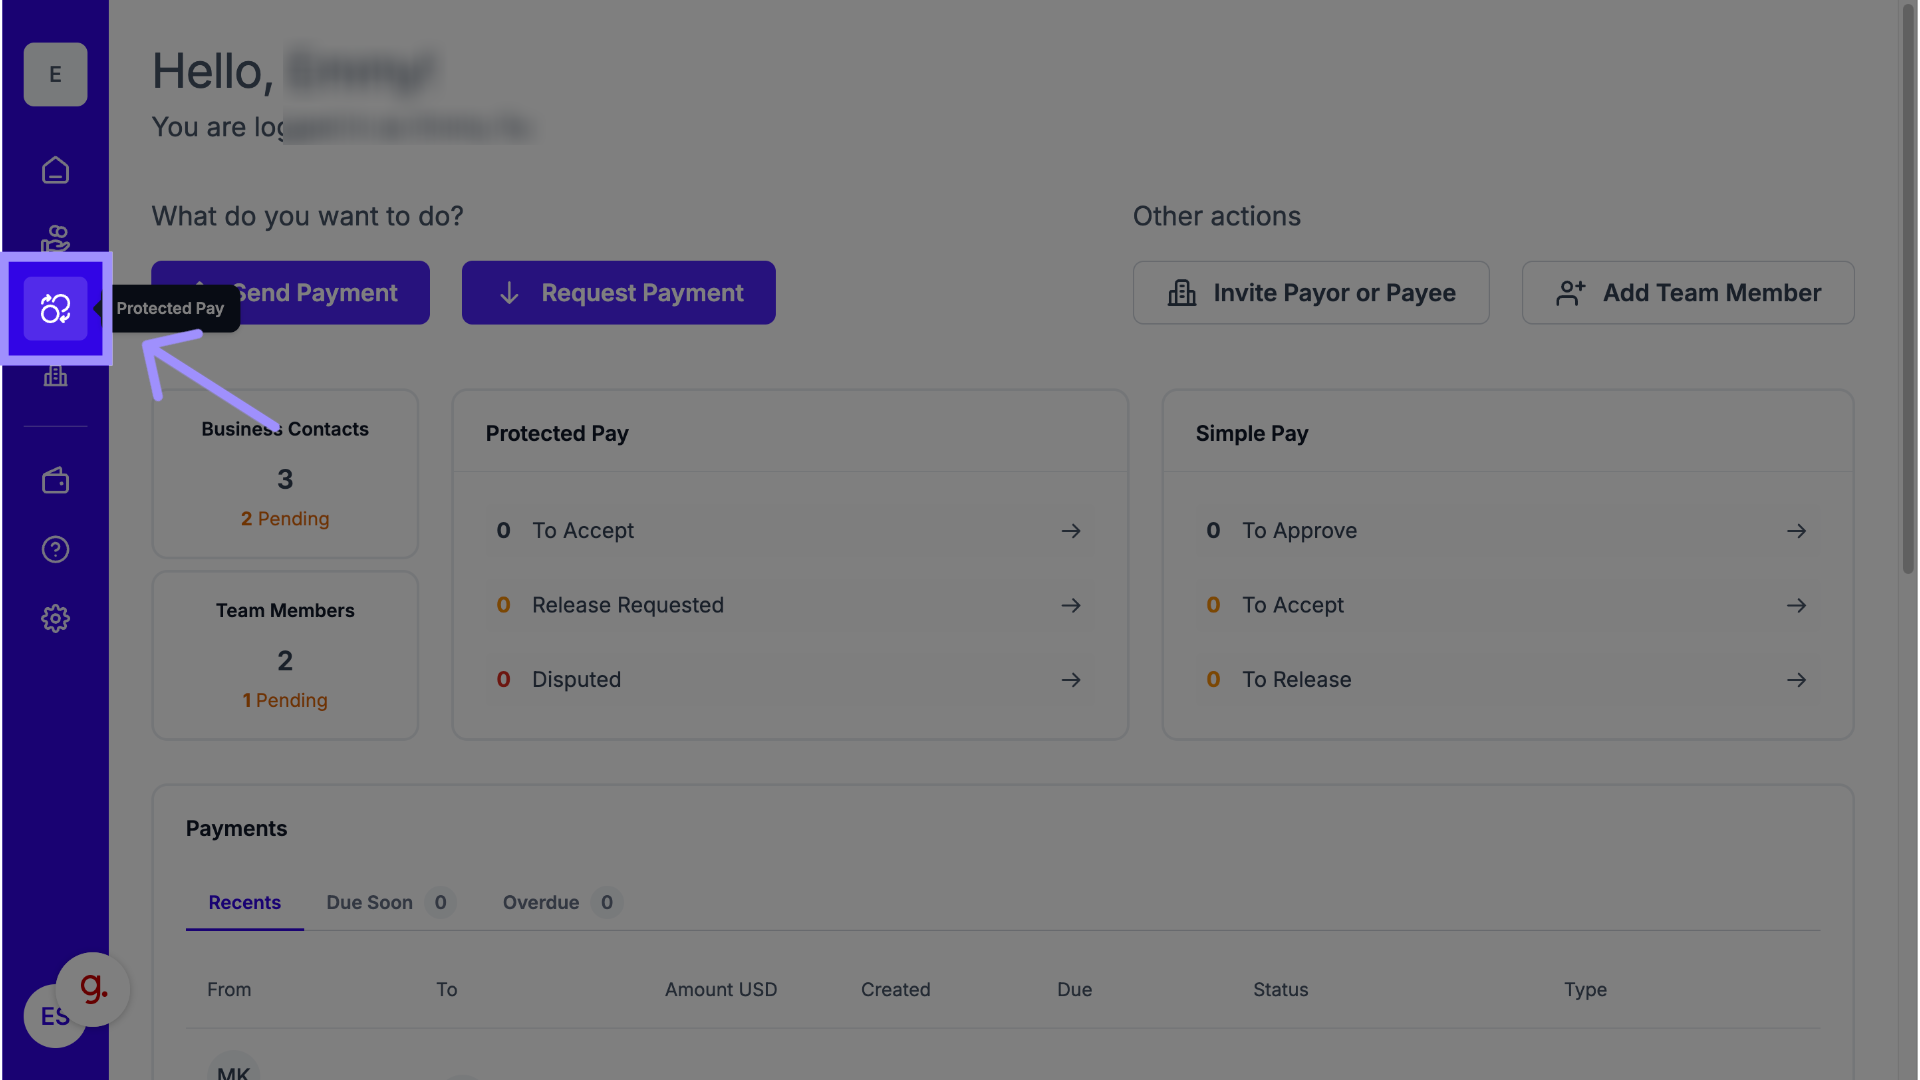
5. Send or Request Payment
Then click Send Payment or Request Payment at the top right.
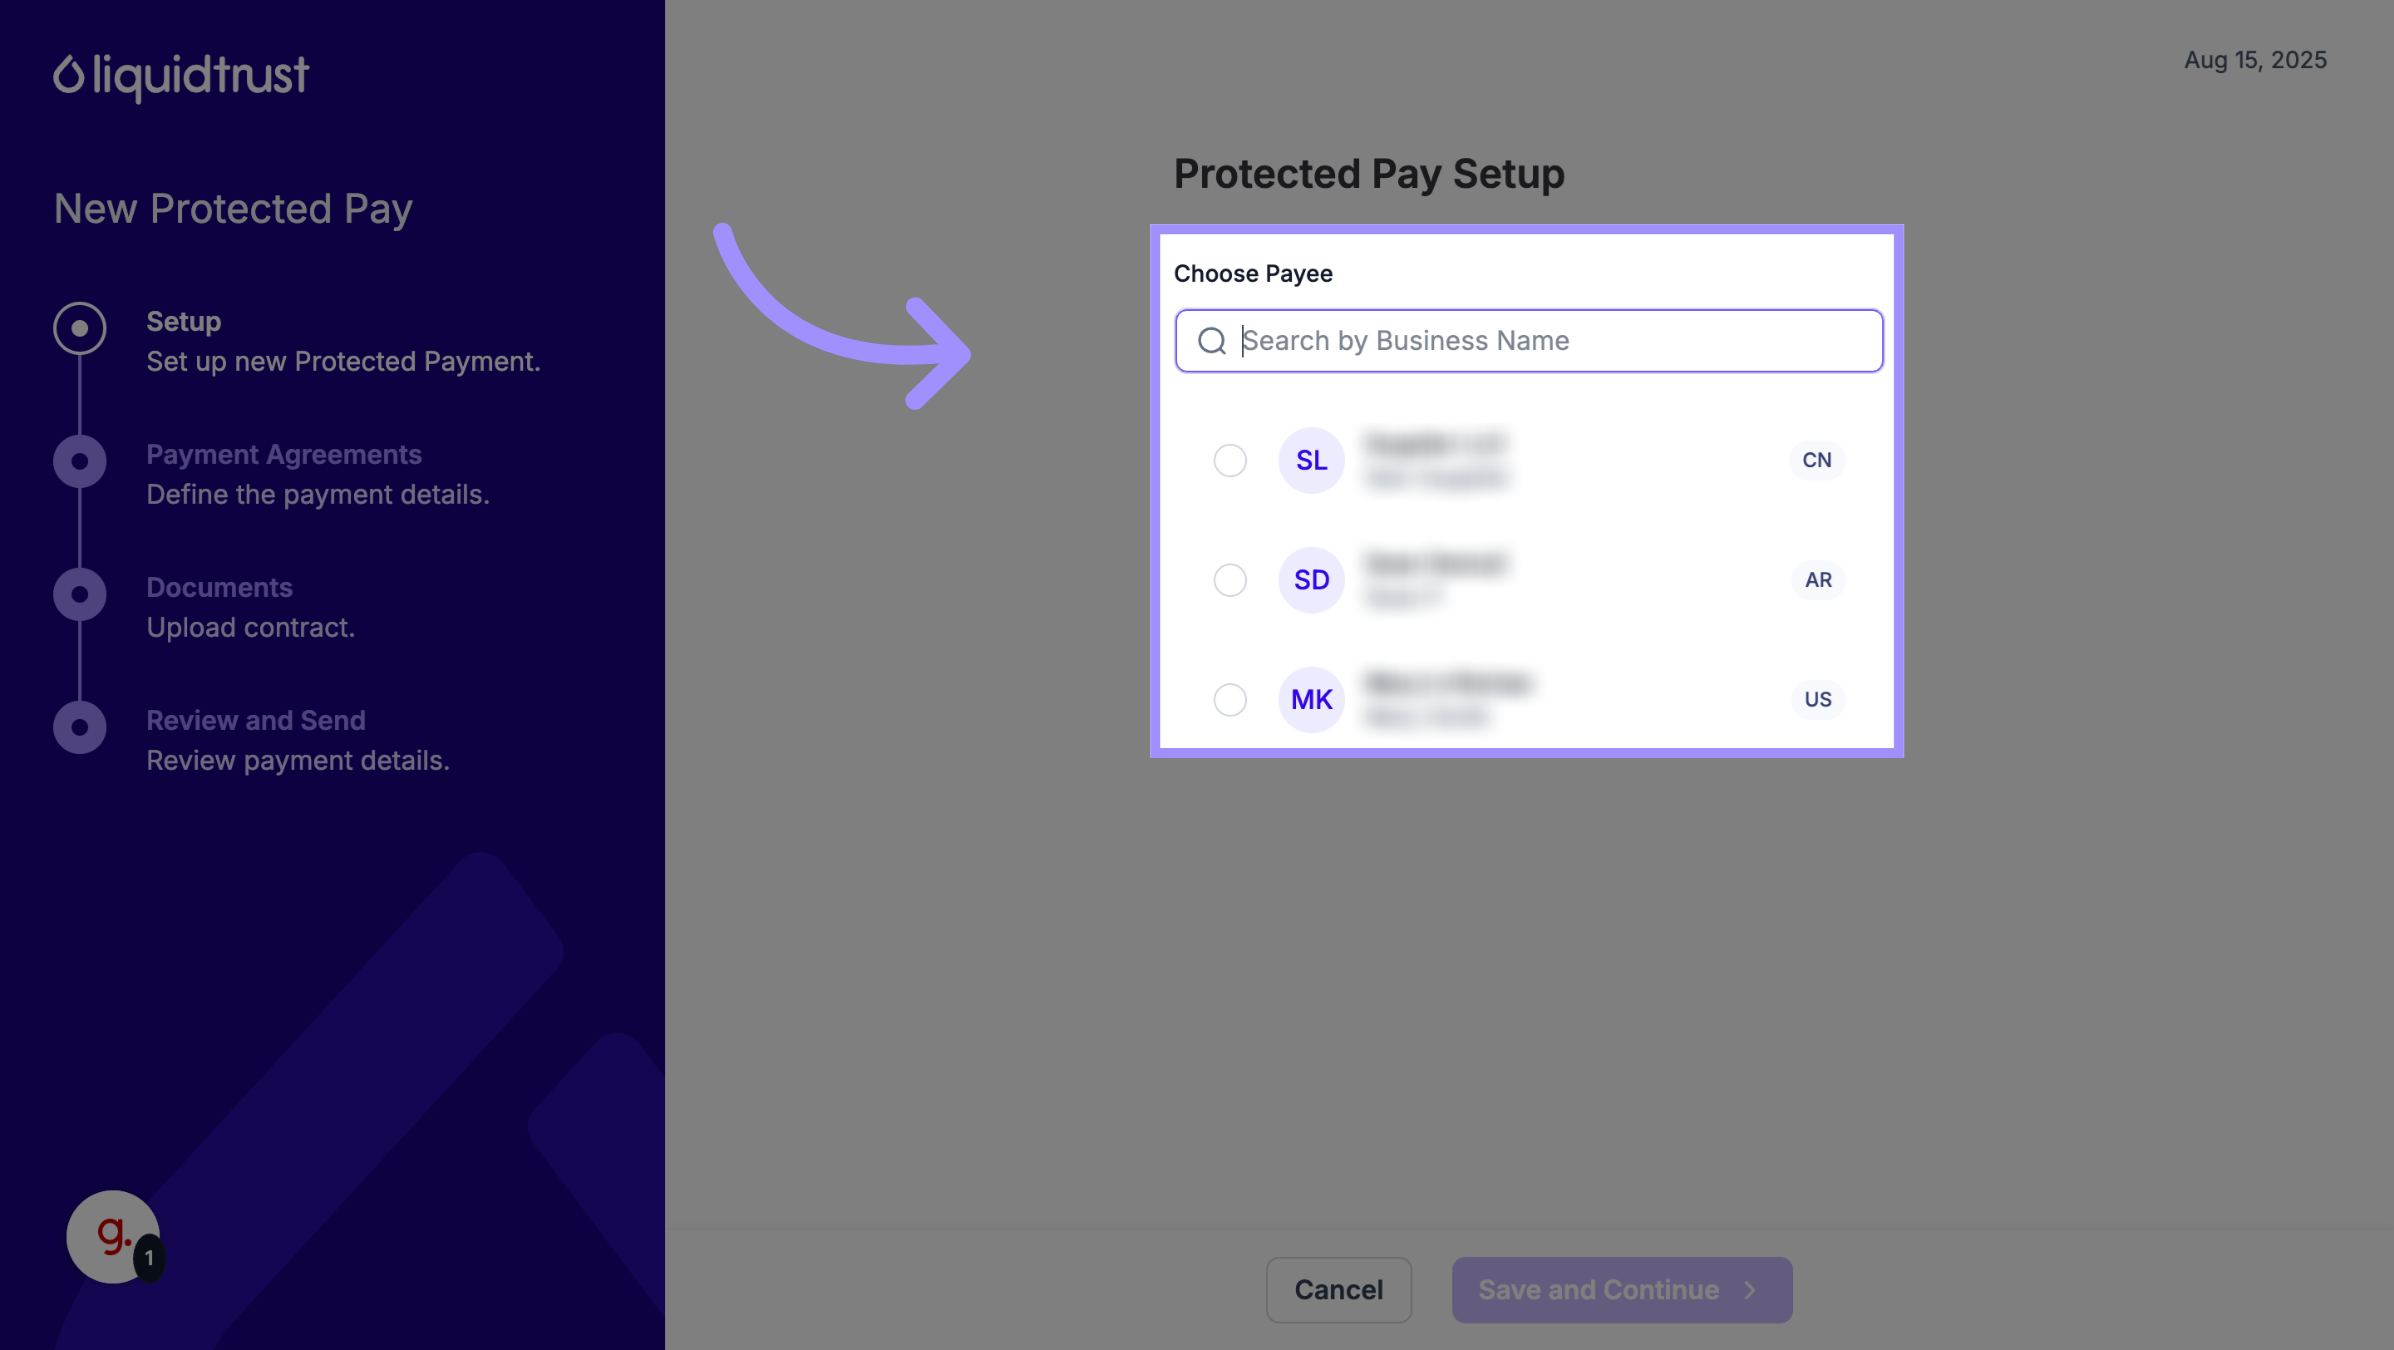
6. Ensure You’re Connected
To send or request any payment, you must first be connected with the Payor or Payee as a business contact.
If you aren’t already connected, you or the other business must send and accept a connection invitation first.
For more details, see How to Invite Other Businesses to Transact.
If you’re already connected, select them from your Contacts list on this page.
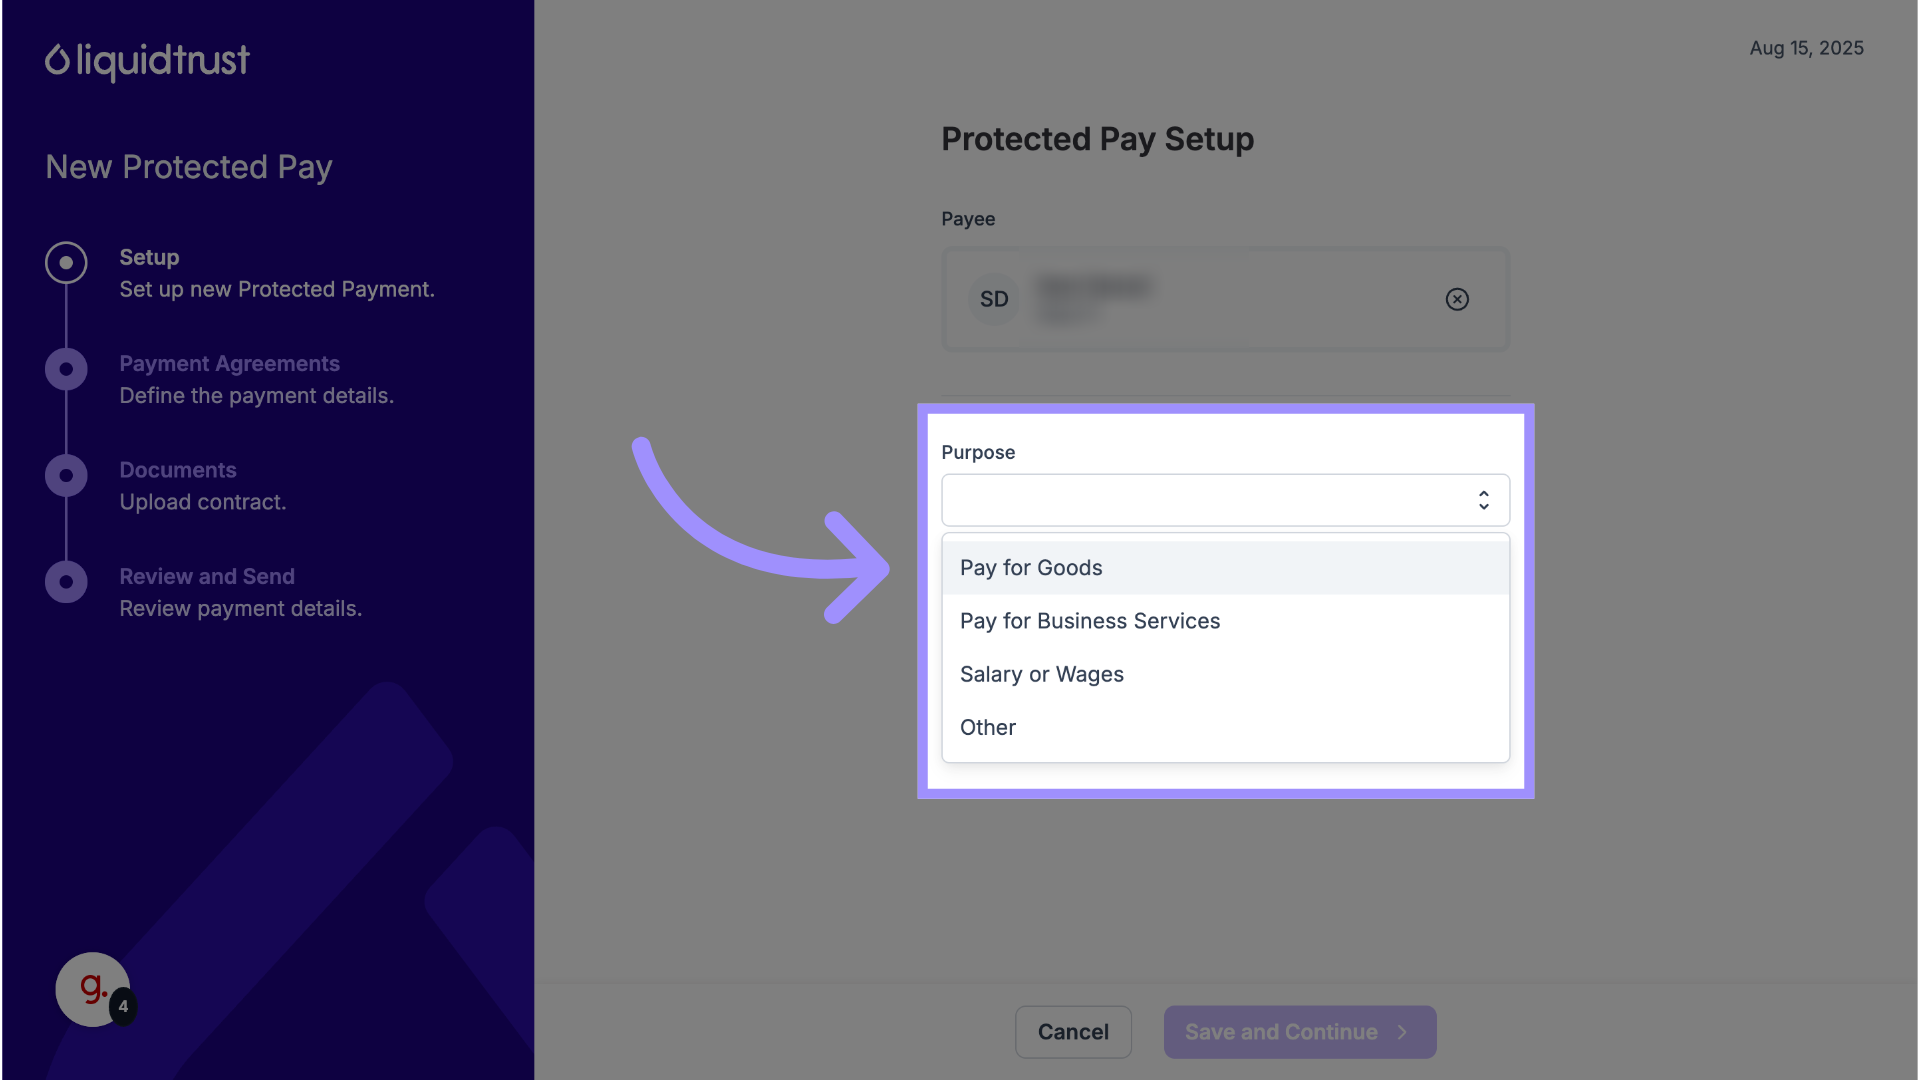
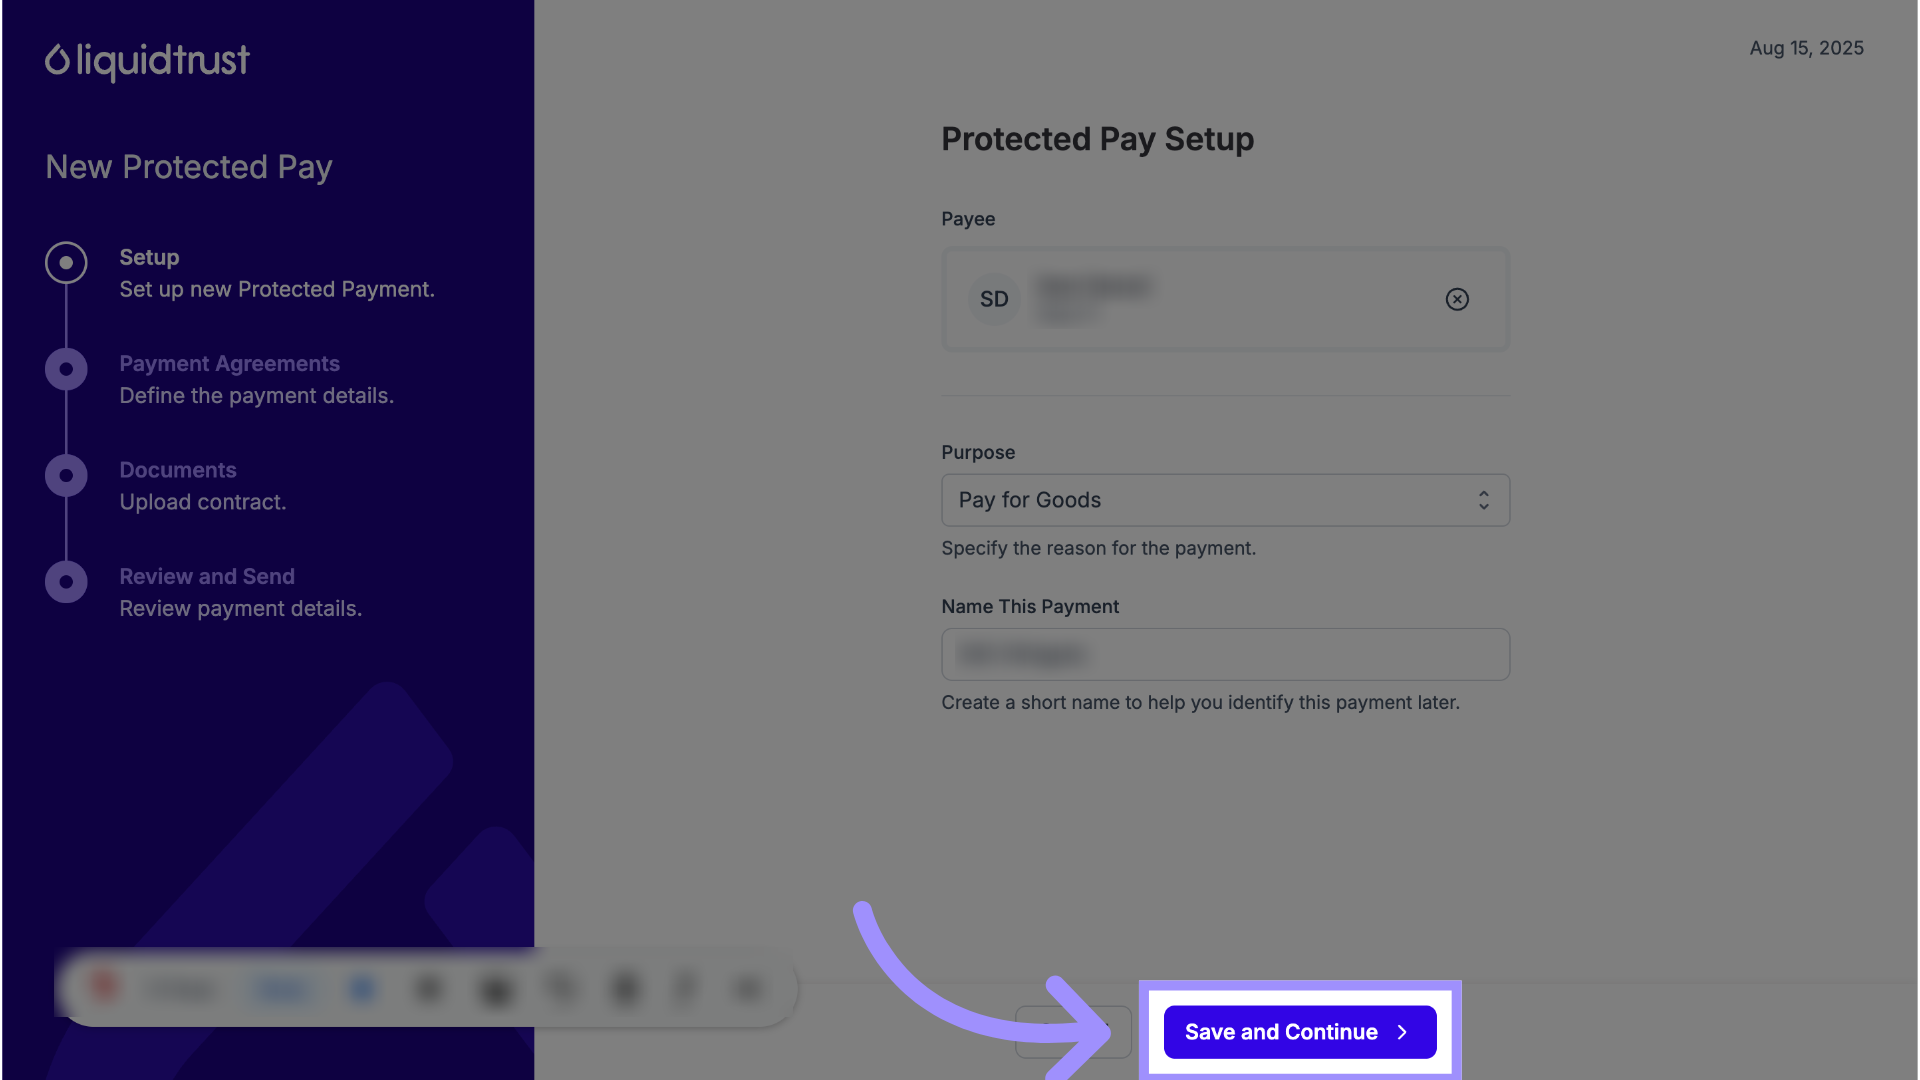
7. Provide the Purpose of Payment
Next, select the Purpose of Payment from the dropdown list. The available options depend on the Payee’s bank location.
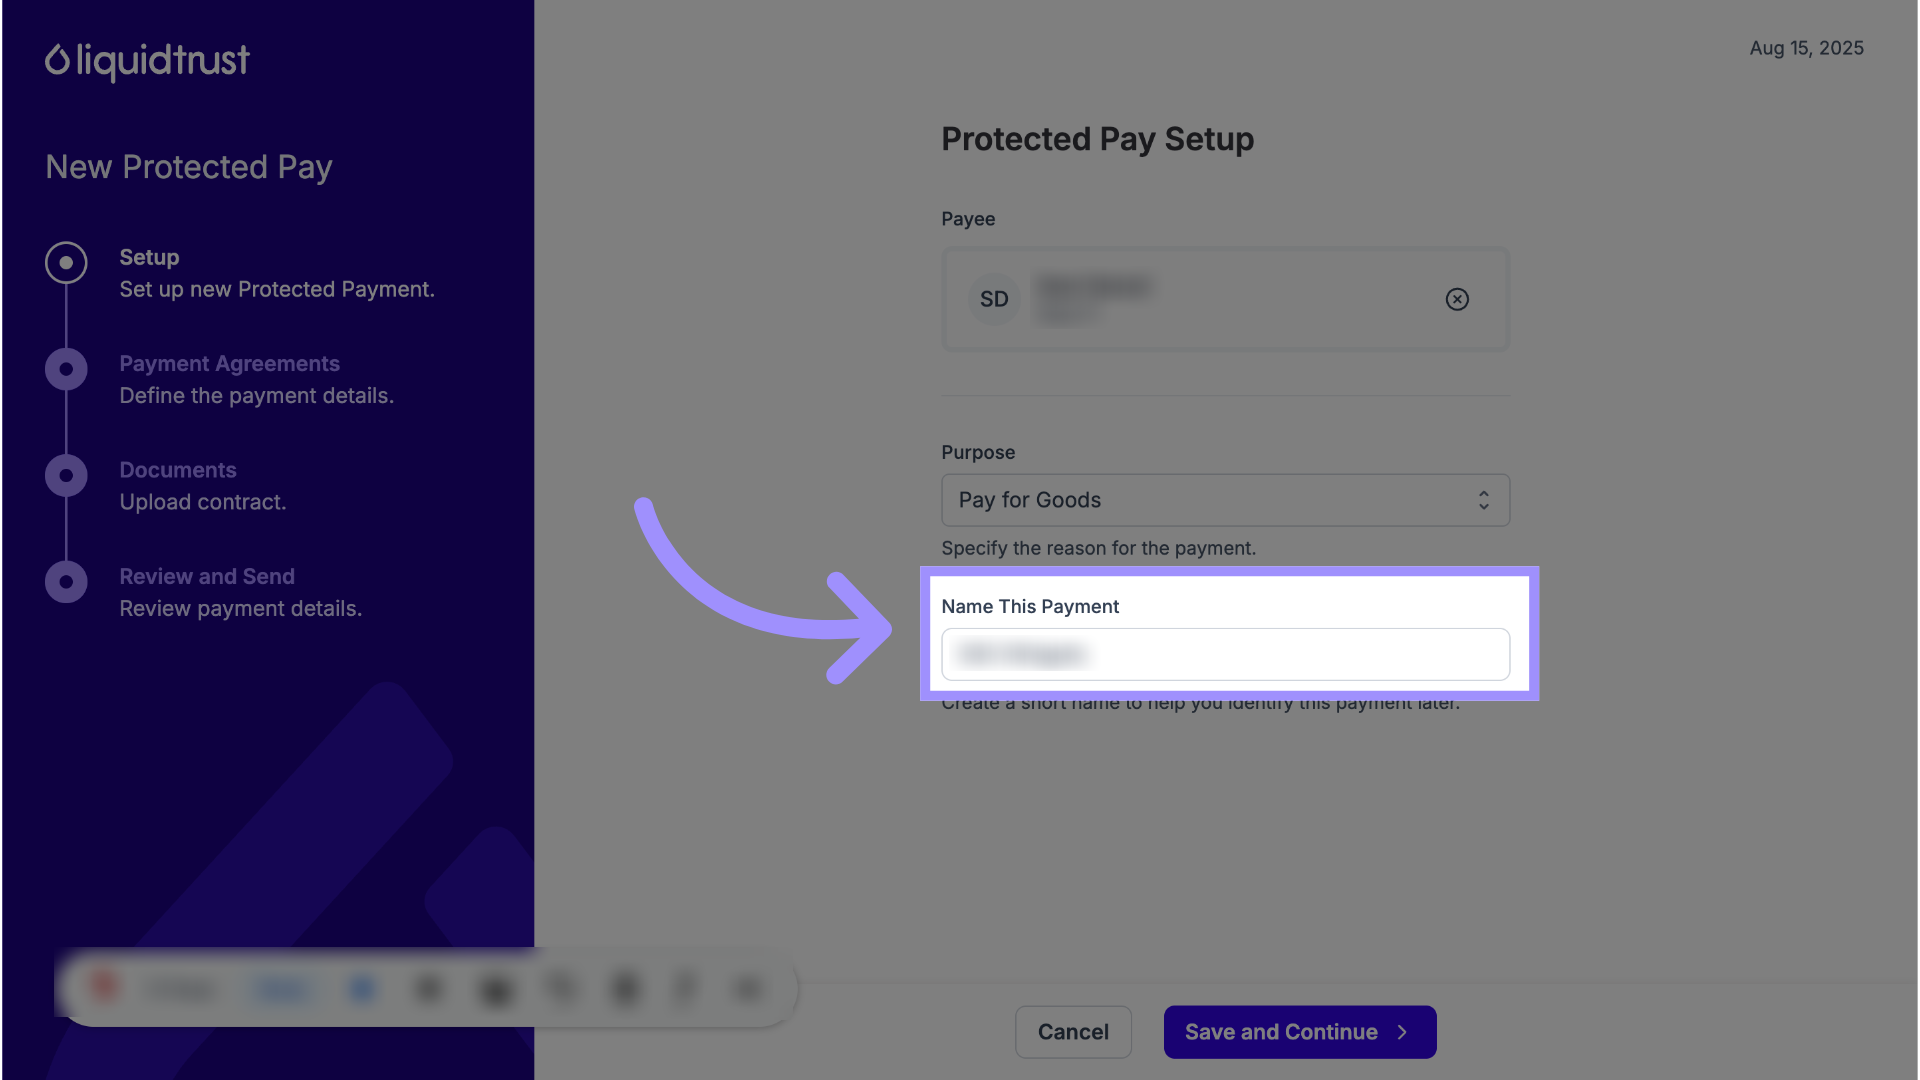
8. Click “Name This Payment”
Assign a clear name to the payment so it’s easy to find later.
9. Click “Save and Continue”
Save your entered information and move to the next step.
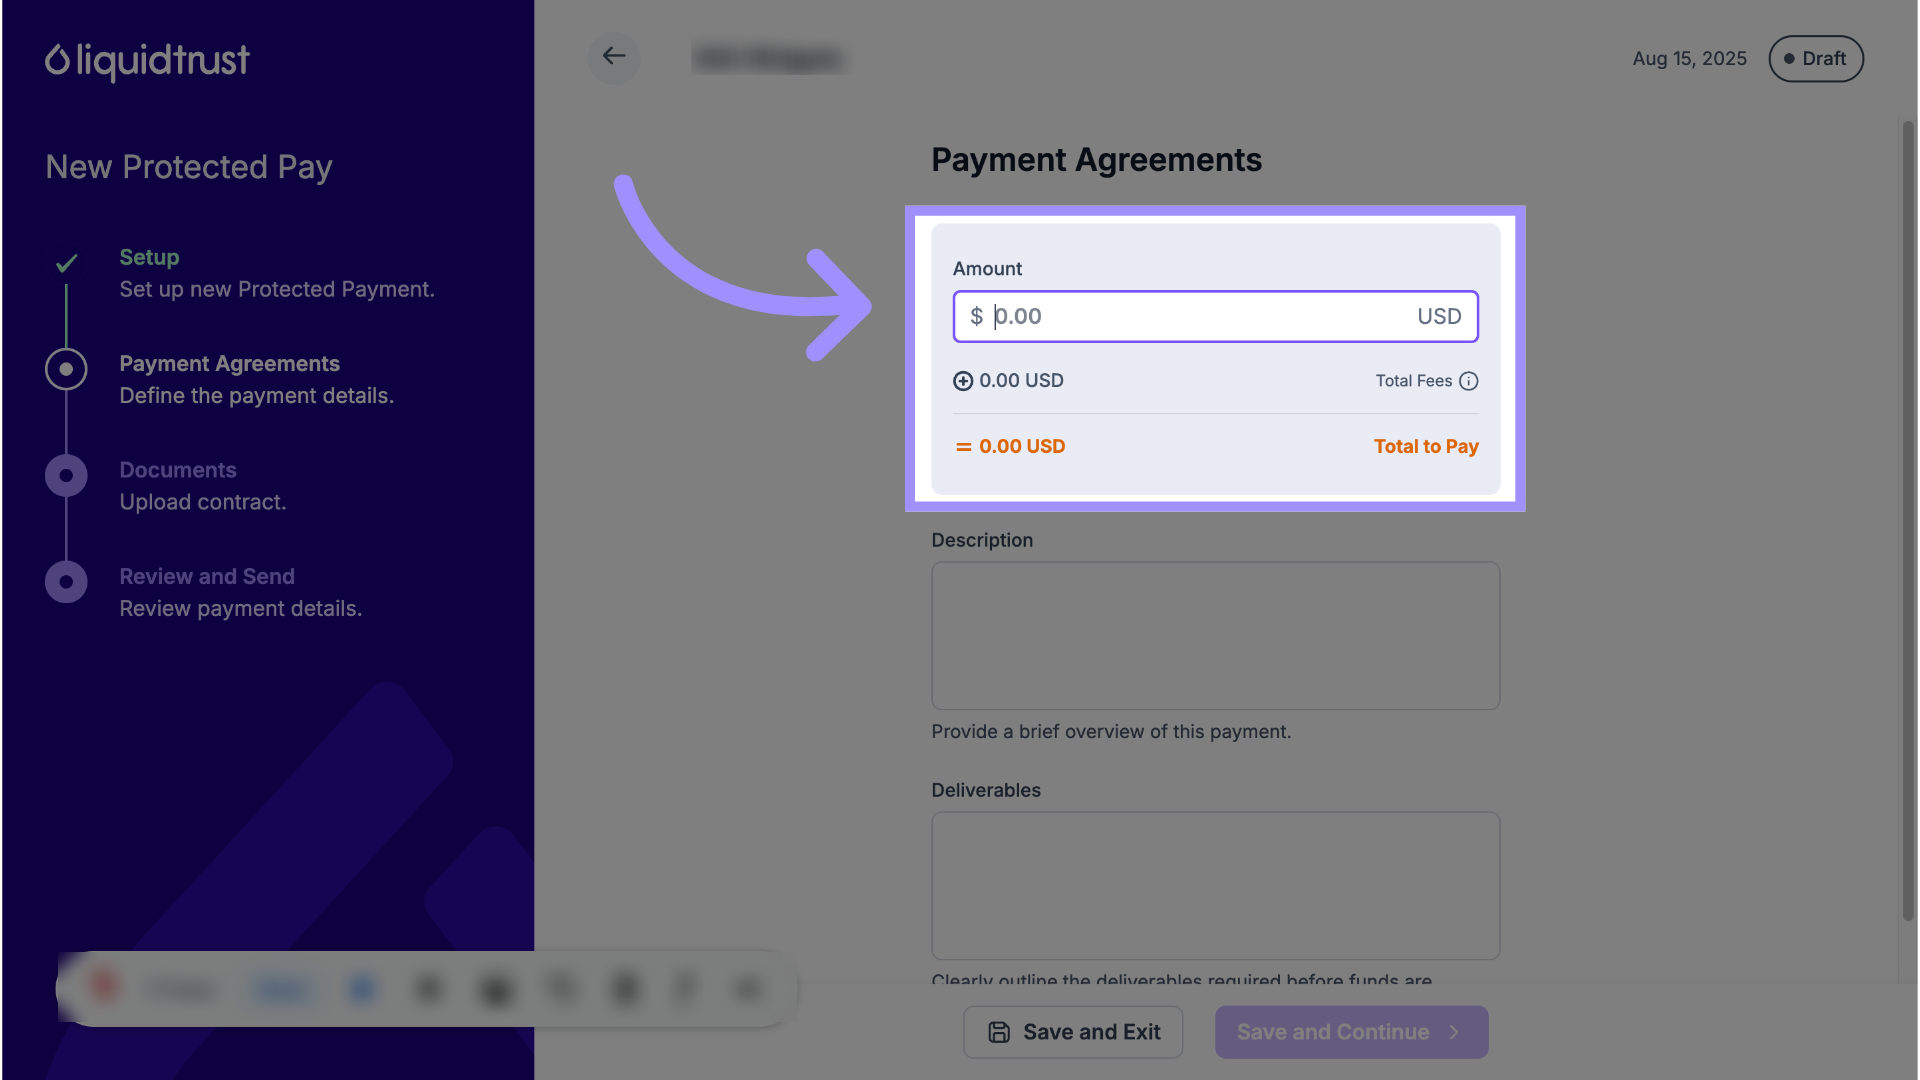
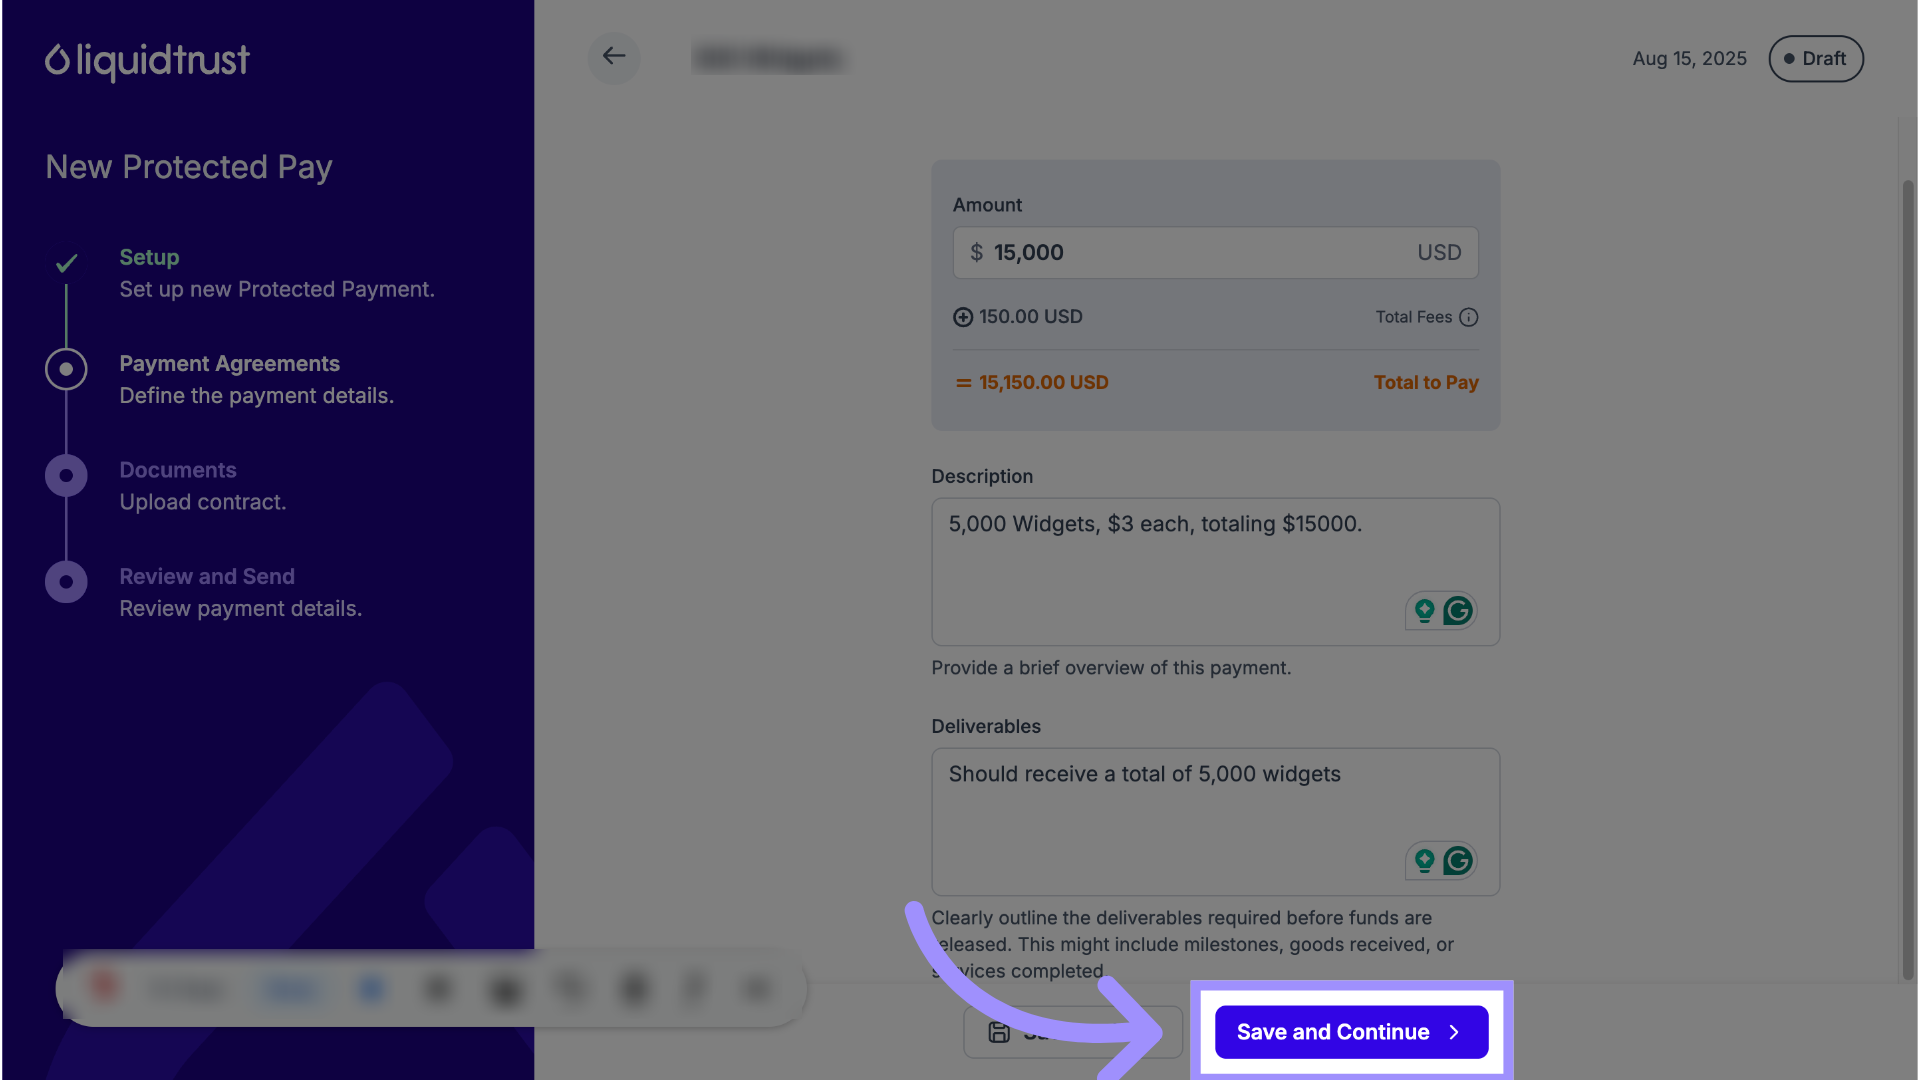
10. Enter the Payment Amount
Specify the total payment amount.
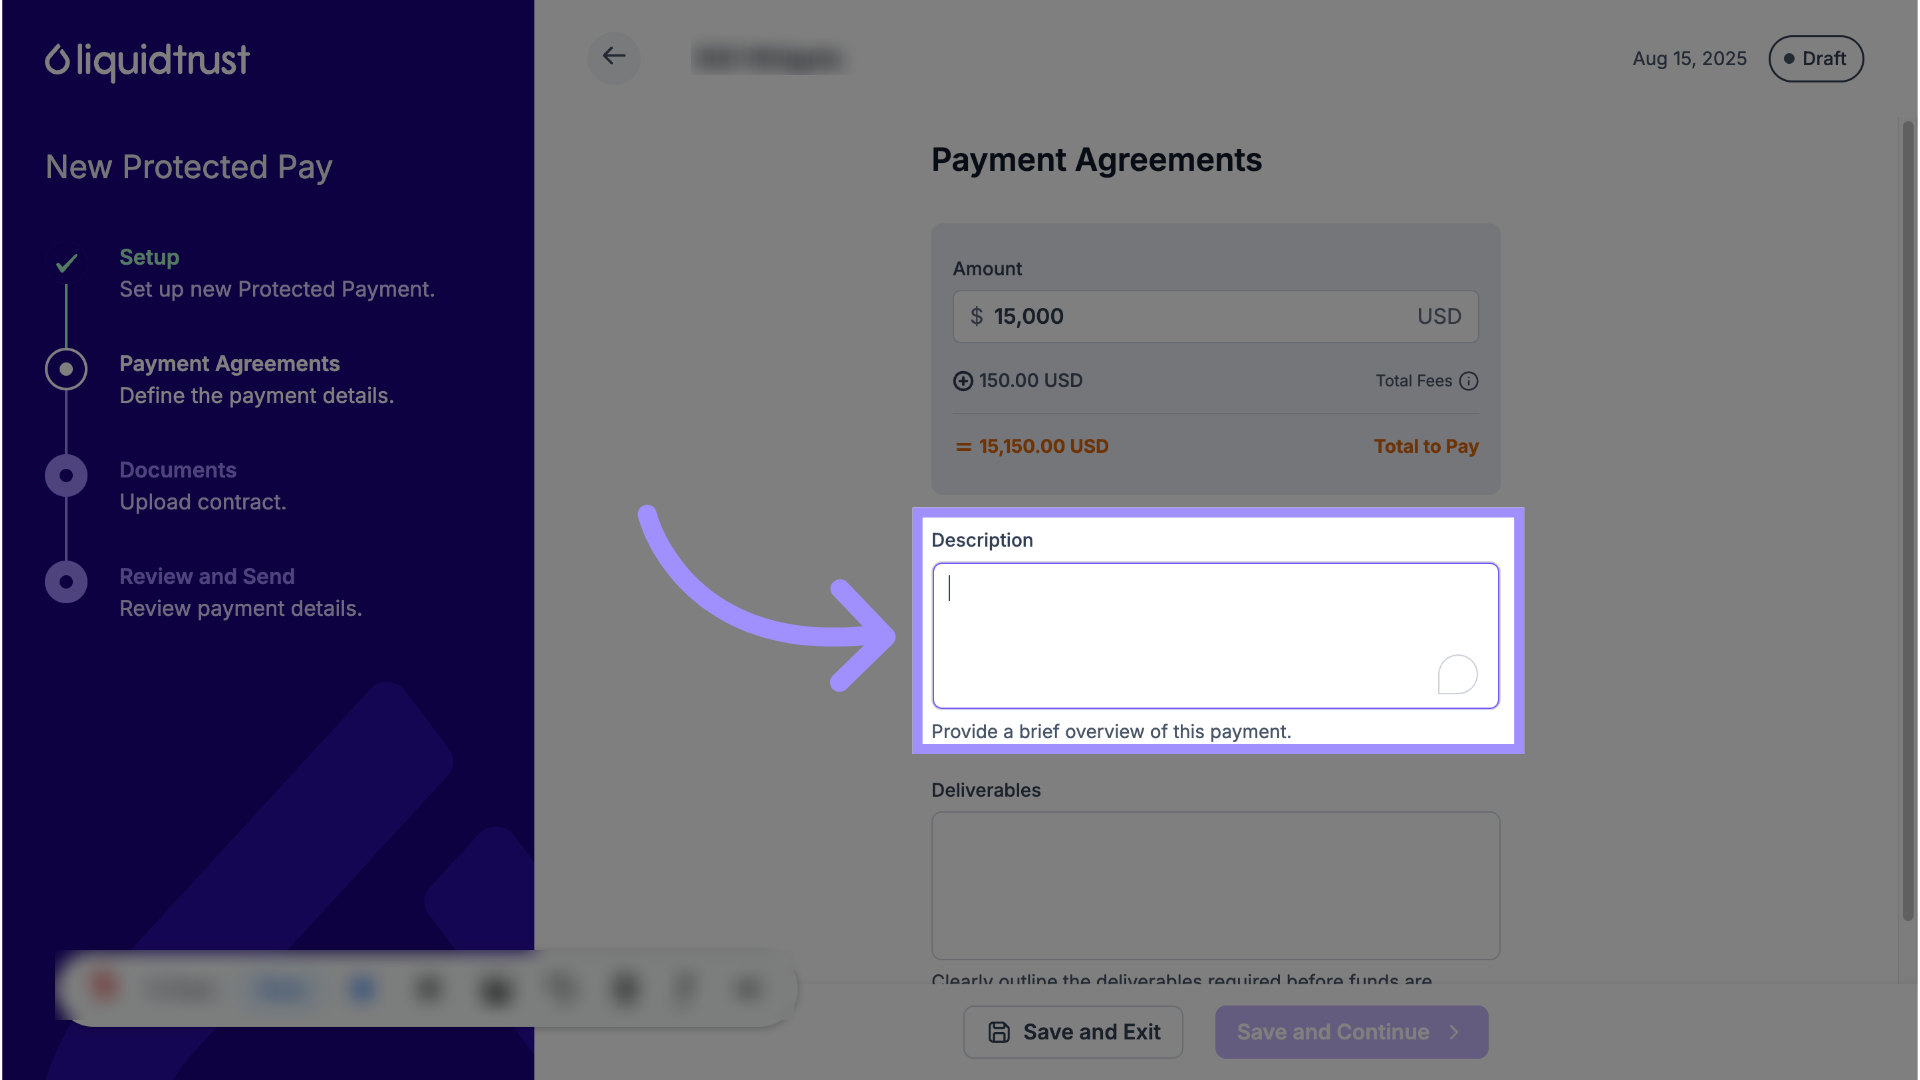
11. Reason for Payment
In the Description field, describe what the Protected Payment is for (e.g., “Final logo and brand assets”).
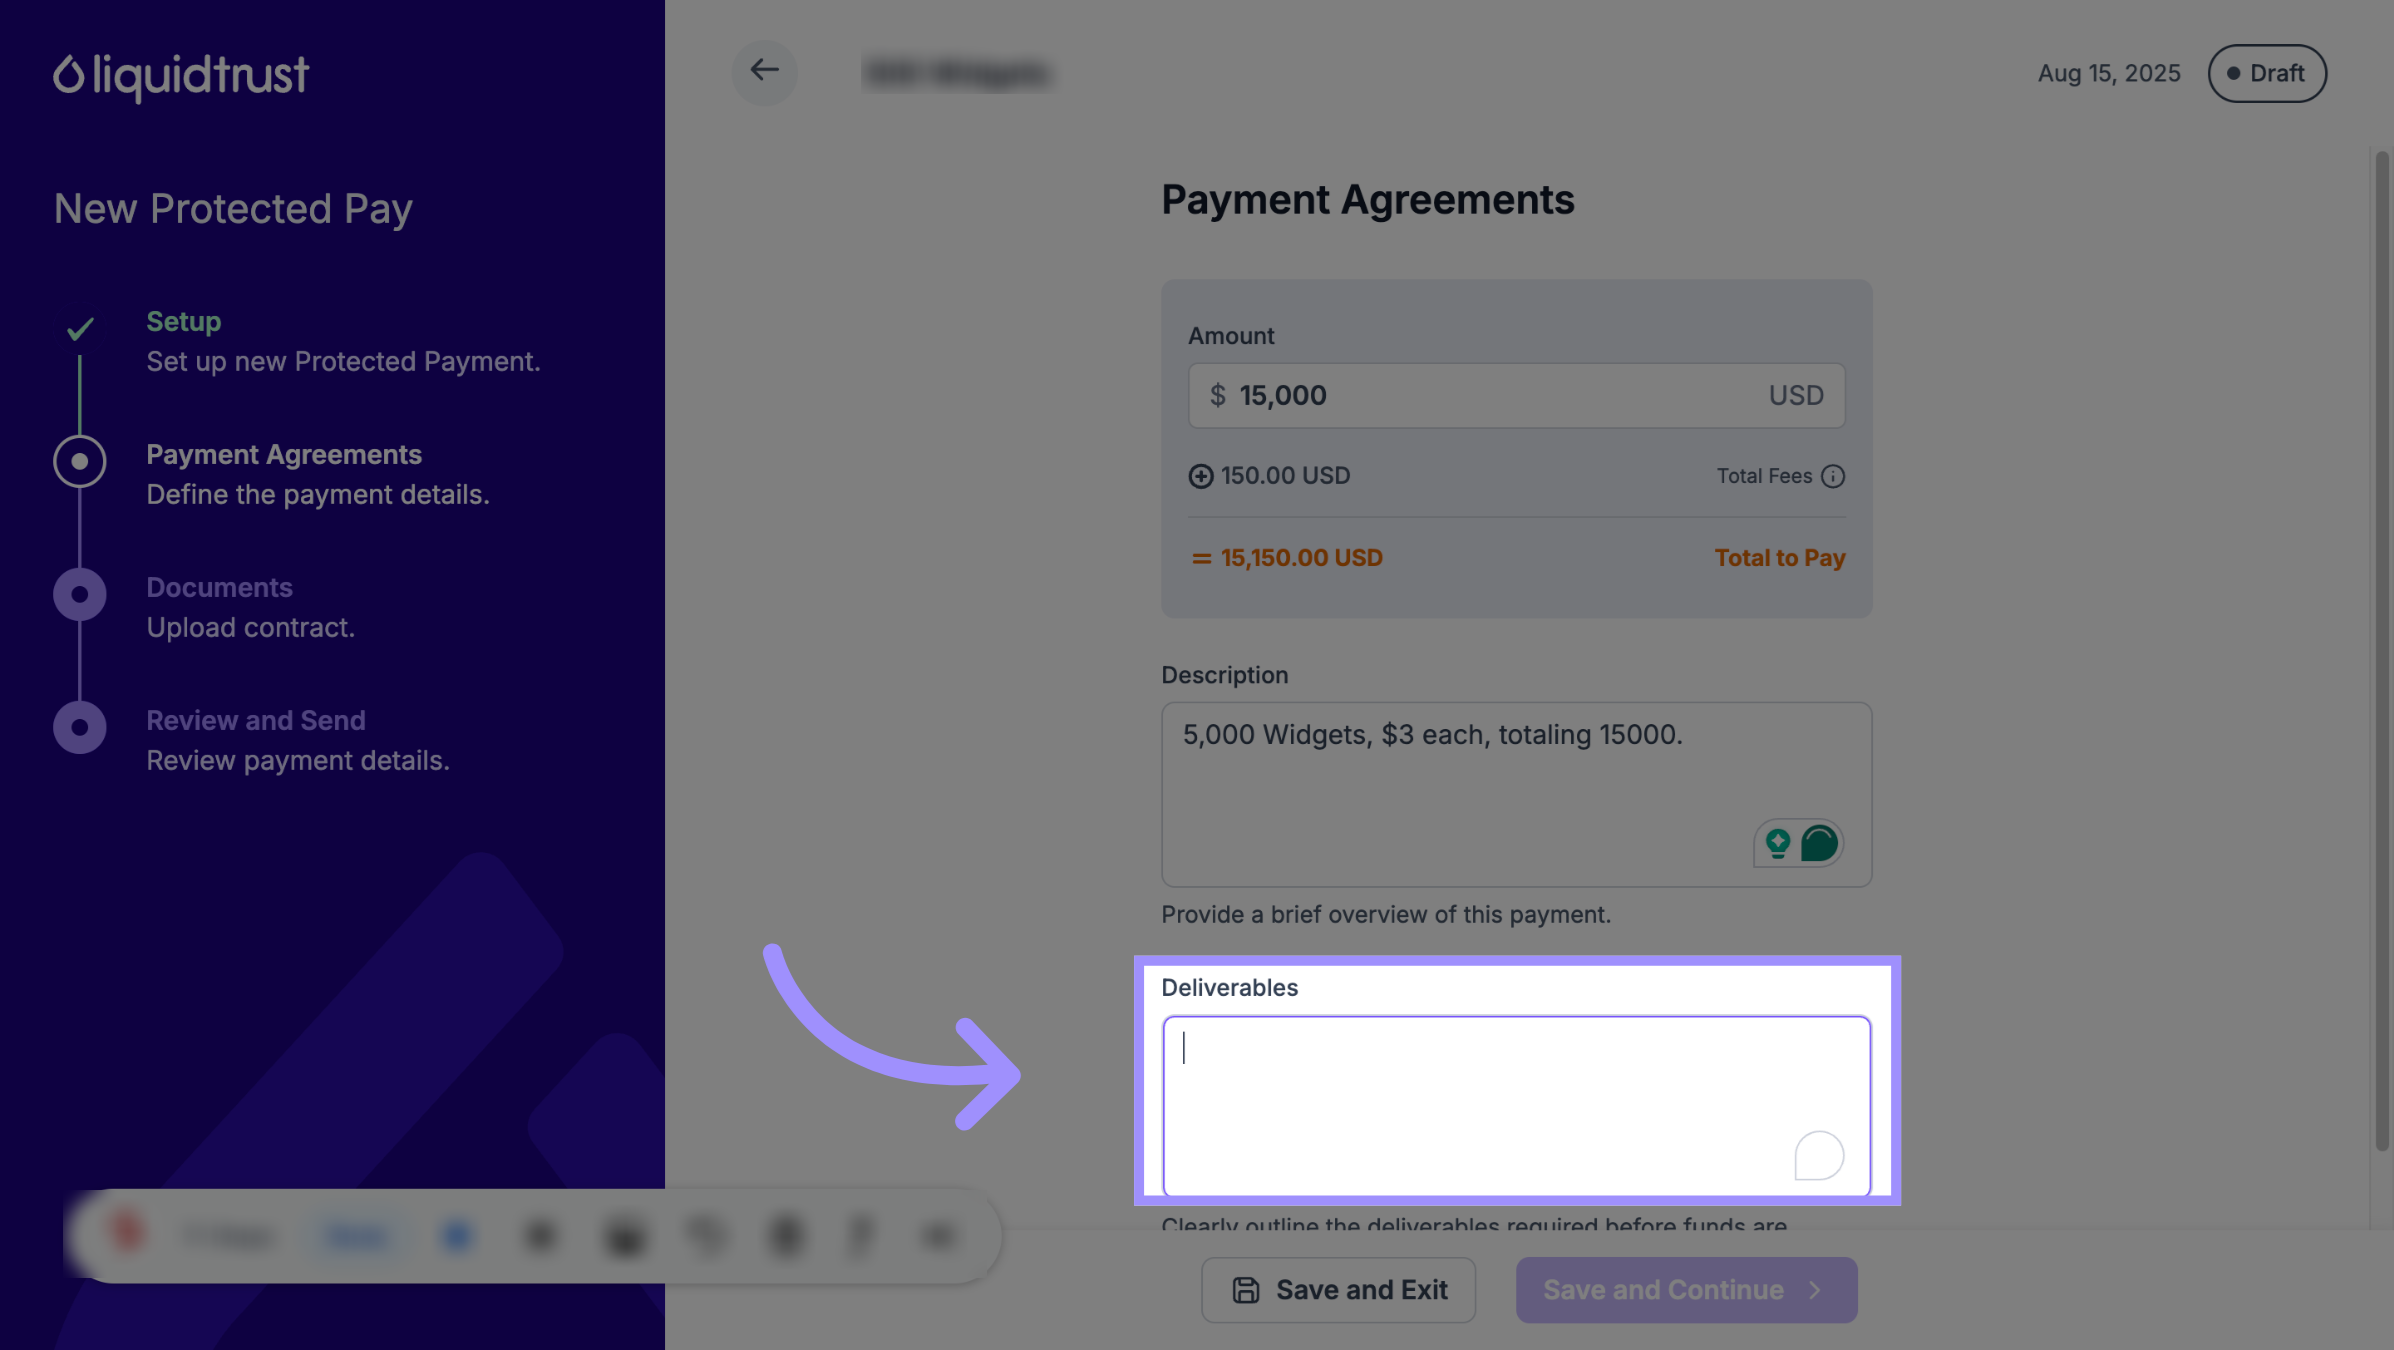
12. Click “Deliverables”
Define the expected deliverables or release conditions for the payment — the steps the Payee will complete before funds are released.
13. Save and Continue
Save the Payment Agreement and proceed.
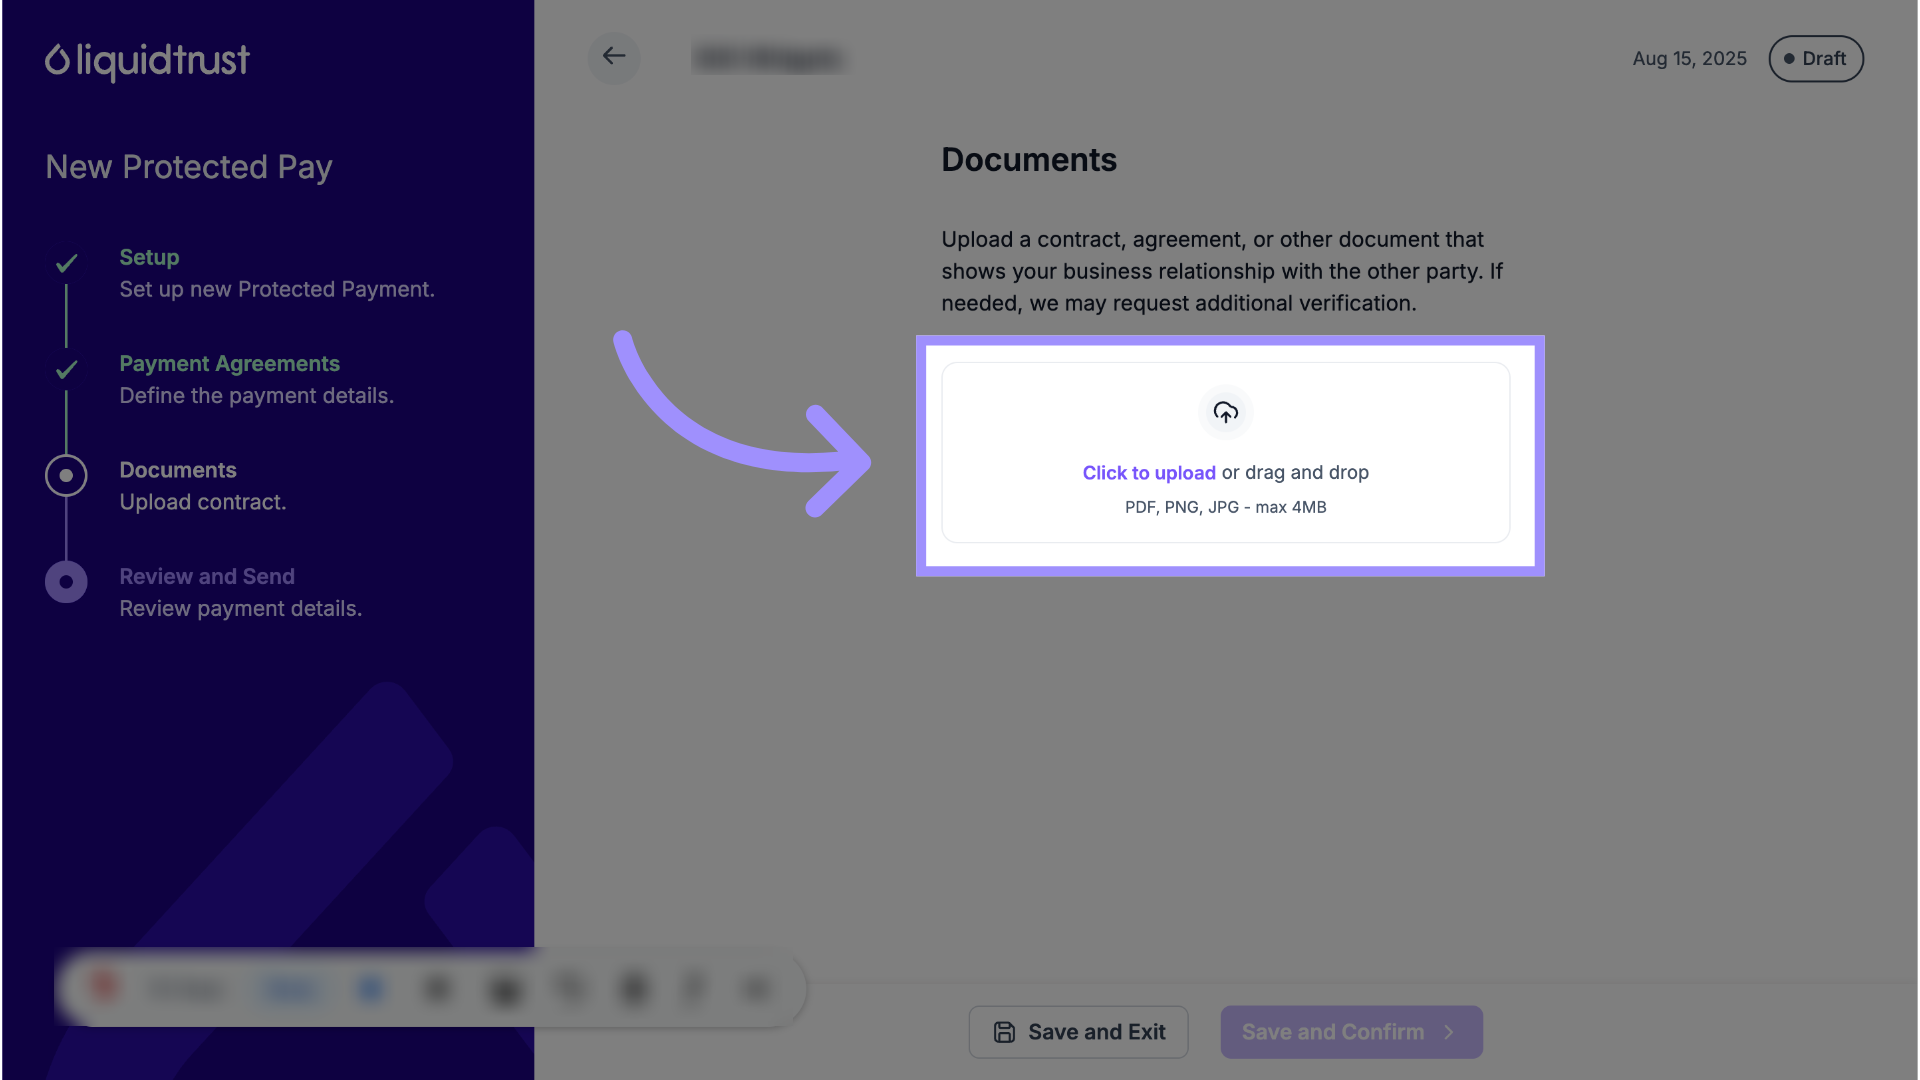
14. Upload Documents
You must provide evidence of the business relationship between you and your Payor/Payee (such as a contract, purchase order, or invoice).
Select and upload your file. Make sure both business names match your accounts.
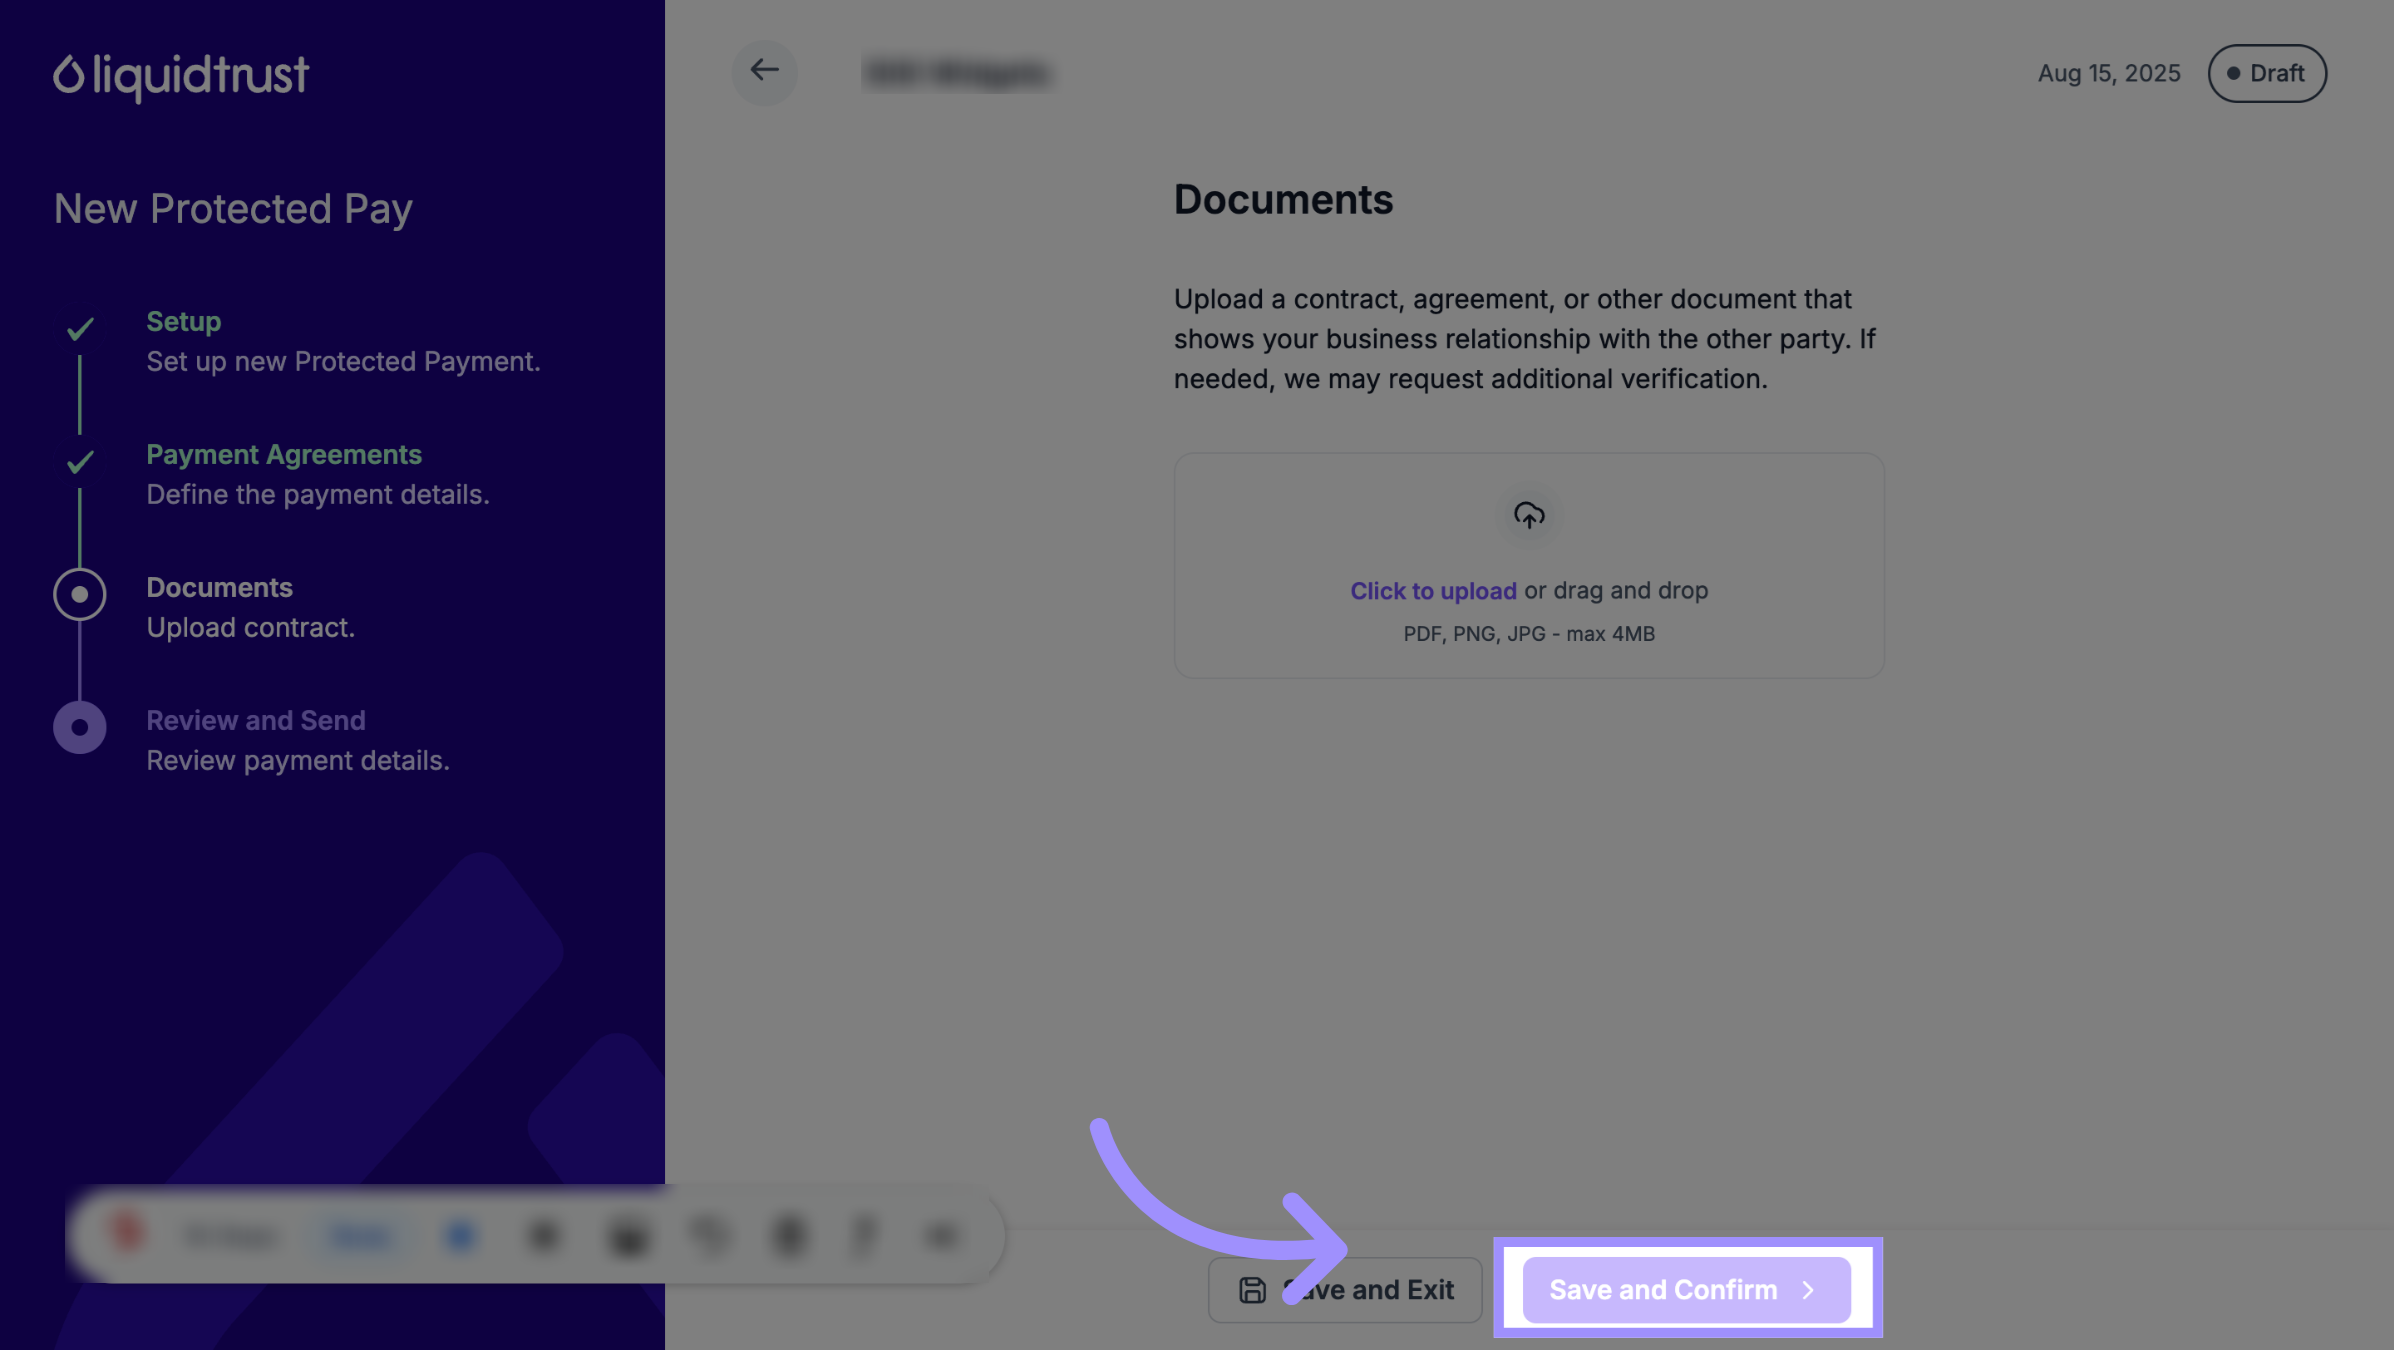
15. Save and Confirm
Click Save and Confirm to review your details.
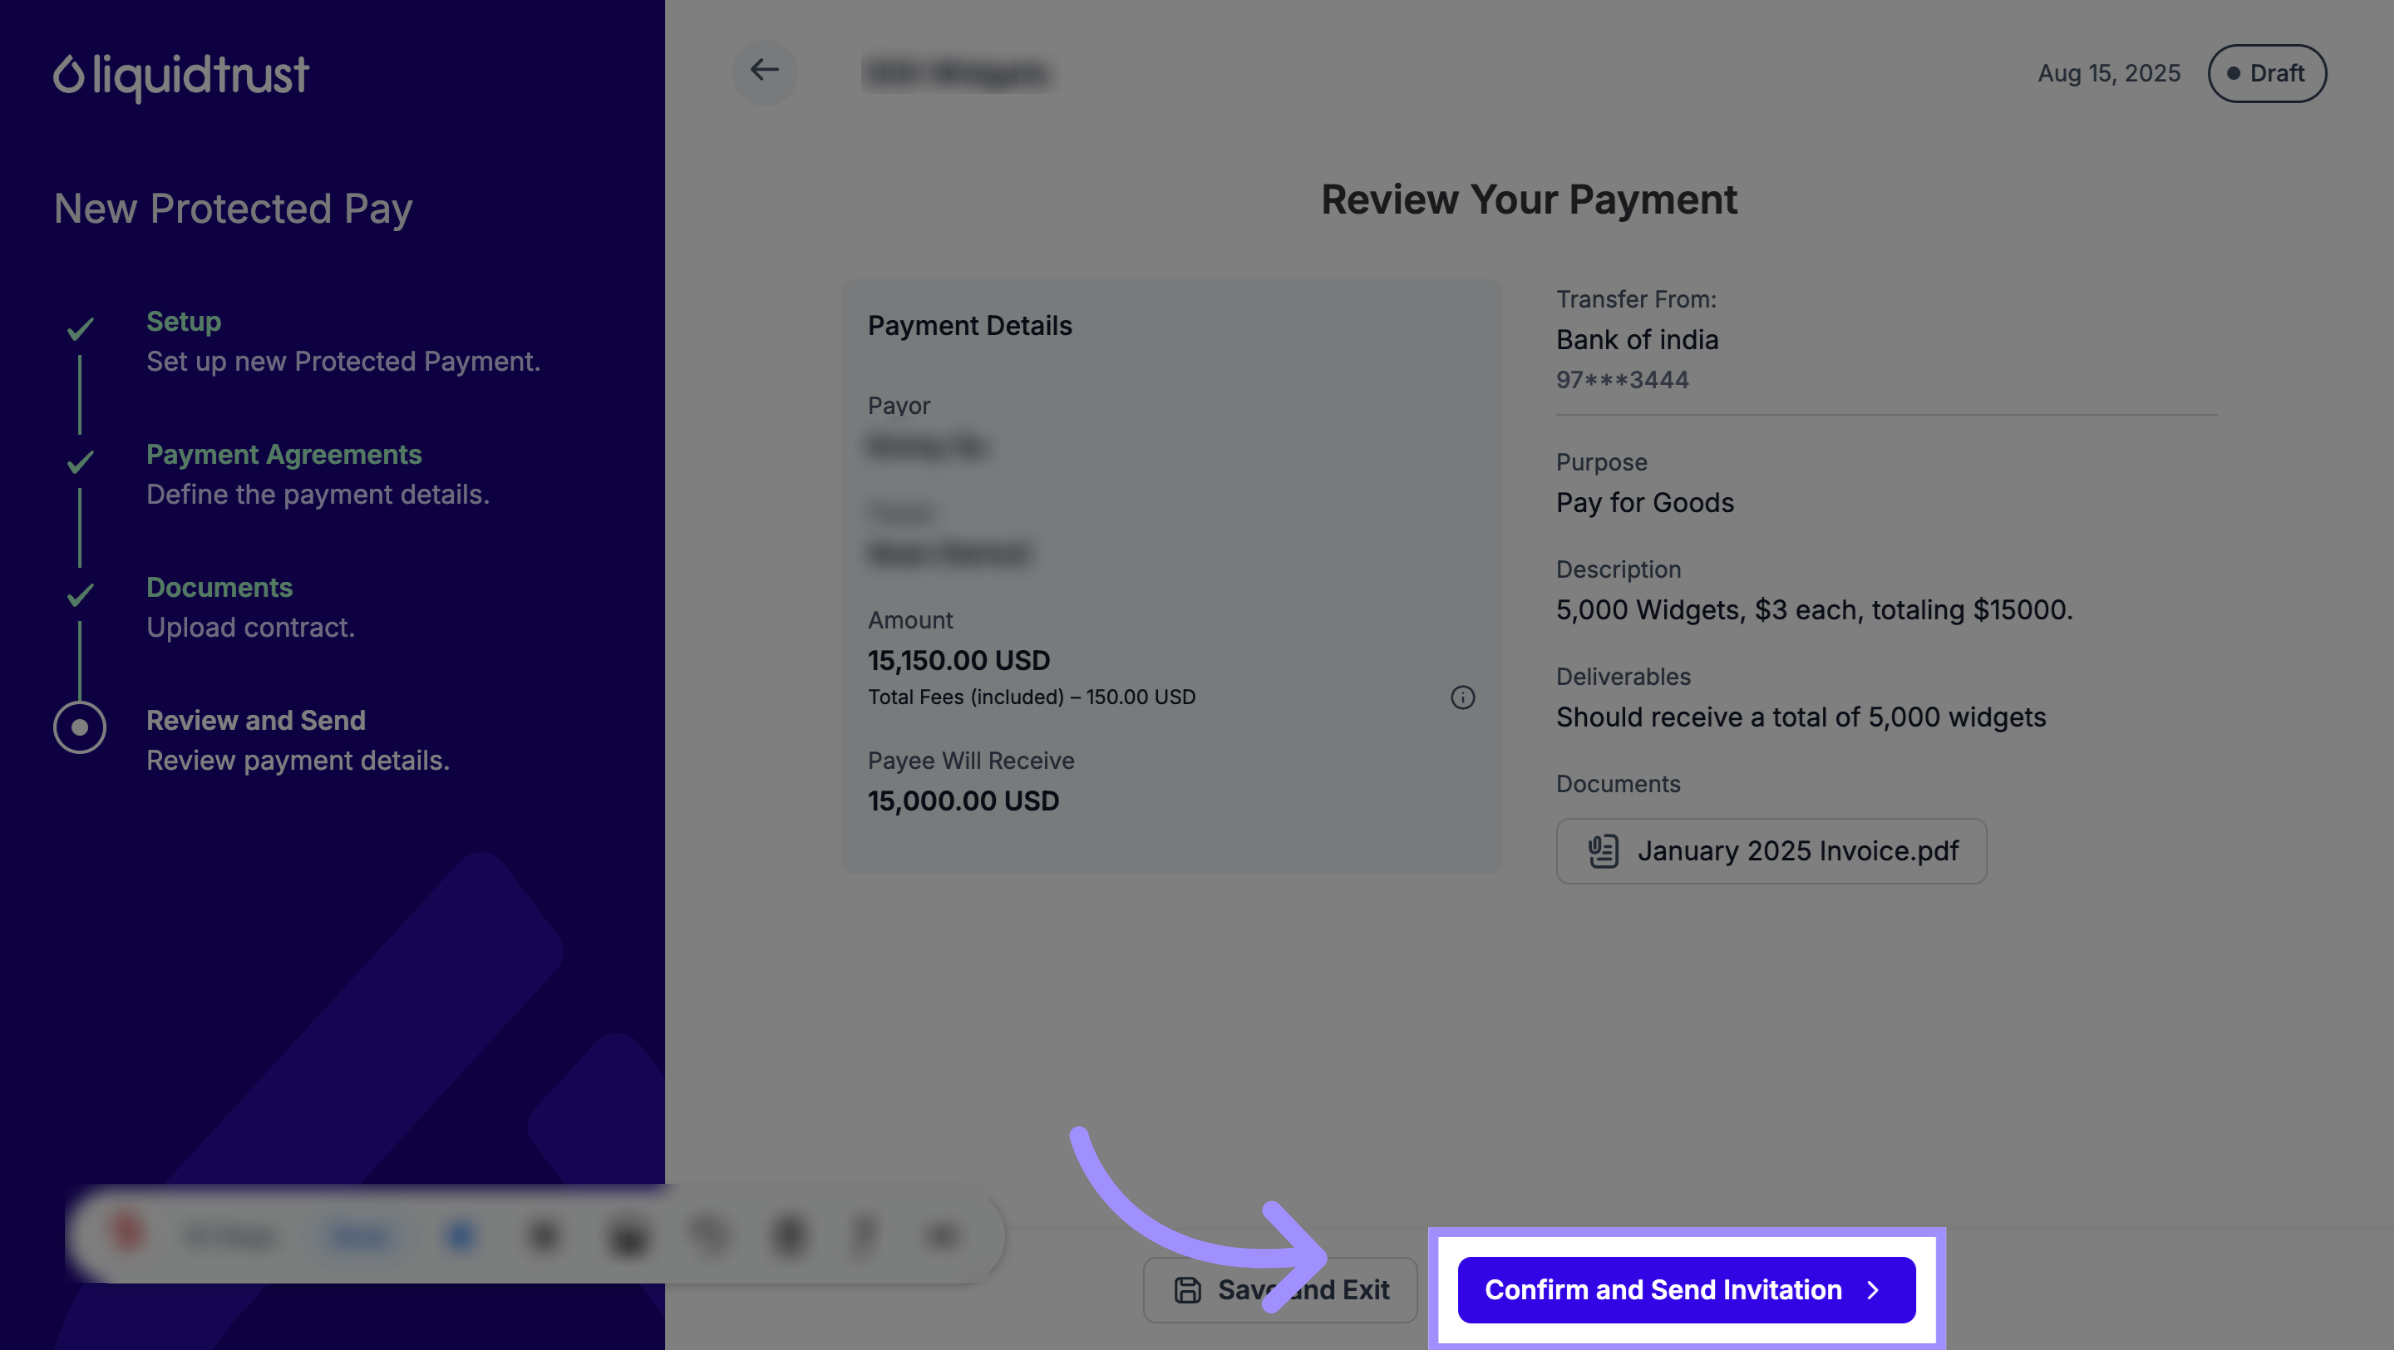
16. Click “Confirm Details and Send Invitation”
Verify payment details and send the Protected Pay proposal to your counterparty for approval.
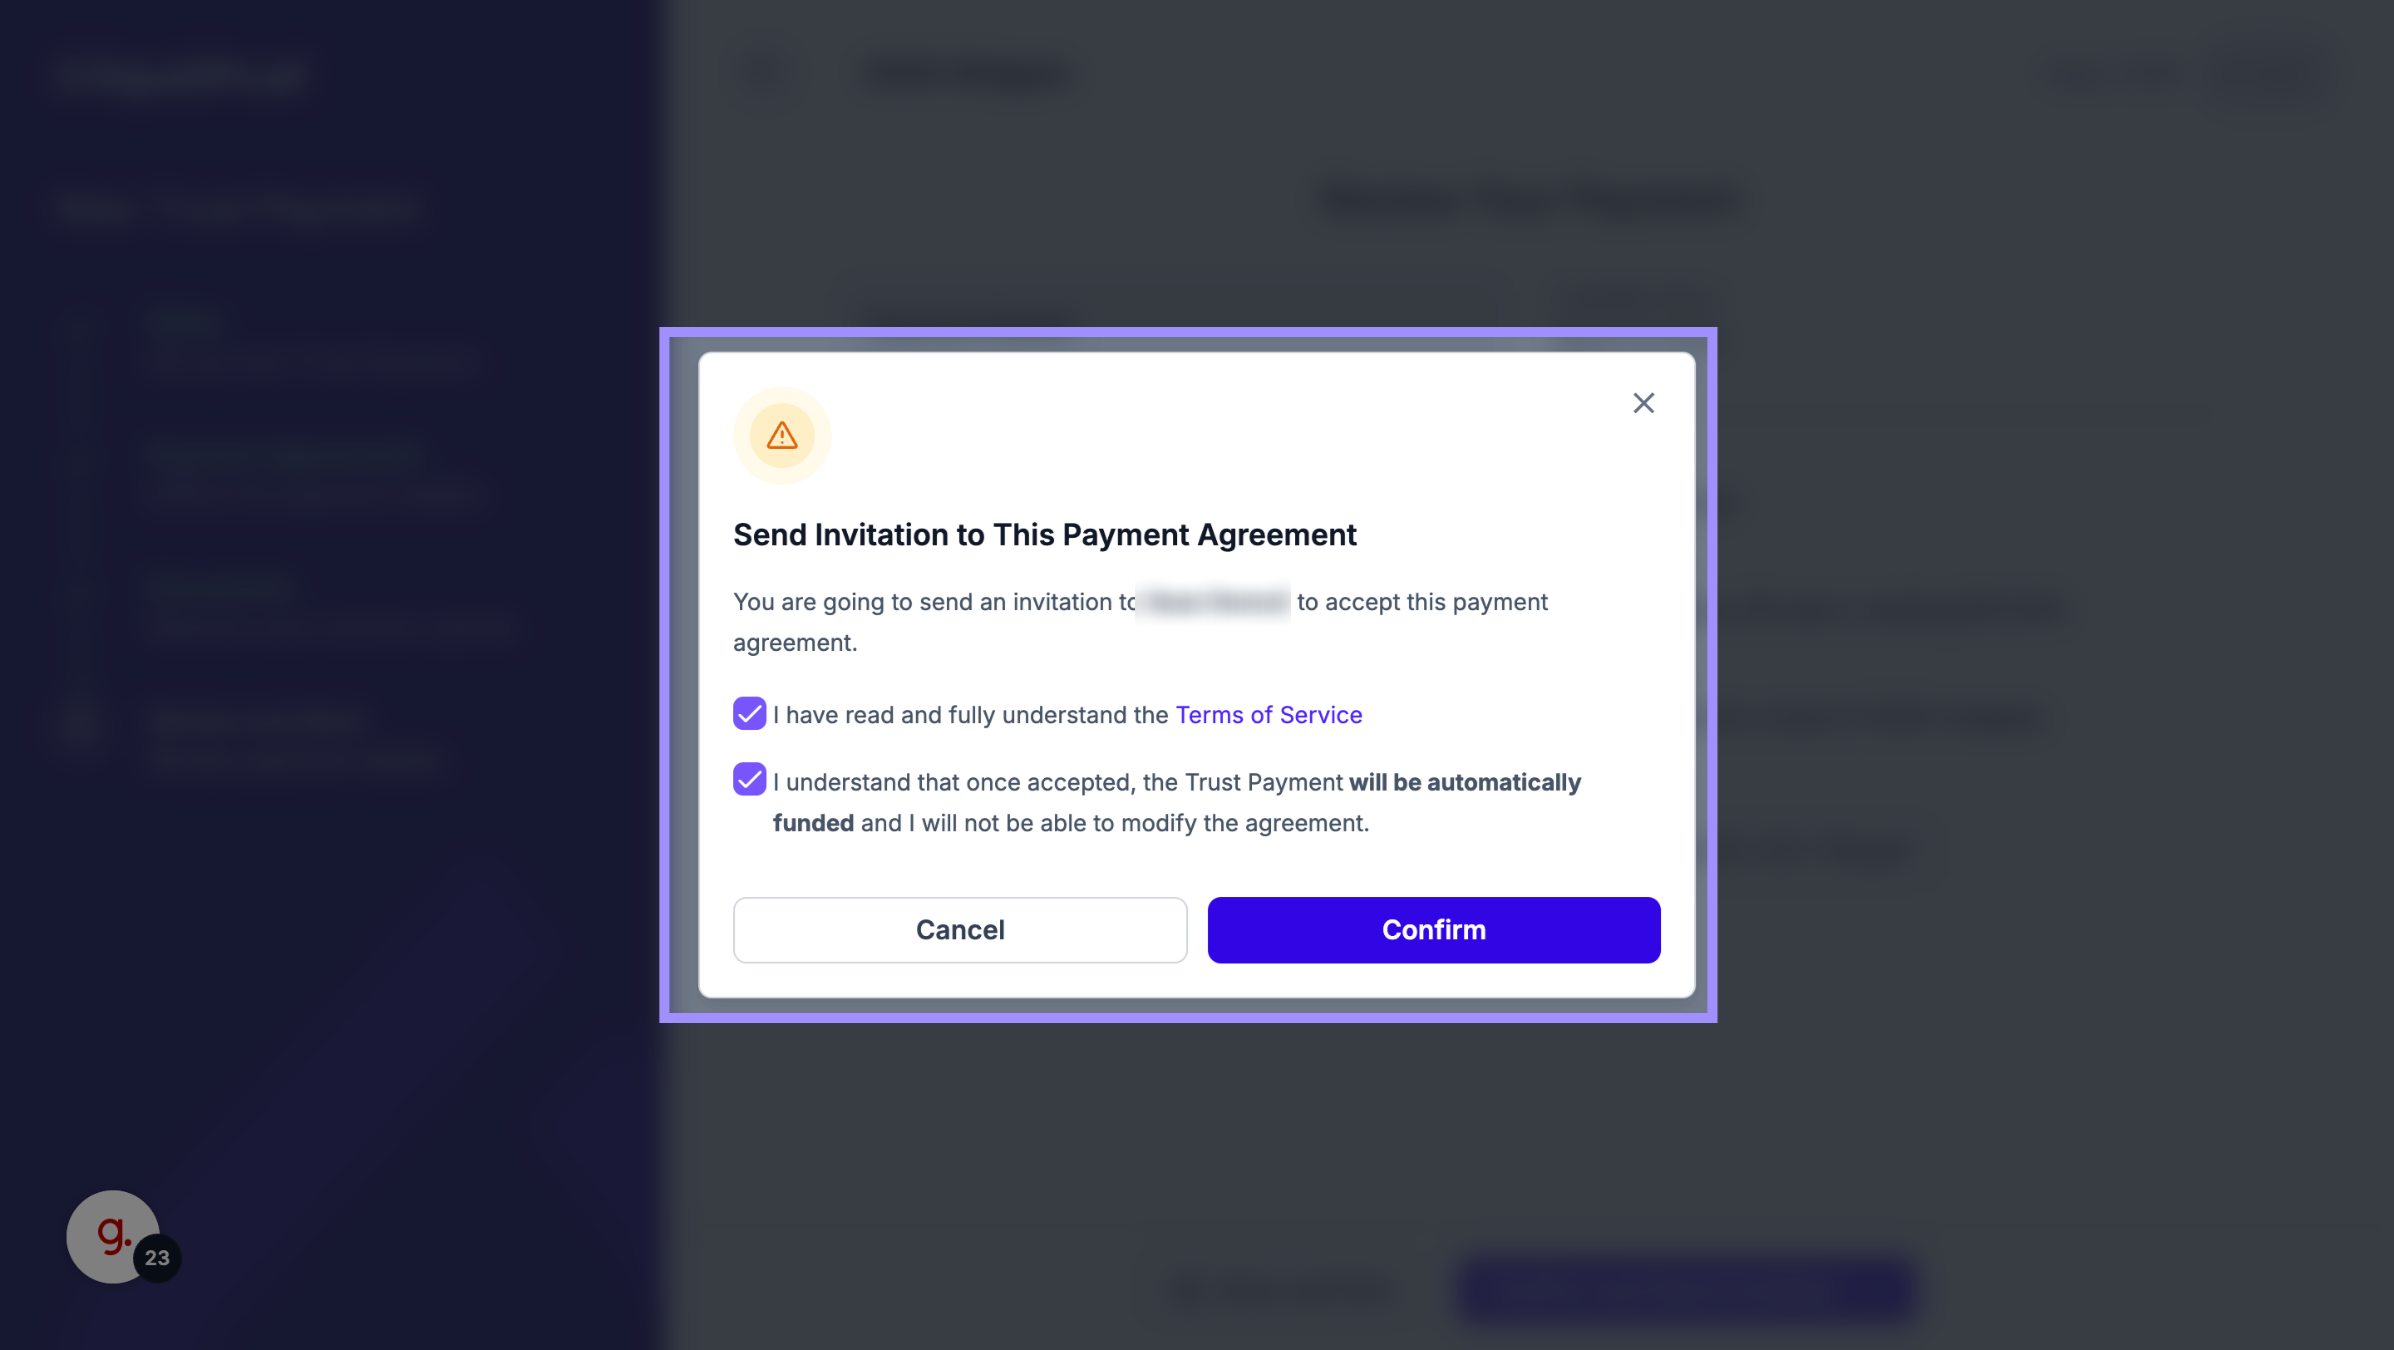
17. Click “Confirm”
Acknowledge the Terms of Service and click Confirm.
Your Protected Payment is now created and visible in both dashboards.
Why This Matters
Defining deliverables and attaching supporting documents creates a clear, traceable agreement — so funds only move once both sides agree that conditions have been met.